
Inferno T-Side Strategy Guide for CSGO
Improve your Terrorist side on Inferno!
Improve your Terrorist side on Inferno!
The present article will serve as guidelines for your Terrorist-side approach on Inferno and should not be considered as the only way to play or the ultimate guide that will lead you to 100% win rate. As you know, having success in a CS match depends on a lot of variables and even if you have flawless strategies, it may still not be enough to get the win. With that said, let’s get on with the map layout analysis.
Inferno has a very distinctive layout, with two middle lanes, an A bombsite with three entering points (Arches, Short and Balcony), each with its own characteristics, and a B bombsite that’s known for having only one entrance (unless somehow the Terrorists are able to flank from CT Spawn), making it one of the hardest bombsites to gain control as a Terrorist.
There are some procedures you should always do on every round when playing T-Side Inferno. They are:
While the first two can, and should, be thrown by the same player (whoever has the best spawn), the third one has to obviously be thrown by another, as these have to be carried on as soon as possible in the beginning of the round.
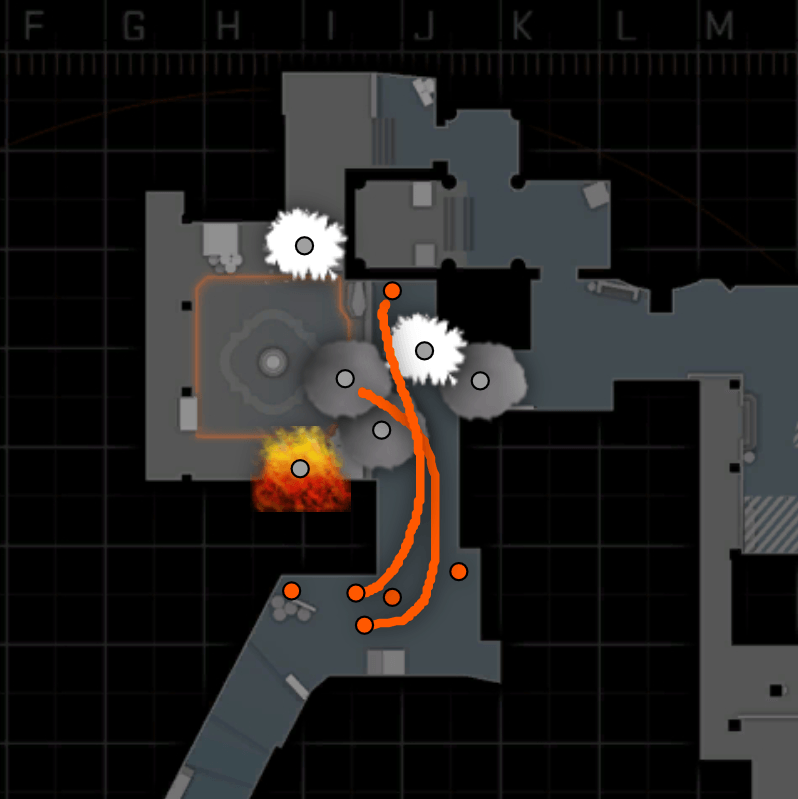
Next, we’ll cover a few simple strategies to enter each site and seize control from the opposing team – starting with the A Bombsite. Bear in mind that the gray splashes are Smoke Grenades, white splashes are Flashbangs, Fire is a Molotov/Incendiary Grenade and orange paths are players.
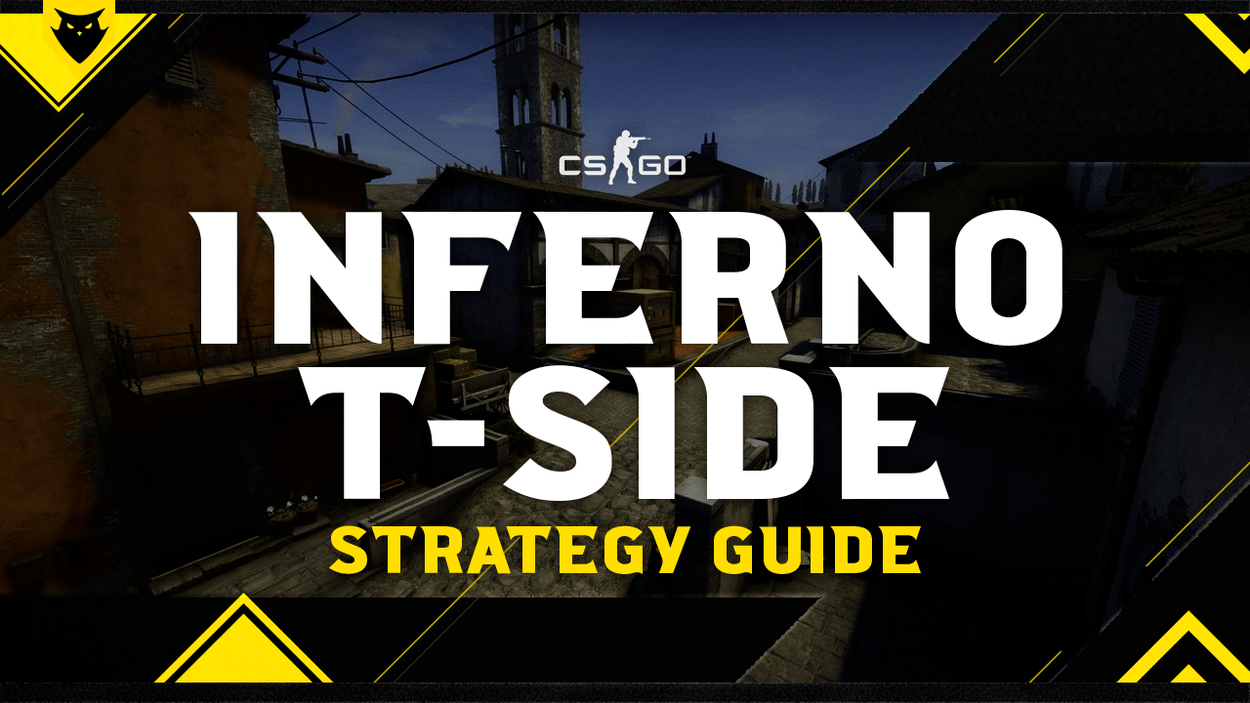
This one is rather simple and involves with 3-4 players pushing Short together, while 1-2 wait in Apartments for the first fights to start, hopefully putting the CTs at a disadvantage. Regarding utility, to begin the execution you need Boiler and Apartments control – that means a Smoke Grenade in Long is crucial. After that, you could have a Smoke protecting Pit, another in the Balcony (to allow for the second contact to push in more safely) and eventually one in Bike, to cover for the eventual rotation. The players in Apartments should be flashing out to help the teammates pushing below. Remember to play with each other, looking for trade frags.
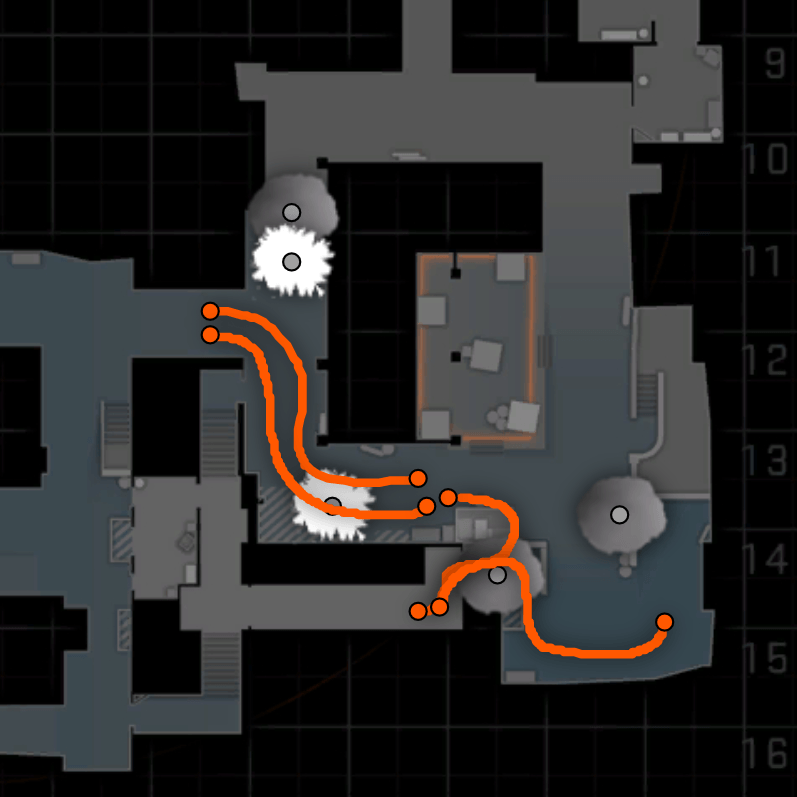
Works pretty much like the previous one, with the exception that you’re splitting up to Long and Arches instead of only pushing Short. I recommend having one player in Apartments, 2 Short and 2 Long. The first steps on this execution is making sure to clear Boiler, Long, and Apartments, whether that is by killing the opponents or making them retreat to the bombsite. The players on Short should wait for the Long attackers to be positioned forward, near the Library door, before starting the push.
To get Long control, a Smoke Grenade should be thrown on Arches and a Molotov/Smoke in Library. After that, being fast is essential, as rotations and smoke fadeouts will start happening. The strategy is pretty straightforward from here, as you will only need to pincer your opponents, taking special care for Flashbangs and Incendiaries slowing the pace down. That’s when the player in Apartments should appear – as the third and final contact.
There are countless other strategies can also be applied on different situations of the match, like a push in Apartments, but the focus of this article is teamplay and focusing on different aspects with the same goal in mind.
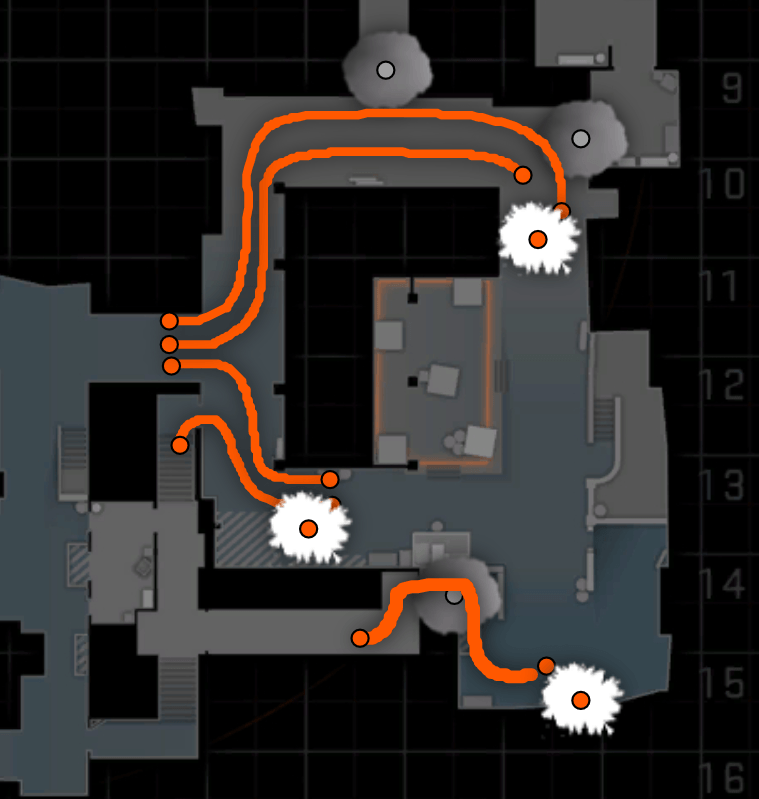
Probably the most common strategy there is. After getting Banana control with the utility I talked about earlier in the article, you should group up in Banana, while Smoking CT and Coffins – both of these Smokes can be thrown safely from Banana. Afterwards, throw Molotovs to the first row of boxes and Quad. Start pushing immediately after with a flashbang thrown from the last player popping behind you. This combination of utility will make your opponents have to flee from those positions, only to instantly get flashed while looking for new cover. You can also have a player on Second Middle, waiting for the rotation towards Middle.
There are some points you should be careful though:
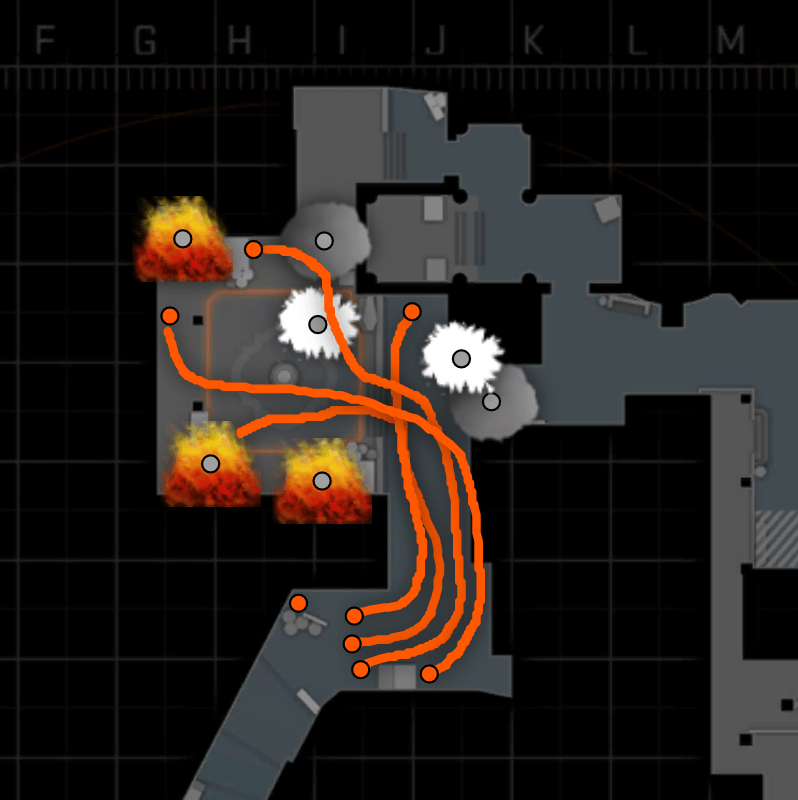
The point of this strategy is the opposite of the previous one: while you were aiming to get control of the entire bombsite previously, now you’re only going for the plant in front of them, while retaining Banana control. You’re going to be planting inside a Smoke, while your teammates cover it with utility, mainly Flashbangs.
Three Smoke Grenades are needed for this execution, with one going CT Spawn and the other two covering the path to bombsite. Remember to play as much on the edge of the Bombsite as possible, to allow for easier peeks. Make sure to know exactly where the bomb is, as you will most likely get Smoked out – which could actually work in your favor if you know the position of the bomb.
This one has several ways of being executed, with the split coming either from Banana to Construction or from the faraway A bombsite. The second one is very situational, as a good team will never let you go through Arches unless something out of the ordinary happens. If you actually manage to swift your way through there, the first contact will always be yours, as the opponents will not be expecting a flank and you’ll find them with their backs turned. Try to maintain trigger discipline for as long as you can, so you can try to spot all the enemies in the site before making your presence known. Only after you start shooting will your team push and pincer them. The same principle should be applied if actually manage to pass from Banana to CT unnoticed, making your way through Constructions. Your teammates can even bait you by smoking CT after you’re there, to make them believe it’s just a normal Smoke. After that, just play it like a normal post-plant situation.
All the smokes used in the article can be seen in action in the following video, from The Gaming God:
One important topic that needs to be addressed is knowing how to respond to your enemies moves. While everything seems pretty easy and straightforward when laid on the table, the situations will always differ from one another, as one player reacts differently when compared to another one. Even if you know your strategies better than anyone else, you can always be surprised by your opponent: be prepared for that to happen, whether that is with different utility used, giving precise calls middle-action or even avoid what could be a safe reload.
Always be prepared to trade your teammates. That means avoiding lining up, so your opponent doesn’t have time to adjust his crosshair by the time you’re already firing at him. Also, avoid throwing Flashbangs to yourself. Instead, have a teammate flash for you, so you can always have the gun up.
If you have any suggestion or would like to read about another map, don’t hesitate to contact me on Twitter.
Like our content? Support us by getting our merchandise in our shop