


The Optimal Audio Setup For CS:GO
In this guide, we run down everything you need to get the most accurate auditory information in CS:GO.
In this guide, we run down everything you need to get the most accurate auditory information in CS:GO.
Just like training artificial intelligence, the ‘garbage in, garbage out’ principle fully applies to competitive gaming. You may have the highest skill level in the world, if you are being fed the wrong information, you will come to the wrong conclusions and make the wrong choices. Consequently, getting your audio settings right will help you construct the vital foundation needed to build your in-game skills. In this guide, we look at some of the ways in which you can make sure that you are getting the most accurate and expansive auditory information in CSGO.
CSGO boasts its own positional audio simulation and allows you to determine an enemy’s position with pinpoint accuracy by hearing alone. Consequently, the quality and accuracy of these auditory cues are of crucial importance. Before we get into the technical stuff, let’s take a look at some of the things you must realize to take full advantage of this information.
First of all, different sounds will travel to different distances. For example, the sound of someone running will travel further than the sound of someone scoping with their AWP. Be aware of this in your decision-making, as any of these cues will give very valuable information to the enemy team. Generally, you must assume that any sound you make will travel for a little over 1000 units, or about 83 feet/25 meters. The only soundless action that can be undertaken in CSGO is walking, which consequently is a very strong part of your toolkit in clutch situations or surprising flanks.
While this gives a general indication of just how far sound will travel, it won’t be that useful to you in-game. This means that you will have to figure out on your own how far you can run until your enemies will hear you, mostly through trial and error. Another good method to get familiar with these positions is by watching demos or pro games with x-ray enabled. Try to spot the exact moment where someone’s footsteps become audible to players and pay attention to the locations on a map where players start walking.
Secondly, the sound of players running will change depending on the floor texture. Someone running on metal will sound different from someone stomping on wood or gravel. Consequently, these audio cues are very powerful indications as to someone’s position. However, keep in mind that these can also be used to bait you by making sound on a certain texture or spot on purpose to trick you into predicting a certain play or rotation, only to slowly make their way to another unexpected spot. Moreover, on vertical maps such as Nuke and Vertigo, the direction sound can be very confusing and it takes a trained ear to recognize where the footsteps are headed on these maps.
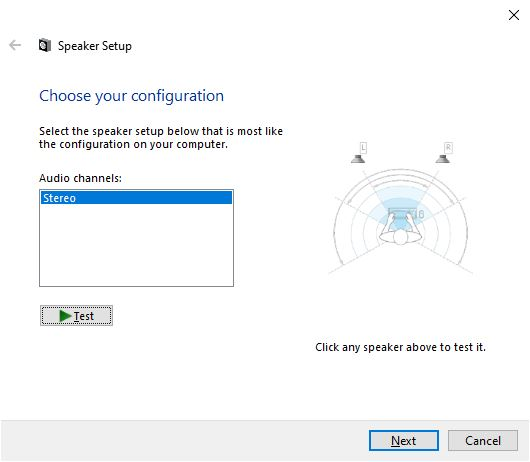
Let’s drive into the actual settings. Your audio settings in Windows will be the basis for everything else. Consequently, getting these settings in order will be of vital importance to an optimal setup. To begin with, you will want to open your ‘Sound’ settings in Windows and select your headphones before pressing the ‘Configure’ button. A menu will open, and you will see several configuration options. The option you want to select is ‘Stereo’. While it may seem like ‘Surround’ would be the go-to option for positional audio, the emulation provided by Windows only distorts the in-game emulation and, consequently, leads to weird results.
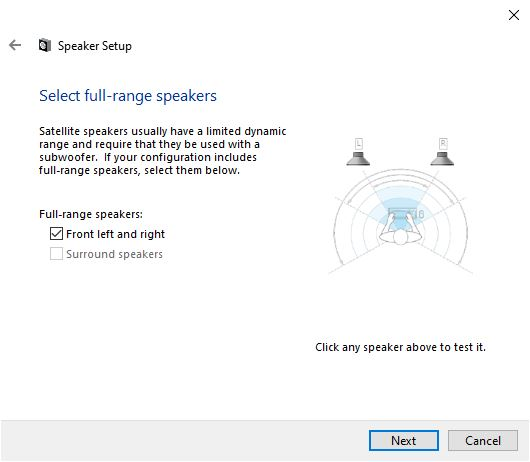
On the next window, select the ‘Front left and right’ speakers setting. Once again, press 'Next' to go to the following window and save your settings by pressing 'Finish'.
Once these settings have been saved, go back to the ‘Sound’ settings menu and select your headphones. This time, open the ‘Properties’ menu and select the ‘Advanced’ tab. There, make sure that the box next to ‘Allow applications to take exclusive control of this device’ is unchecked and, if the option is given, that all enhancements are disabled. These enhancements would only distort your audio’s positional accuracy.

If you don't have custom drivers, you can safely skip ahead to the next section called ‘In-game settings.’ However, in case you do use them, you will have to change their settings too. Before you start changing the settings of your custom drivers, some quick advice. You might enjoy different equalizer settings when listening to music or playing games other than CS:GO. In that case, make sure to create a separate profile for each. Just don’t forget to switch between them when changing activities.
As all drivers are different, it is impossible to tell you exactly what settings to change. However, the key concept is quite simple. Basically, we will use the drivers to make the sound as boring and clean as possible. So, once again, you have to make sure that your drivers are set to a ‘stereo’ output. If possible, disable your equalizer, and if not, make sure that all settings are set to ‘0 dB’ besides, naturally, volume. Finally, disable all enhancements such as loudness equalization, echo cancellation, or bass boost.
Once we’ve got our foundation laid out for us in Windows, let’s look at our in-game settings. As for ‘Master Volume’, this is mostly your own preference. However, in case you use a DAC/AMP combo, it’s better to maximize this setting and just to change the volume on your amplifier. Whatever setup you have, you want your actual volume output level set at a sufficient level to hear footsteps well in advance, while making sure not to listen at a volume that is too high, as this will only damage your hearing.
Next, skip ahead to the ‘Audio Output Configuration’ and ‘Audio Device’ settings. Once again, you will want to select ‘STEREO HEADPHONES’ under the configuration setting and select your headset or, in case you are using one, your amplifier as your ‘Audio Device’. Right underneath there is an option for ‘Advanced 3D Audio Processing’. You will want to enable this one, and once again we return to the importance of having a clean foundation in Windows. If you have drivers that enhance or simulate your audio, they will enter into conflict with this setting and deliver distorted results.
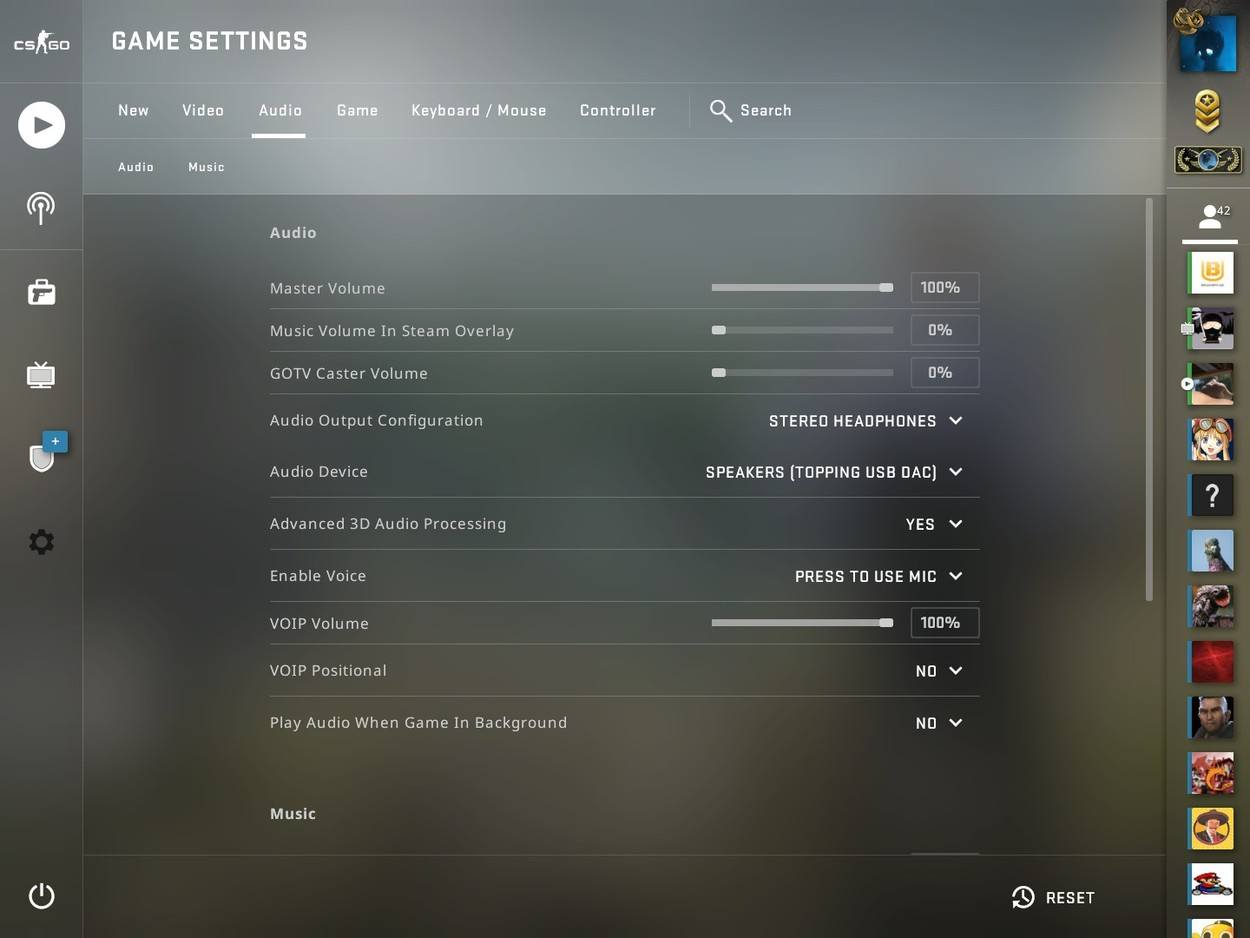
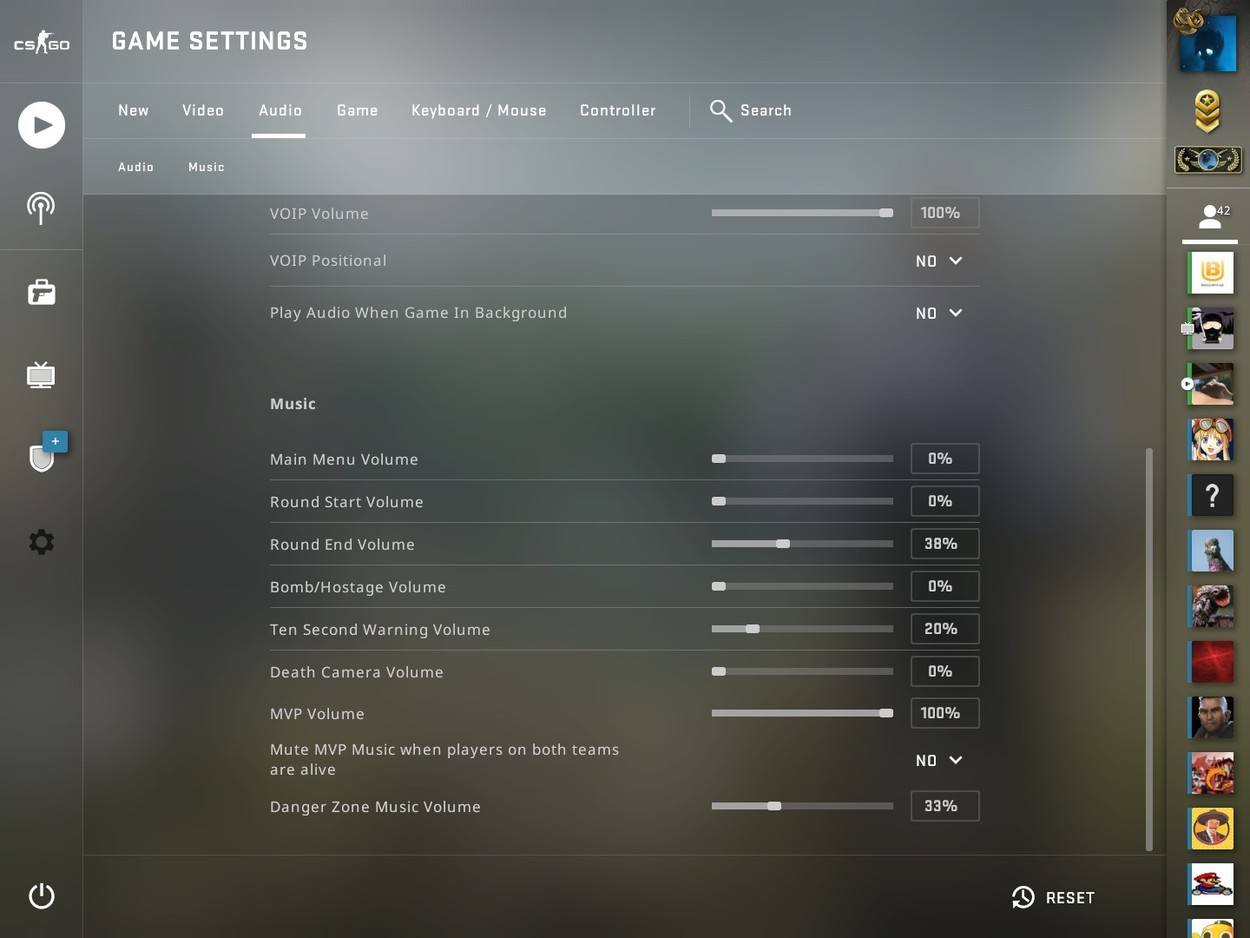
Finally, we get to the last of our in-game settings. When it comes to VOIP (Voice over IP, or your in-game voice chat), you will want to experiment with this setting and find that sweet spot where communication is audible enough to hear your teammates in-game while not being dominant over in-game sounds. You shouldn't use the VOIP Positional settings as this adds very little of value and will merely distract you from the informative parts of communication. As for the music volume, this is ultimately also up to personal preference. Some people prefer to disable all music except for the 10-second defuse time warning, while others also want to hear MVP music.
Ultimately, your software settings can only get you so far and you will always fall back on your hardware to carry the load. In case your hardware is not up to par, it will bottleneck any effort you put into improving it. The cheapest and the best plug-and-go solution is to get a gaming headset. The headset most commonly used by the pros is the HyperX Cloud II headset, followed by the HyperX Cloud Alpha. Either of these two will be a good choice and provide you with optimal auditory accuracy. Moreover, they already come with a great microphone, so you can just plug these into your computer and you’ll be good to go.
With all of this in mind you will get a competitive edge over your opponents in CS:GO, good luck!


