Fundamental Utility for the T-side on Overpass in CS:GO
Let's take a look at the most fundamental smokes you need for a succesful T-side on Overpass.
Let's take a look at the most fundamental smokes you need for a succesful T-side on Overpass.
Overpass, the map of annoyingly loud metros, stinky wastewater, dirty toilets, and a club tucked away in a corner playing some groovy beats. Also, the location of a planned terrorist attack. In this guide, we take a look at the best ways to use your utility to take the site. While there is an abundance of guides out there that show all sorts of cool line-ups for specific spots on Overpass, I think that learning all of these can be quite overwhelming and even detrimental to your overall performance. Soon, you won’t see the forest for the trees.
Moreover, unless you’re creating executions with your team, most of these line-ups will be futile in your attempt to win the round. I believe that by focusing on the fundamentals your odds of winning will increase significantly. After all, if the most basic smokes are not in place on a site, what good will a smoke for a specific position do? In fact, most of these more exotic line-ups will only be really useful once you are aware that a player likes to play a certain position, which doesn’t happen too frequently in public matchmaking.

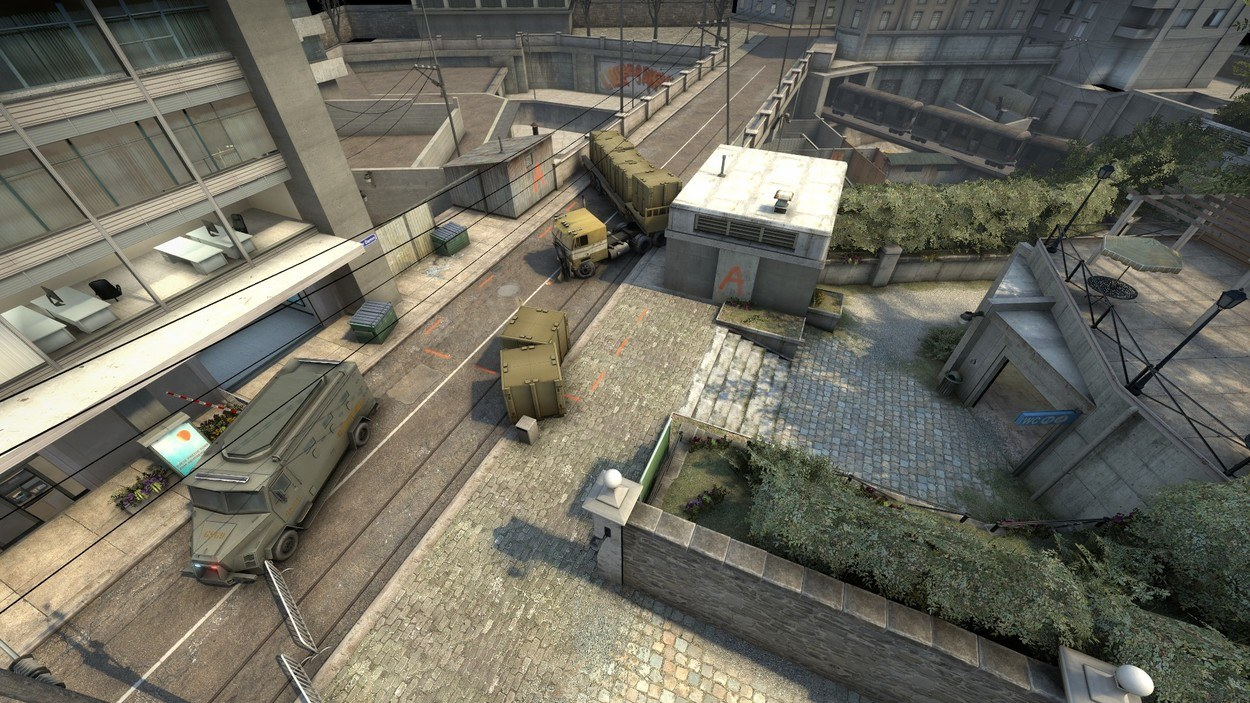
We kick this guide off with the A-site. Now, before I show you these line-ups, it's important to explain why I chose these specific ones. Usually, it will take CTs quite a long time to rotate to the A-site because of the long-winded walk that is needed to traverse from B to the A. Moreover, even when they finally arrive, the only entranceways into the site from CT are two chokepoints called Dumpster and Bank. Consequently, to lock down the site, these chokepoints are the two key positions you need to secure, preferably by covering them in a thick layer of smoke. Doing so may even give you the entire site for free if the two defenders decide to play passively.
We also use an incendiary to force an enemy out of the extremely annoying position that is 'Truck'. Players can normally very easily hide behind Truck and can even deny a bomb plant from this position without being too exposed to other players. Clearing this location is quite crucial to a succesful A-site take. Finally, keep in mind that CTs will often also rotate by going up Connector to backstab you, so make sure to have a teammate watching the flank even before you plant the bomb. Many poor souls have been sent to the afterlife because an enemy pushed upon them while they were planting, even in pro games.
The first one of these is called ‘Dumpster’. This spot is also generally the favorite location for the AWP user rotating from B Heaven, as it allows him to seek cover while cocking back the bolt action between every shot. Luckily, you can smoke this position from outside the reach of this pesky sniper.
Jump onto the bench in front of the ‘WC’ sign in Banana. Then, put your crosshair right on the head of the ‘woman’-sign. Sorry, ladies. Let that sucker go, which will force the sniper to peer into a thick fog. Hunting season is finally over.
The second position is ‘Bank’. This can be the position a player retreats to after spotting enemies Long or Banana and is also usually the position from which a rotator will enter the site. Sadly, there is no spot from which you can throw this smoke that is entirely safe to throw. Consequently, you will want your teammates to have pushed up and taken some control before you set up for this one.
In Banana, go to the right of the first pink flowers hanging from the wall. Stand right in front of the dirt line running down the wall and look at the top of the radio tower. Finally, pop the smoke and release.
Assuming that Dumpster is smoked and you have some teammates to cover you, there are two Molotovs you can throw in case you believe someone is hiding either in the corner next to Truck or behind Truck. Generally, these are Molotovs you’ll want to throw after someone throws a smoke between Truck and Boxes.
To dose the corner next to Truck with fire, aim at the corner of the driver’s cabin and throw the Molotov against it while stepping forward. It will bounce right into the corner and usually even cover the area right behind the cabin. If you want to cover the area behind Truck with a layer of fire, you simply aim at the back of the truck and release the firebomb, also while stepping forward.

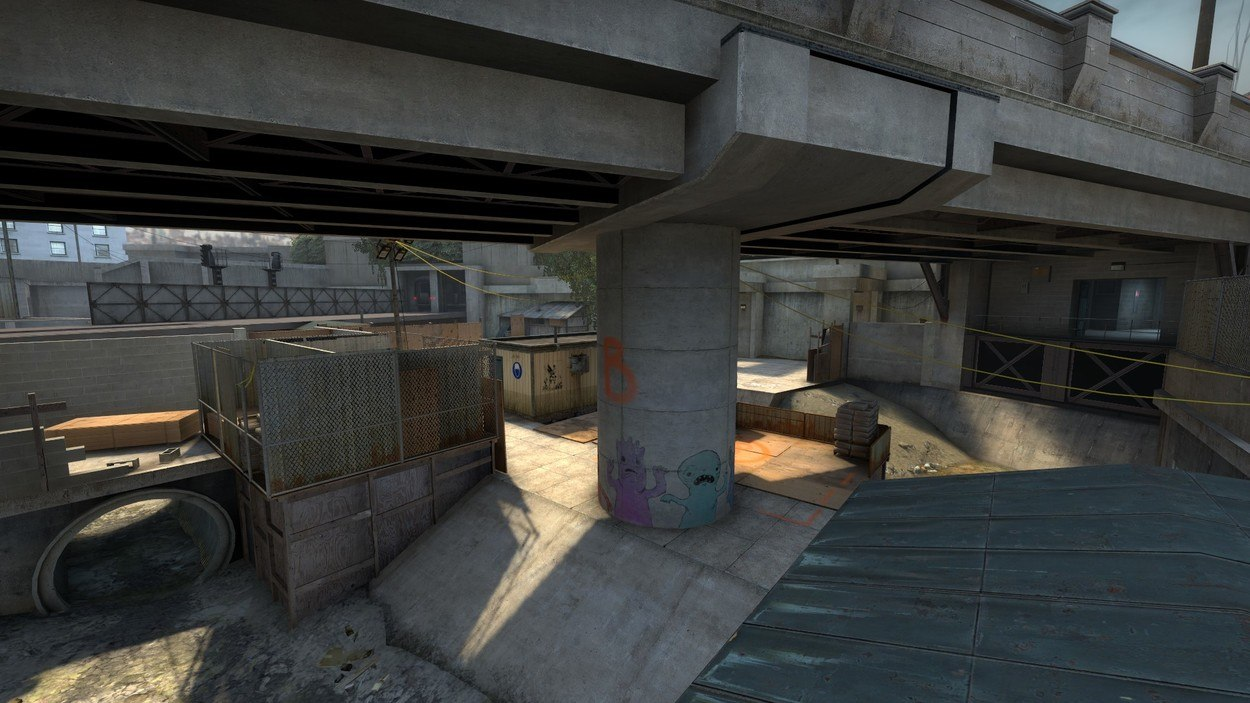
Up next, we have the B-site. Rotations to the B-site can happen quite fast, and any defender can quickly rotate to Heaven to rain down vengeance on his attackers. While the entrance to the B-site is less of a chokepoint for the CTs to stumble through, there is only one main entrance from CT, and many different hiding spots for the terrorists. Consequently, once you get the kills, it’s relatively easy to lock down the entire site with utility and practically force the defenders from the A-site into saving their guns. However, entering the site might prove difficult.
Heaven is a very strong position for AWPers to play from, and another defender can safely play from cover behind ABC while having a full vision of players entering the site. Consequently, these are the two positions we will block with a smoke grenade. We also throw a Molotov behind on barrels, as it is another very strong position for the defenders that can shut down any Monster push. Finally, keep in mind that, once you have successfully taken the site, there is a high chance of defenders rotating through Connector to backstab you from Short or Monster. It's a good idea to have a teammate in Water checking for a Connector push, and another teammate to stay in Monster and watch for a T-Spawn push.
Like an overzealous god, the AWPer can observe the entire B-site from Heaven and swiftly punish any trespasser. Luckily, even the vision of heavenly beings can be obscured with a well-thrown cloud of smoke.
To throw the smoke, stand on the pile of trash next to the wooden plank in the water. Keep in mind that this position leaves you very exposed to the Short-position and Connector, so make sure your teammates protect you from any pesky intruders. Once you’re in position, look at the cable line above the bridge in front of you and aim slightly below the middle of the line running across the pole and the first cable. Then, simply release the smoke grenade.
Crossing onto the B-site with the bomb is a very dangerous undertaking as you are directly exposed to any players in ABC or coming from CT. Many rounds have been lost due to the bomb falling from the dead body of an overeager player that decided to sprint onto the site. Luckily, there is a smoke that can help you.
Put yourself in between the large and smaller pipes slowly taking in the water. Then, put your crosshair on the top of the second pole carrying the cables from the left, and release it. Once again, you can easily get pushed from both connector and short. If you and your teammate are busy throwing this smoke and the previous one, then you are both very easy targets for an enemy that decides to push. Consequently, always have someone that can cover you while you’re setting up for these smokes.
The final dangerous position that can be eliminated on the B-site is Barrels. If you feel any sympathy for your enemies, then you better hope those barrels aren’t filled with oil, because you’re going to dose them in a nice coat of fire. Unfortunately, all of the previous advice about standing open to short and connector applies here as well.
To grant all who oppose you and happen to be in that exact position a fiery death, you have to put yourself on top of the railing towards the edge of the wooden plank. There, find the spot where the texture of the bridge leaves the roof of the building in front of you and where the sky opens up. Then, quickly let the Molotov go before you burn your fingers.
Visit our partner VIE for the safest market and best customer care in esports betting.
Must be age 18+ and reside in a country where online gambling is legal. Gamble responsibly