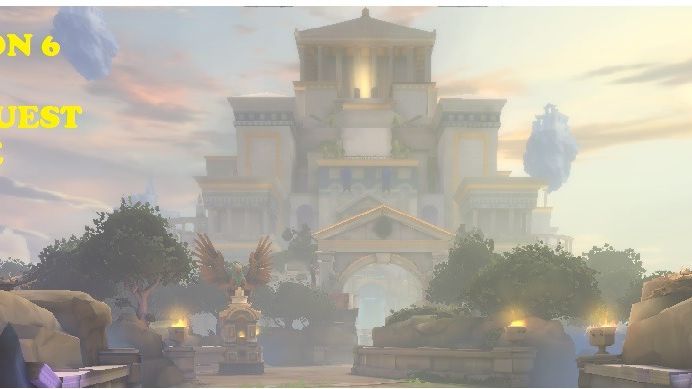
SMITE Season 6: Diving Further Into Conquest
Itching to know more about Conquest? Here is a guide to Conquest in Season 6.
Itching to know more about Conquest? Here is a guide to Conquest in Season 6.
Interested in knowing more about how Conquest works? Look no further! I'm here to give you a rundown on everything you need to know when it comes to Conquest. Let’s break it down with a quick look at the map. There are two sides to the map: the Order side (which is blue) and the Chaos side (which is red).
The map is broken into three main lanes. The objective of Conquest is to break all the towers, of which there are two in each lane. After you break down the towers, you would focus on breaking any of the Phoenixes. Remember the two towers in any lane have to be destroyed before you can damage the Phoenix. There are three total Phoenixes but you need to have at least one destroyed to do damage to the Titan and win the game.
ROLES:
The longer lane on the left side of the picture above is typically called the duo lane. The names of these roles are ADC (Attack Damage Carry) and Support. The most basic characters for the ADC role are Hunters, who typically do sustained ranged damage and can help destroy the objectives. The most common characters for the Support role are Guardians, who usually build more defensive items and tank damage for the team or even use CC (crowd control) like a stun or root to set up teamfights. Typically these roles work together to gain the advantage in the long lane and push towers down.
The middle lane of the map is usually where your Mid laner will be. The most common character used for the middle lane are Mages. Mages are usually more focused on burst damage to help swing a teamfight with a big damaging ultimate or help secure a neutral objective on the map. However, because there are so many different types of characters in SMITE, not every mage will be focused on burst. Some can sustain with healing or even focus on consistent output of damage. It will come down to more of what your team is trying to do at that point.
The last lane on the map is the shorter lane or more simply referred to as Solo. Here is where this role can get a little tricky. In the past this was a lane where mostly Warriors were played. However, due to how SMITE has changed and certain items that have been updated or implemented, this role can have a variety of characters played in it. It’s more about trying to help balance what your team may be missing than simply playing a Warrior. In the competitive scene, Warriors still are picked a decent amount, followed by Guardians. This role usually helps either frontline in a teamfight and tries to keep the other team's ADC or Mid out of the fight or provides support for their own teammates. Whatever the case may be, this position should usually be building some defensive items.
The last role that is left of the 5 roles in Conquest is the Jungle. This role is for sure an interesting one. Whoever on your team is playing Jungle has a couple things to do, and it can almost be done in any order. Typically you will see an Assassin being played in this role. With high damage and lower defenses, this role is perfect for showing up in any of the three lanes and securing a quick kill or even forcing someone to back before retreating out and continuing to farm the camps in the jungle. There are also, just like all the other roles, a number of different characters that will be able to supply different things to the team in this role.
Now that you know what you should be looking to do in each role, I'm going to dive into some of the more complex ideas and mechanics behind the game mode. The first things I'll go over are wave mechanics and timers. The basis of Conquest is centered around farming. Earning gold to buy items and doing it in an efficient manner to get a lead and destroy towers and then win the game.
WAVE/CAMP TIMERS:
In each lane, a wave of minions spawns every 30 seconds. Each wave is composed of six minions. Every so often, you may see a larger minion that is harder to kill and you might be thinking what is that. This large minion is referred to as a Brute Minion. Understand that for the first 10 minutes, one of these minions will spawn every 3rd wave. After 10 minutes, you will see one Brute Minion per wave. After 20 minutes, you will see two. And finally, if the game lasts 30 minutes, you will see three Brute Minions per wave.
Now this is important because these Brute Minions are harder to take down than the normal minion. So timing your backs around these minion timers and the other buff timers can be the difference between losing a wave to the tower and the waves stalling in the middle of the lane so you don't lose too much gold and experience, further falling far behind your lane opponent. Do not forget that your wave will target hitting the tower over hitting other minions, so forcing minions into your opponent's tower will put them down even more, because a minion that takes damage from the tower gives reduced gold and experience to any player that is close to it.
On top of the timers for the waves, you have the camps in the jungle as well. Your normal back camps spawn on a 60 second timer, so you'll see them come up once in that time. There is an additional neutral camp with a separate timer.
Say hello to the Mid Harpies. These are found next to the Middle lane in two little coves next to the main lane. This particular camp spawns on a 90 second cooldown. This camp is usually highly contested, the reason being each side of the map has two back camps as well as their standard buffs, but there are only two Mid Harpy camps that are in a neutral location. Allowing this camp to be taken from you continuously will put you down in gold and experience rather quickly.
BUFFS:
Each side of the map has four jungle buffs in between three lanes that are depicted with color that give whoever picks them up increased stats. Listed below are the four buffs and what they do:
Purple/Void: This buff reduces nearby enemy gods' protections by 10 + 2 per enemy in the radius stacking up to a max of 4. The area effect of 55 units and lasts 120 seconds.
Red/Damage: This buff increases Physical and Magical damage by 10%, 15% while hitting an enemy god. It also grants 10 magical power and Physical power and lasts 120 seconds.
Blue/Mana: This buff gives +15 MP5 (Mana Per 5 Seconds) and 10% cooldown reduction and hitting an enemy god restores 2% of your missing mana (once per ability) lasts for 120 seconds.
Yellow/Speed: This buff increases movement speed by 5%, which also stacks 2% per jungle minion kill/assist maxing at 3 stacks. Those stacks last for 15 seconds, and the buff lasts 120 seconds.
So now you've got timers to learn so you can set up a path of farming to maximize your gold and you've got an idea of what you should be looking to do for each role. Now it's time to the last big concept of the game mode at you.
OBJECTIVES:
There are now five objectives in Smite that can be taken by either of the teams to help sway the game in your direction. They are in different locations and impact the game differently but I'm going to run over all five so you know what you're looking for the next time you're in game.
The Oracles: This is more of a camp than an objective really. There are two monsters to be killed and when you kill them you are granted vision over the Gold Fury pit. They are on a 3 minute cooldown and spawn in the game at 30 seconds.
Totem of Ku: This Objective is on the Solo lane. It's on the back wall of the Fire Giant and spawns at 1 minute and respawns after it is taken after a 1 minute cooldown. The objective will stop spawning at 15 minutes into the game. Securing this objective will give your team 5% movement speed and 25 MP5 (Mana per 5 Seconds), plus 25 global gold to each team member. So if you have a high pressure lane god, this is a nice little boost to your team.
Pyromancer: A strong neutral monster. Defeating it grants 100 gold (+3 per minute) and 100 experience, and provides a fountain buff for 90 seconds so anyone in base will be able to leave the fountain and gain +40% Movement Speed for 15 seconds. However, if you enter combat before the 15 seconds is up, the buff will be removed. This objective is on a 5 minute spawn timer after being defeated.
Fire Giant: The strongest neutral monster in the game mode. This monster has physical protections (90), magical protections (60), and will reduce the Lifesteal from attacking gods by 50%. Its basic attacks can be ranged or melee and apply a debuff depending on rotation. It will also use Magma Blast, a line ability that slows by 80% for 1.5 seconds and will knock up while dealing 500 Magical damage. Ragnarok's Fury, an ability that summons several meteors that will target all gods within the area, dealing 80 magical damage per boulder.
Flames of Ragnarok is a non-stop ability that surrounds the Fire Giant Pit with flames. Gods who cross through these flames will be dealt 25 magical damage every 0.25 seconds for 3 seconds. Lastly Molten Pools is a ground ability that deals 225 Magical damage every 1 second for 5 seconds. When you defeat the Fire Giant, it grants 150 gold (+6 per minute) and 200 experience (+5 per minute), and also grants a buff to each living member of the team. This objective is on a 5 minute spawn timer.
After the 25 minute mark, the Fire Giant evolves into Enhanced Fire Giant, and grants an enhanced version of the normal buff as well as allowing you to ignore 50% of the back door protections on towers so you will do more damage to towers without a wave tanking it for you.
Gold Fury: Finally, we have the Gold Fury. I decided to go over this one last as it has been changed recently. There are now three variations of the Gold Fury. The first one is the Gold Fury we have come to know and love. But they added two new forms to keep track of when trying to deicde what your team should contest or let go.
Oni Fury: Killing the Oni Fury creates a wave of enhanced minions in every lane on the next spawn. These minions will do 75% more damage than the normal minion wave. They also get their health increased by 30%. Lastly they gain an additional buff to physical protections (50) and magical protections (60). If you're not watching this wave of minions, you're liable to lose a Phoenix.
Primal Fury: Killing this Fury will increase your teams damage to jungle camps and bosses to 7% and can stack up to 3 times. So if you take this Fury down three times in one game, you are looking at a hefty damage increase of 21% to camps and bosses. This would be a big help for example in securing the tanky Enhanced Fire Giant that spawns at 25 minutes in the game.
In this article, we have gone over a lot of the nitty gritty concepts in SMITE. At this point, more of what your missing might just be the experience of playing. But I hope after you read this article you have a better understanding of where to farm what to farm and when to farm.
Like our content? Support us by getting our merchandise in our shop