


Defending the Most Commonly Pushed Angles in VALORANT
VALORANT is all about proper angle management. Here's how to lock down the most commonly pushed angles in the game.
VALORANT is all about proper angle management. Here's how to lock down the most commonly pushed angles in the game.
If you’ve played enough games of VALORANT, chances are, you’ve seen the same handful of chokes and angles dominate the game from round-to-round. Regardless of which map you’re playing on, there’s a good chance that a similar batch of angles is going to be pushed by either team throughout the course of a game.
In this guide, we’ll break down the most commonly pushed angles in VALORANT and how to specifically defend them. From close angles to lengthy vantage points, we’ll show you everything it takes to stop the most popular pushes dead in their tracks.
Haven’s three sites make the map stand out as truly unique. However, if two players are able to steadily lock down the two main entrances to B-Site, the map becomes a lot more constricted for the attacking team. With less options on the table, the attackers will have to make a split decision when it comes to which site they’ll push on to. This decision-making process might lead them straight into an alternate route like the map’s Garage — by which they can reach B-Site or C-Site.
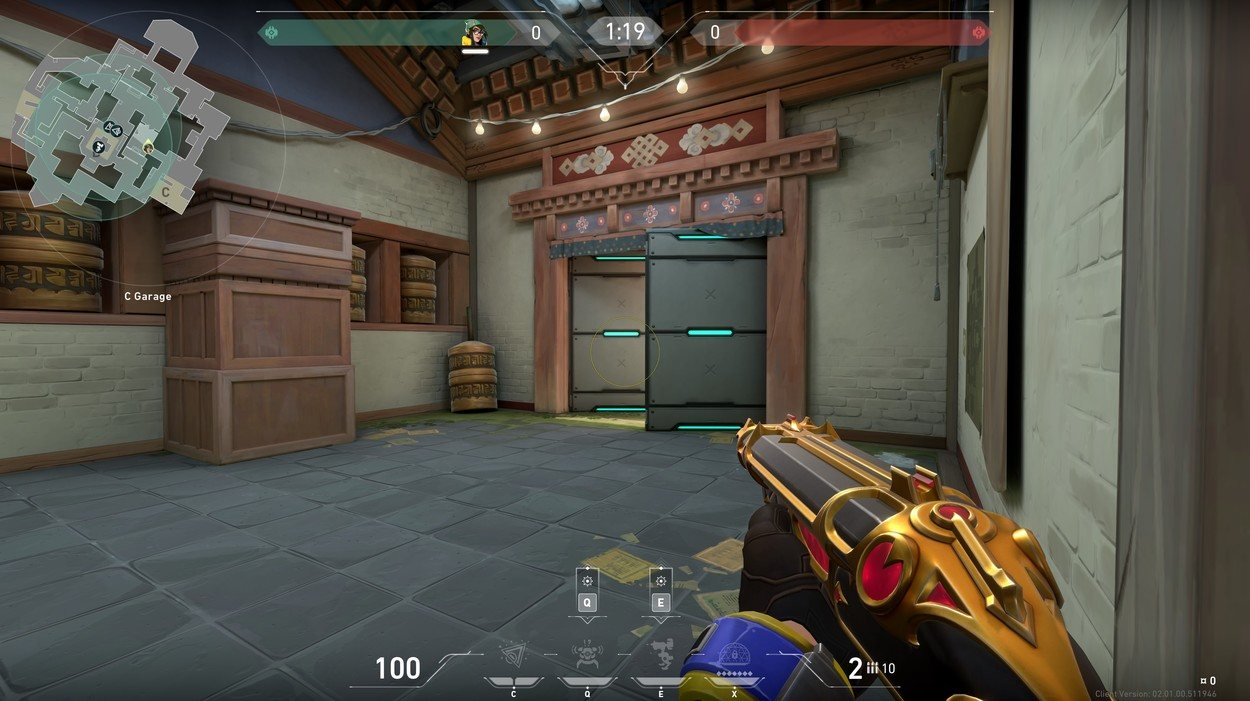
Holding Garage is incredibly important on defense, as it helps with limiting the attacking team from rotating throughout the right side of the map. The angle pictured above is ideal for rotating quickly and falling back to C-Site. It gives you enough freedom as a defender to head into the connector between Garage and C-Site while still getting intel on the attacking team that’s pushing through. Alternatively, you could hold the angle looking down on the Garage Doors (which would give you an easier path to B-Site), but the risk is higher.
No matter how you hold down the Garage on Haven, it’s imperative that you are preemptively aiming at the sliver in between the two doors that lead into the area. With your crosshair placed at the direct entrance to Garage, you’re ensuring that any pushing attackers will be denied the opportunity to swing an advantage on you, regardless of where they check first upon entering.

A-Short on Bind is a highly-contested choke that attackers will inevitably push several times per half. If they aren’t pushing it outright, there’s a high chance that a retake or rotate will occur on A-Short. By watching the angle from just in front of U-Hall, you’re able to get a clear look at anyone coming from the Bathroom side of the choke. If an attacking player peeks that angle, you’re going to have the first look no matter what.
Additionally, by watching this angle in particular, you’ll have the chance to lie in wait for a player rotating from B-Site. If you have the intel that an enemy is rotating to A-site through mid, there’s an extremely high chance that they’re going to come to the site via A-Short. As long as you have this angle locked down, you’ll be able to see any player making a rotation or initial push.
One of the tougher angles to execute in VALORANT, Icebox’s B-Long choke definitely has the tendency to put defending players on the back foot. Due to the map’s extreme verticality and maze-like layout at points, this shot that you’ll have on attackers coming from B-Long onto B-Site is one of the only chances that defenders have at a clear-cut straightaway angle on Icebox.
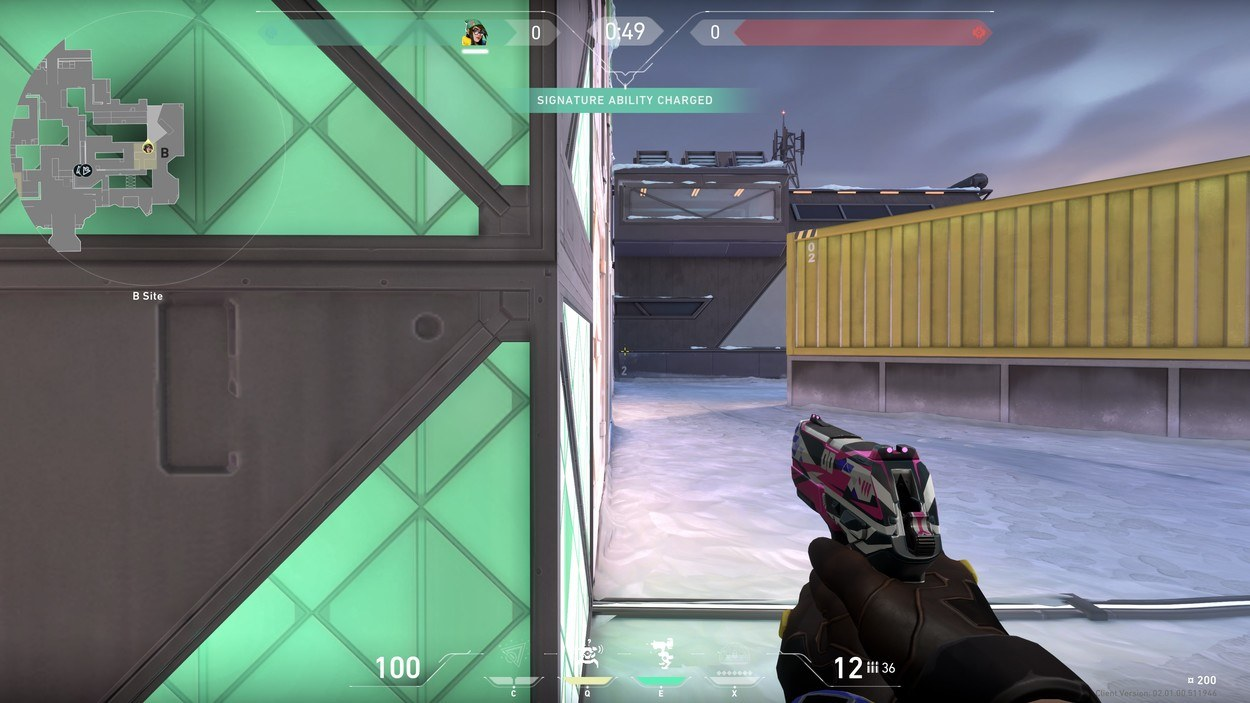
Even still, this angle is definitely one where the defender can be caught flat-footed if not careful. If an attacker manages to get under Tube and push from Mid, they can shoot through the green box that’ll be to the left of the defender. Additionally, if an agent with mobility such as Jett or Omen gets behind Yellow without the defender realizing, they’ll be strapped for a chance to get a pick and can be collapsed upon pretty easily.
To counteract this concept, you’ll want to hold the angle as tightly as possible while another teammate watches your back from Mid or Kitchen. But, whatever you do, don’t peek out B-Long. If a big push is coming your way, the attacking team will have a numbers advantage and consequently, have an extremely easy time picking you off. A straight shot down Long is essentially a firing range for the other team. If you hold the close angle here and simply wait for the pushing team to make its way onto site, you’ll have an increased chance of getting at least one kill in a trade-off situation. The longer you wait, the more time you’ll potentially have to get a pick. And, more importantly, if you take your time with the enemy team, allowing them to make the first move on this angle, your teammates will have more time to respond and rotate.
Attackers that go through Mid on Split have two options when they get to the top of the stairs: run straight through to A-Site, or swing a hard left turn and head towards B-Site. By holding this angle, it’s your job to ensure that they never get to make that decision in the first place. If the enemy team tries pushing into B-Heaven, you’ll have a clear shot at them from a higher vantage point. You also want to make sure your back is to the wall as you hold this angle. You definitely don’t want to get caught from behind in case a lurker makes it onto B-Site through Garage.
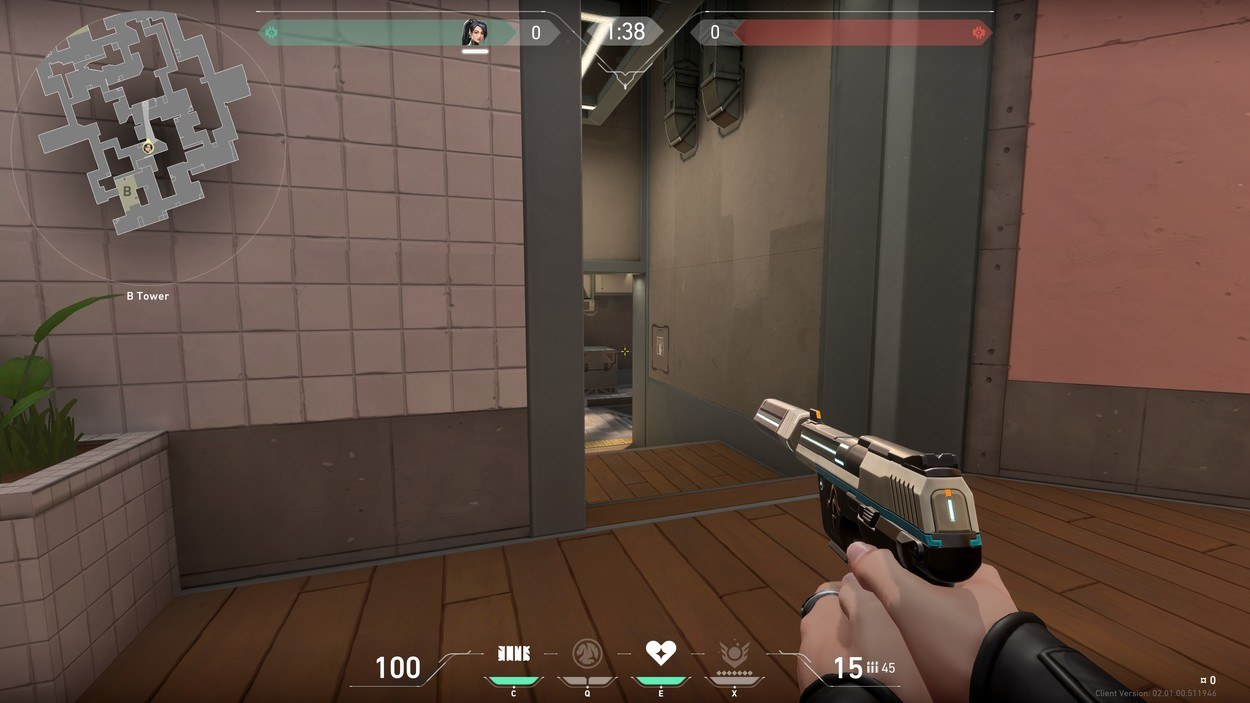
Still, this angle allows you to get a good glimpse at any pushers coming up the stairs, as well as any players that might fall back next to the silver box in an attempt to get a better look at you. In order to hold this angle as efficiently as possible, you want to have your crosshair slightly below eye level considering that you’ll be looking down at any pushing enemies. Additionally, to gather as much information as you can (and to prevent any unfortunate flanks), you’ll want a teammate covering Garage while another teammate rotates through the Rope Room.
With enough angles covered, you can set up an efficient crossfire between you and your teammates if the rotation is fast enough. However, if you see yourself getting overwhelmed and feel the need to fall back, you can always hold the close angle on top of the box right next to the door in B-Heaven.
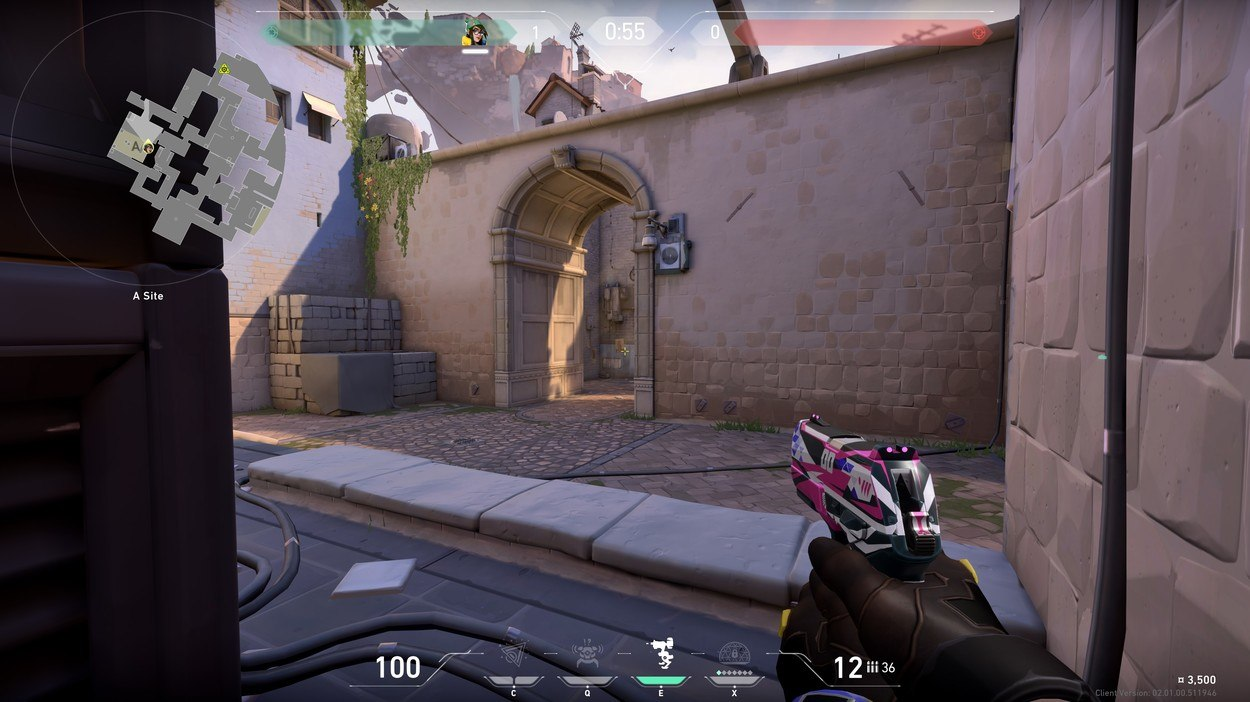
Defending A-Site on Ascent is incredibly easy if you can properly manage your angles. By peeking from the right side of Generator, you’re essentially giving yourself enough freedom to have the advantage on a pushing player coming from A-Main. If you were to watch A-Main from the other side of the site, you would be throwing yourself into a 50-50 position. On defense, you ideally want to have some sort of advantage, so watching A-Main from Generator and waiting until you have a clear shot is the position you really want to be in.
With this angle in mind, you also don’t want any of your teammates sitting in Heaven. If the enemy team pushes A-Main, a teammate that’s peeking an angle out in the open could easily get picked off while you’re forced to defend the site from behind Generator on your own. If you keep the element of surprise intact, you’ll have a stronger chance of capitalizing on this angle.


