


An overview of Anubis: the newest CS:GO map
With the recent update, Valve removed the legendary map Dust II, and in its place, we received a community-made map Anubis - here are both CT and T side structures.
With the recent update, Valve removed the legendary map Dust II, and in its place, we received a community-made map Anubis - here are both CT and T side structures.
Anubis has recently been introduced as the newest addition to the Active Duty map pool, replacing the fabled Dust II. While this sparked some controversy within the community due to attachment to the legendary map, others were excited for a breath of fresh air.
The map, however, has been in the game for almost three years. It was first added in March of 2020, and ten days later in April, it got moved from Scrimmage into Competitive mode. After being added to the Active Duty map pool, it became the second community-made map to do so, with the first one being Cache.
Let’s take a look at the map’s structure, and the strategies that are currently being used on both playing sides.
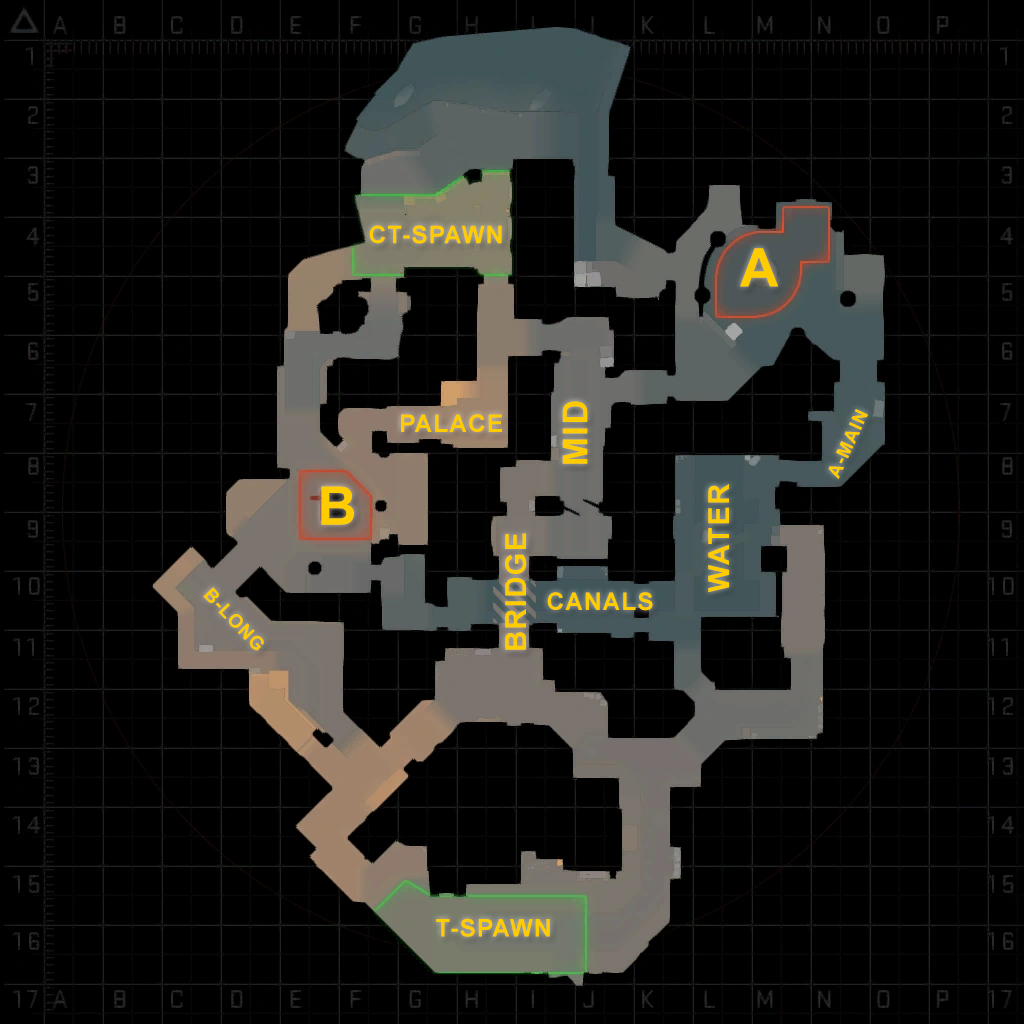
Like most defusal maps, this one is divided into three parts: A Site, B Site, and Mid. Unlike most maps, it is more T-sided.
Fakes are some of the most popular strategies to execute on this map, so it’s important to understand the map structure and rotation opportunities. This is where the Water position comes into play. Primarily, it serves as a direct entrance for the Terrorists onto the A Bombsite. While approaching A Main you have open windows, which allow you to throw utility directly onto the site and going into A Main lets you enter the bombsite. However, if your team decides to go to the B Site, there’s a direct, but rather open, path through the canal. This will take you to the B Site up from the lower level. If a few players are pushing B Long, the other team is forced to pick a fight. However, while crossing Canal, be careful of Middle/Bridge players, as they have visuals from the Bridge up above Canal. However, Smoke lineups from T Spawn allow you to instantly block the enemy's vision of Canal. This move grants a quick site rush and Canal take.
Looking at Middle, we can see that the map is very forgiving for lurkers. Playing this position on the Terrorist side gives you a great deal of space for movement and different strategies. If you manage to take control of Mid Doors, paths to both sites and the CT Spawn open up. Using the Palace position and going through the Connector to A lets you go to the CT Spawn. This allows you to flank both sites or to enter directly Backdoors into the B Site.
Terrorist players mostly want to take control of Water and Middle because these positions prove beneficial while accessing the rest of the map. The Ts may even opt to have only one player, often an AWPer, holding B Long to maintain map control and punish CT aggression.
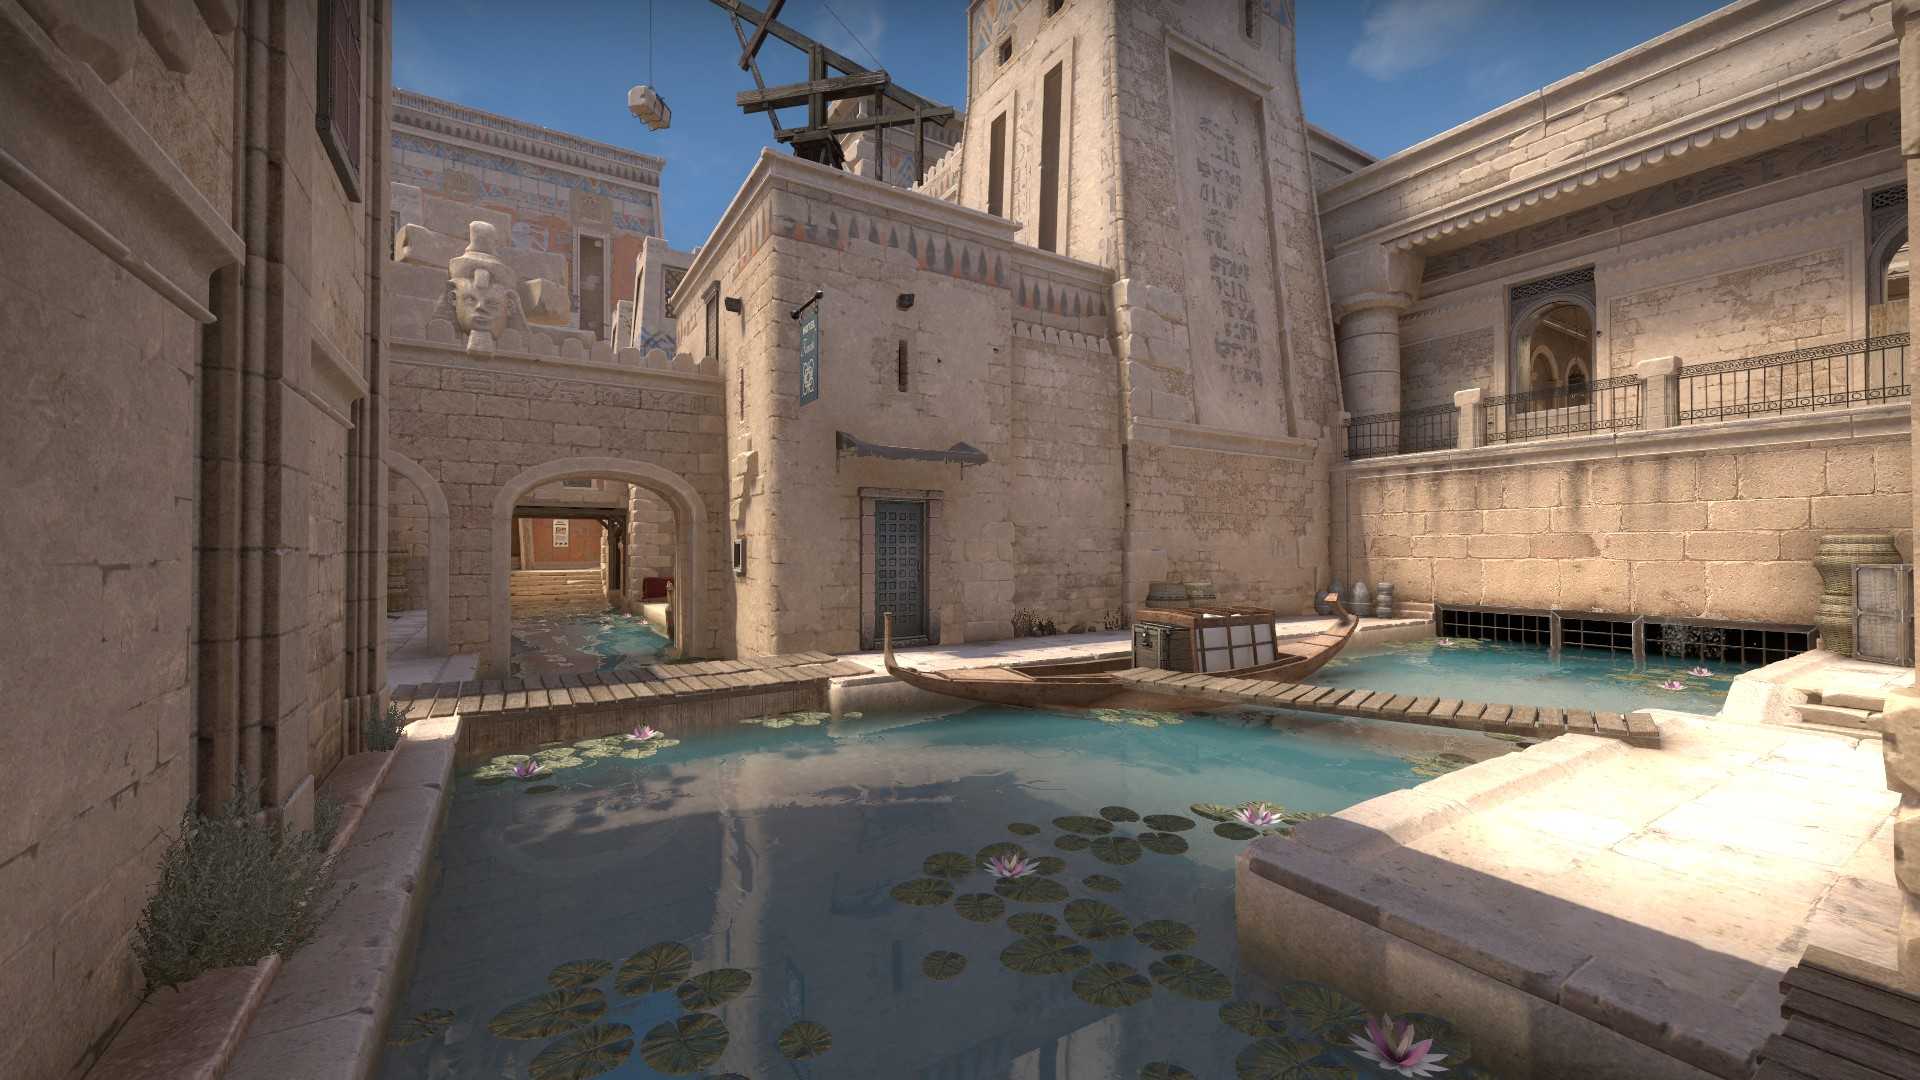
The Water position in Anubis
The CT-Side Structure
While playing CT, it is crucial to understand how and where the other team is possibly rotating because they might be changing positions.
Let’s start with the A bombsite. It is a common default strategy to have two players here, one playing as an anchor, and the other as a rotation player. The A rotation player may spend a decent portion of the round helping the player in Middle, as the positions are close to one another. If the rotation player is helping over at Middle, they can throw flashbangs over the walls onto Water, helping the A player peek out of A Main. Utility is a key part on A Site, as it can make or break the T-Side plan for the round.
Since the enemy players should be taking Middle often, the player there has to help hold off any Mid pushes and use grenades to assist teammates from B Connector to Water and Canal.
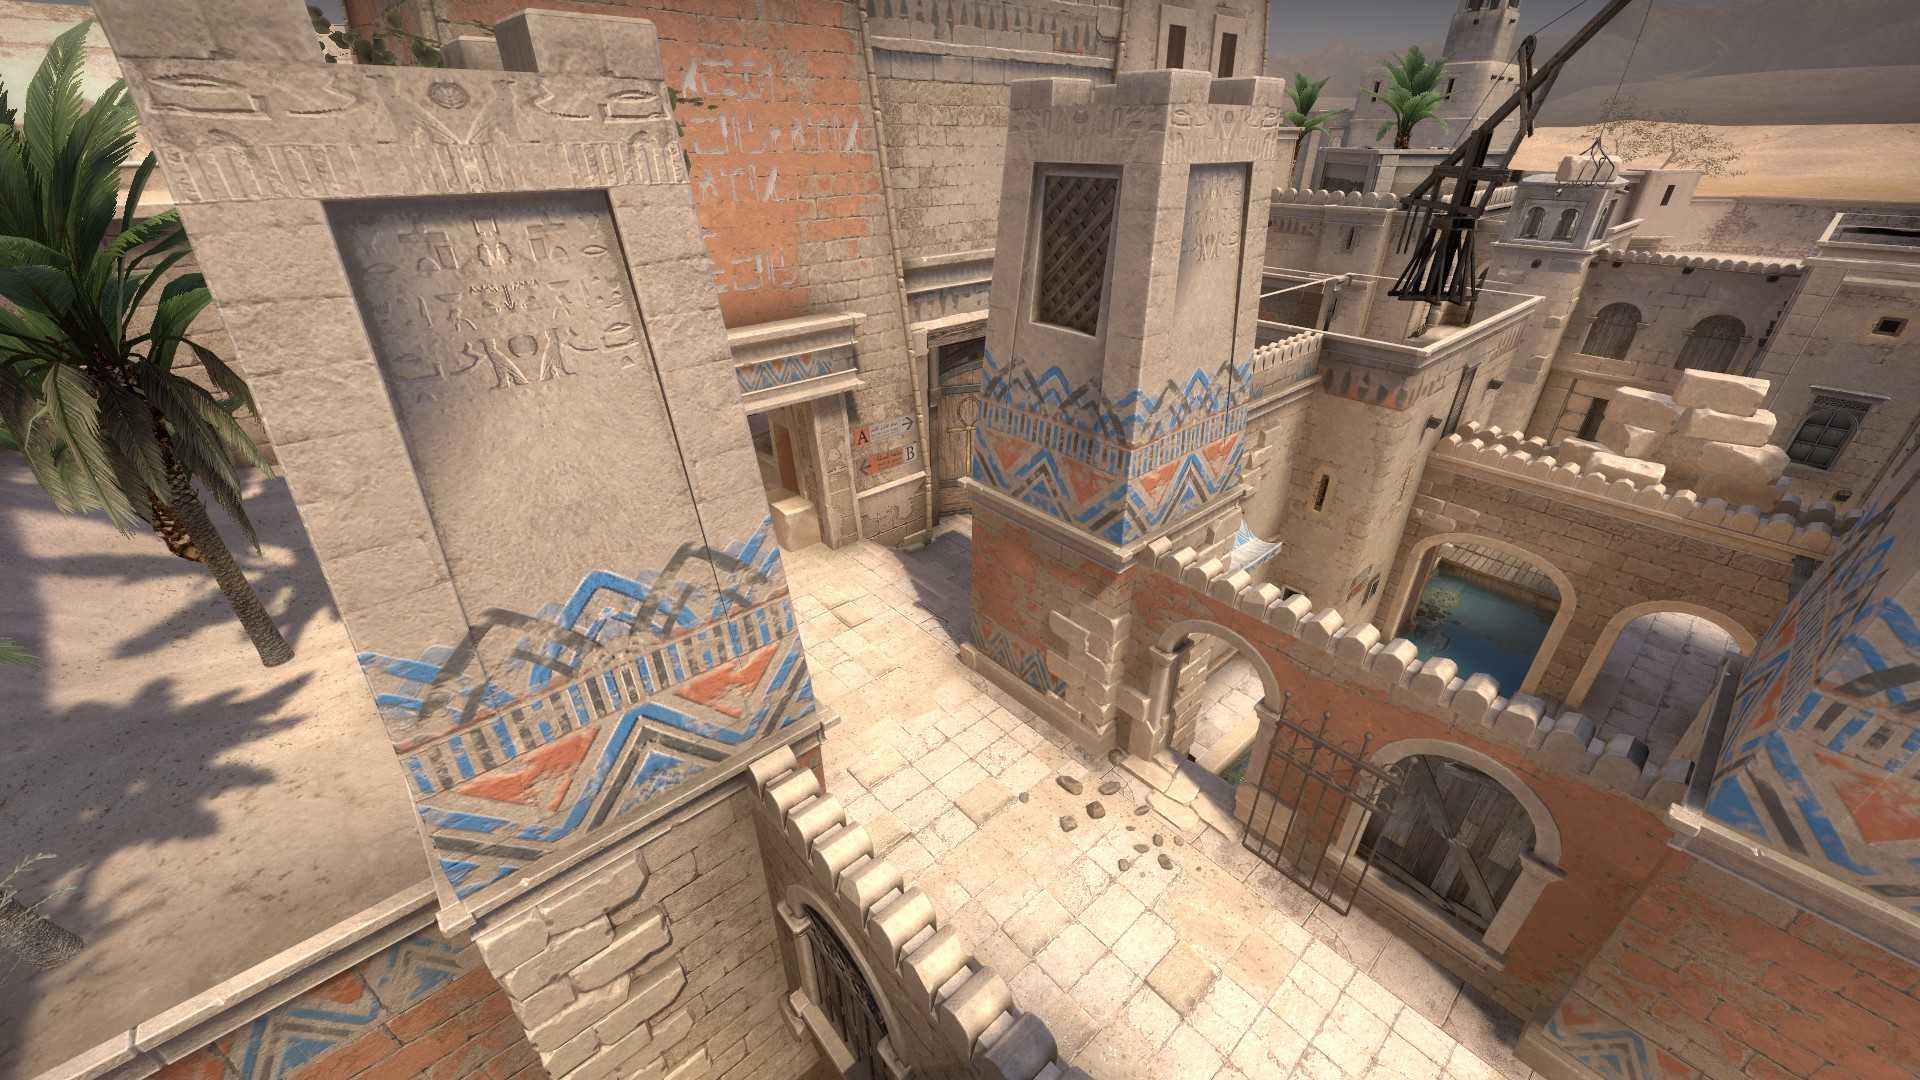
The Bridge position in Anubis
Playing B site as a Counter-Terrorist, you need to keep track of multiple angles: B Long, Canal, Palace, and CT Spawn. Usually, players will play along the back of the site. That is B Connector, Back of B or Palace, etc. Here it could get hard to hold off rushes from multiple angles, therefore utility is essential. The use of smoke grenades can help you change positions and rotate, and the community was quick to find various one-way smoke grenade lineups. Flashes are key, as they can fully stop a B Long rush with the correct timing. Terrorists may tend to peek out and take angles where they can get trade-kills, but a flash or a molly not only stops them from fully entering the site, but they can try to climb onto the ledges and peek into the site, using some clever B Back boosts you can punish them for it.
In the end, it comes down to your position, and how you are able to move around the site. Whether it is your utility usage or rotation, you should never stay in the same place while playing on B. A player can always push you from a different position as part of the T-Side strategy.
Anubis is indeed a breath of fresh air. The swiftly done rotations may remind people of Overpass. The more T-Side favored structure is not a common characteristic in the Active Duty map pool. Communication and teamwork are crucial on this map to achieve the best results. Various positions closely intertwine in the game plan - teammates must assist each other constantly.


