


A CS:GO Guide to Your Utility
Although this should be basic, even higher ranks struggle to use their utility correctly.
Although this should be basic, even higher ranks struggle to use their utility correctly.
An integral part of Counter-Strike: Global Offensive, utility is a very important factor in the current meta and can decide between victory and defeat. There are way too few people out there who know how to actually use their utility, and some of them do not even buy them at all. This article will discuss the possible uses the pieces of utility have and how to correctly deploy them.
There are multiple ways to throw the grenades you can use, not just the left click or the right click. If you hold both buttons, and let go of both of them at the same time, the grenade will be thrown with medium strength. This allows you to throw the grenades a shorter distance than just the left click, and a further distance than just the right click.
You can also let go of the right button, once you held down both, to get a smooth transition back into the left click mode. If you let go of the left mouse button at any time during the transition, the grenade will be thrown with a percentage of strength that is equal to the state of transition it was in. If you hold the left mouse button down longer during the transition, the grenade will fly further; if you hold it down a shorter period of time, it will fly a shorter range. You can also do this in the opposite direction by letting go of the left mouse button first. The longer you hold down the right mouse button the shorter the grenade will fly.
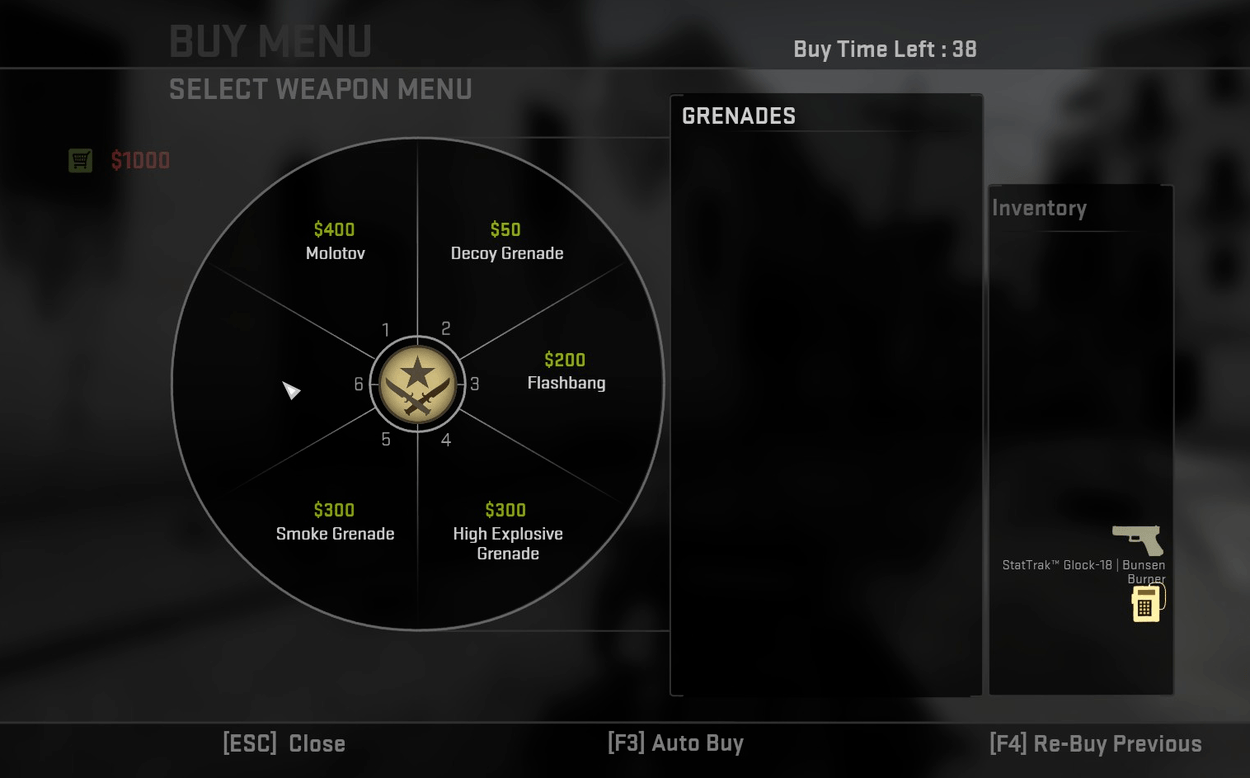
On both sides there are five different kinds of grenades that you can use: the flashbang, the HE grenade, the smoke grenade, the molotov/incendiary grenade and the decoy grenade. All of them have specific uses, and all of them can help you win your game. Some parts of this article will seem very basic to some, but I have seen Supremes struggle with the use of smoke grenades and other utility.
The flashbang, or flash, has the primary use of blinding your opponent. If people look directly at it, teammate or not, the person who looked at it will be blinded for a period of time, defined by how close the flash popped and how directly the person looked at it. Therefore, the further away the flashbang pops, the less effective the blinding effect will be. There are multiple ways to use the flash.
The most common way is to throw it in such a manner that the person you want blind will only see the flash once it is so close to popping that he cannot turn away. This is called a popflash, and will leave the players no chance but to back away or take damage. But there is more that defines what a good popflash is. At medium-high ranks (Gold Nova 4+) people will start to turn away once they hear the metallic sound of the flash hitting a surface on the map. To throw a good popflash, the flash should not make sounds that the enemy can hear. The flash therefore must either make contact to a surface at a far distance to the enemy, right when it is about to pop or not at all.
If you want to peek out with a flash, and you cannot throw a popflash in the situation you are in, you can simply throw it to the opposite way of which you will be looking/peeking. This is only an option if the enemy is relatively close, so this kind of flash will not help you against the AWPer in Pit on Dust 2, as he will not even look away, which is the purpose of this flash. You can peek at the same time the visible flash you threw would be about to pop, so you can peek an enemy that is turning around.
There are multiple ways to practice your flashing skills, but you should start with getting a feeling for the grenade itself. You should open up an offline practice server and see how the flash jumps off of different surfaces and walls. You should know how high, how far and how fast they can fly. How do you flash someone around this corner and behind that piece of cover? You should know how they fly to be able to answer these questions. If you already have a feel for the throwing of you flashes, you can start to systematically look for, and learn, good flashes. There are tons of tutorials on YouTube and Steam for popflashes on certain parts of maps, and most of them require only a minimum amount of time to set up. To find your own popflashes and to see how certain flashes would actually fare against an enemy, you can download this script that former pro adreN uses to find his own flashes. Be aware that the behavior of grenades is different on 64 and 128 tick!

Flashes can be useful in many different scenarios. I already touched on the possibility to throw a flash behind you to peek with it, so you can kill an enemy who is not prepared for your peek. This is especially useful if you want to peek against an enemy who is on his way to attack you. When you hear his footsteps and time your flash well, you will get at least one guaranteed kill. Popflashes are useful for both sides, the CT and the T side. As a T, you can use it to push AWPers back who are holding an angle, like A-Long on Dust 2. You can also use them to support your entry fragger, by either pushing the CTs back or leaving the CTs vulnerable to your entry. Try to chain visible flashes together, so the enemy will turn back once the first flash(es) popped and will look into your next flashbang. On the CT side, the main purpose of them is to delay an enemy rush and to enable you to get a safe kill. If they push you on A on Cache, a good popflash will blind them and either get them killed or they will back away into A-Main again. This gives your teammates time to rotate. The same goes for delaying a retake as a T. When a retake is happening, playing for time is always a good choice, you just need to be sure to not get cornered and picked off this way. Flashes are perfect for delaying the retake or splitting their forces by flashing one side of the attack during said attack.
The HE (High-Explosive) grenade is a grenade which will explode after a certain amount of time has passed after throwing them, and has a maximum damage output of 57 against armored players, and 98 against unarmored players. Therefore, a HE grenade can be lethal against eco-rushes, because a direct impact of the grenade on a player can leave them at 2 health.
I have already described that it is potentially lethal against a player who is part of an eco-rush, even when there was no damage inflicted before the HE makes contact. Because it has a wide damage-range with reasonable damage output, it has multiple different uses.
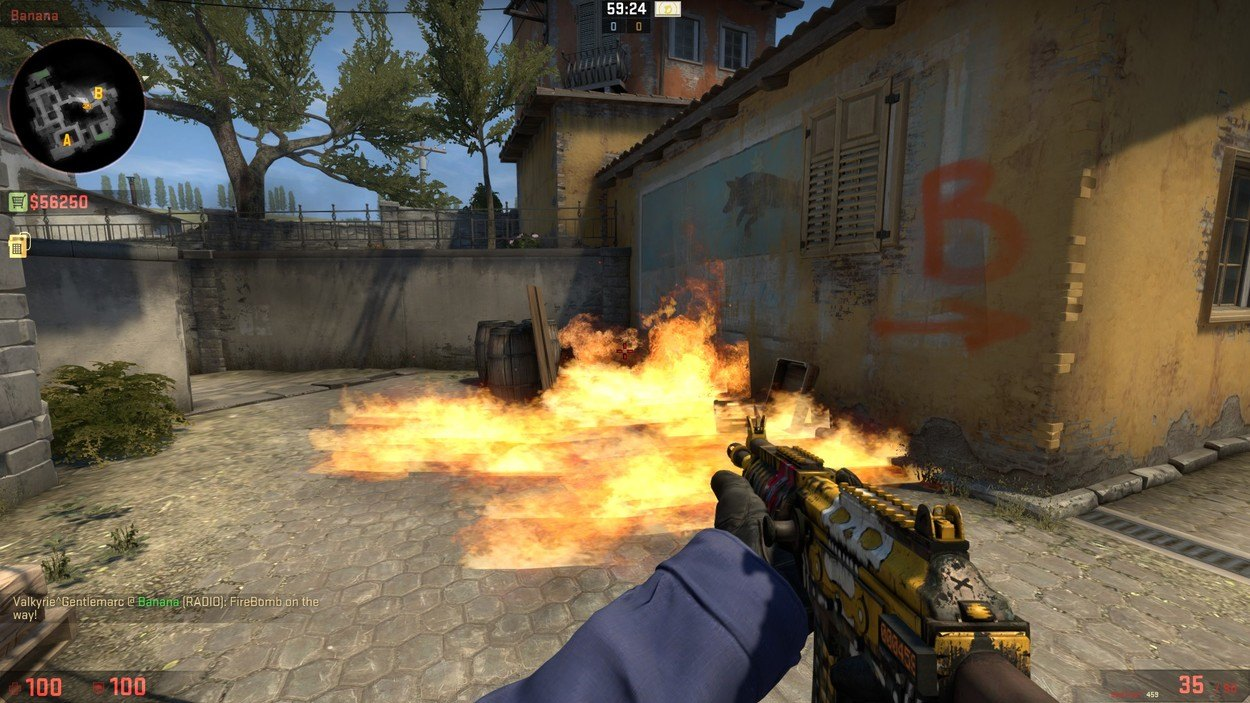
You can use HEs to stop rushes and to punish overaggression of the Ts. When people are running through a narrow corridor, such Banana on Inferno, a few HEs can completely destroy all 5 players, or at least get them down to low HP which should secure you the round. The HE is also useful when you try to retake a bombsite, or you want to deny a bomb plant from a hurt enemy. Because a retake normally ensues in the later parts of the rounds, a lot of the Ts should be lower than 100 HP anyway, which makes the HE a good tool to end them or to get them down even further. When the Ts are playing for time, and are hiding in corners that are hard to clear, you can use the HE to preemptively damage Ts hiding in known hiding spots.
When you are on the offensive side of the in-game conflict, the use of the HE only shifts slightly. You should still use them to prenade known spots, especially corners which are favoured by the AWPers, to get free damage in. It also makes sense to nadestack certain parts of a bombsite when you try to take one, in order to deny the CT who is possibly hiding in that spot any chance of a frag. A good spot to do this with is the Pit on Inferno's A site. When two people are exiting through Apartments, and one T is also coming through Short, nadestacking Pit will most likely guarantee you a kill.
The smoke grenade became synonymous with CT-side holds of bombsites. They are a crucial part of the defense in Counter-Strike: Global Offensive, and rightfully so. They only pop once they've stopped moving, so you are able to throw them as far as the map allows you to, which allows for both sides to smoke off certain passageways or doorframes that are a crucial part for the other to have vision through, like the Z-Connector on Cache. You can find a basic guide to crucial smokes in Counter-Strike: Global Offensive here.
The CTs should adjust their usage of smokes to the way the Ts act. If they normally attack within the first few seconds of a round, with a lot of rushes, it is good to smoke of crucial chokepoints. They, at least, have to use part of their utility to get through the smoke safely, but a good amount of rushes get stopped dead by a good smoke. It is important to know that you should deny map control with your smokes, and not enable it. If you only smoke the doorframe of B-Main on Cache, the Ts will easily be able to push into Ventroom. You should instead smoke further into B-Main to stop them from getting into Ventroom without taking damage. If they are especially slow on their T-rounds, you should start to consider to keep your smokes until you are sure that they attack is going to commence shortly after deployment. This guarantees you a strong advantage over the Ts, who have no vision of the bombsite and should have a hard time finding out where the CTs are standing. Sometimes it is a good idea to use the Smokes to deny any vision of you early in the round, especially on Dust 2. This ensures that they cannot know how many of the CTs are on B, and should allow you to cross rather safely.
The first thing that comes to mind is to use them in a way that makes taking map control, or a bombsite, easier. The most popular examples here are the Dust 2 Corner and the Long Cross smokes. These allow you to cancel out popular and strong positions for the CTs, and to force them to either take a huge risk or to fall back and wait for the smokes to clear. You can also smoke off chokepoints that the CTs like to exploit, such as the top of Banana on Inferno, if the CTs have been rather successful taking full Banana control. If they see a smoke that completely denies information for the CTs, they will think twice about pushing through it. This can help you to establish your default, and you can then wait for the CTs to make a mistake. After you have planted the bomb, delaying and bugging them with smokes can help you to close out the round, by smoking off important chokepoints.
This grenade explodes after a certain amount of time has passed after you have thrown it. If it explodes on, or close to, the ground (or any other flat surface) it will cover a good amount of space in flames. Everyone standing in those flames with 100 HP has roughly three and a half seconds left to get out of it before they die. I should mention that you can put out any flames caused by an incendiary or a molotov with a smoke grenade, which may allow the CTs to survive longer than intended.
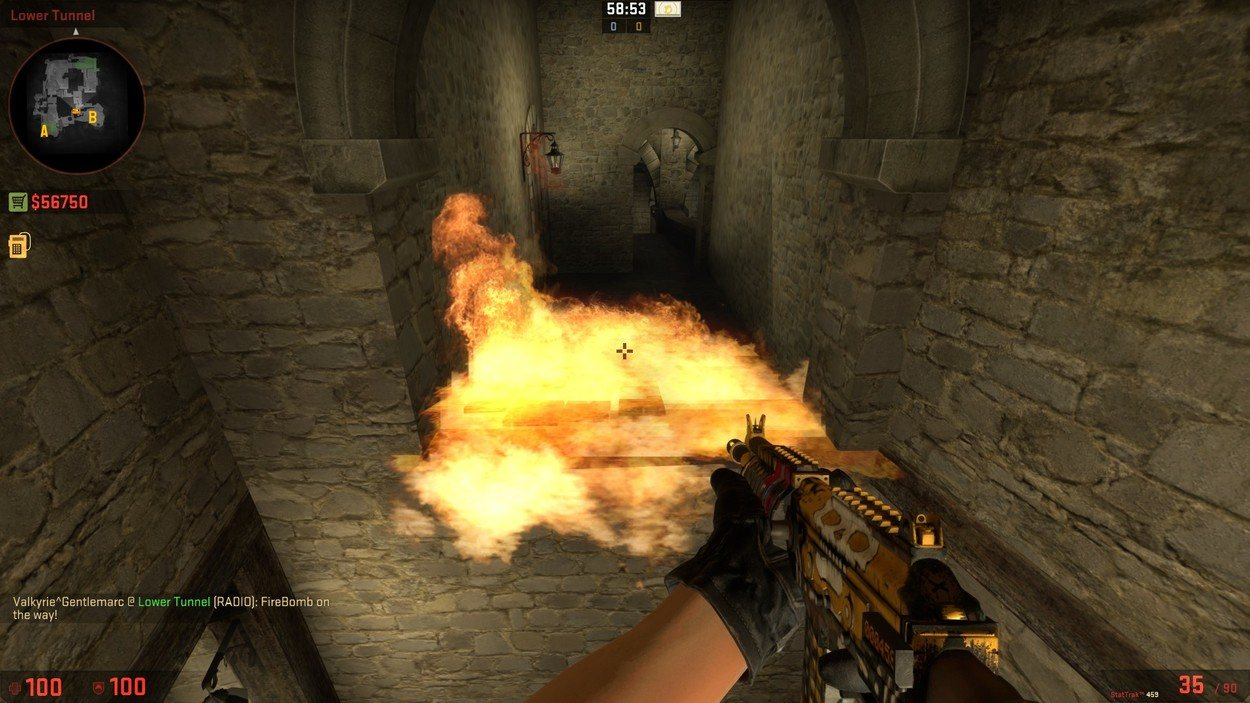
As a CT, you can use the incendiary grenade to delay and stop a push, and to deny map control in certain cases. If the attack is taking place, getting damage in with an incendiary placed in one of the chokepoints can win you the round. Alternatively, if the Ts are already on the bombsite, you can use the incendiary to stop the plant, and to buy time this way. You should be careful as a CT when you try to use the incendiary grenade. They cost $600 on the CT side, and only burn for close to six and a half seconds. Throwing them at the wrong time or to the wrong location will cause you to throw away that money. But, still, do not be afraid to play around with them in Matchmaking. I often see people who never use them on the CT as well as the T side, and they often could have won us the round if they could have delayed the enemy longer.
The molotov truly is multi-faceted on the T side. You use them to stop overly-aggressive CTs, when the CT side has successfully pushed you multiple times. The molotov can, obviously, help you gain map control, either by denying an important and offensive position for the CTs, or by clearing out corners when you progress through the map. Banana on Inferno is the perfect example for this, as you can throw a molotov behind the wooden board on the Old Car position.
This denies a lot of aggressive peeks the CT AWPer could try, even though he may be crazy enough to peek past the wall. The molotov also is useful when you try to take a bombsite, as you can also use them to clear corners on the bombsite itself. If you know the CTs are on an eco, you may try to cook them on a rather narrow bombsite with enough molotovs to cover all of the hiding spots. This would secure you a safe plant, and a successful eco retake by the CTs is highly unlikely. If you have held onto your molotovs past the bombplant, it most likely is time to use them now, if you face a fight which is close to even in numbers. Much like the smoke, the molotov can block off chokepoints during the planned retake of the CTs.
The decoy truly is the outcast of the grenade family. It is often ridiculed by casuals and pros alike, and probably rightfully so. I do not need to split the uses of this grenade by fraction, simply because there are not many. It is only truly useful in a handful of situations.
You can use the decoy in three different ways. The first one is to use them to mask your rush, and to confuse your enemy by doing so. It could be possible for you to throw a good amount of decoys towards one side of the map, let them make noise and then push out. The CTs will be late to call for backup, as they will only know about your push once you are already knocking on their door. Alternatively, to vary, you can play a fake by throwing decoys to one side of the map and going to the different side. The second way to use them is to cause confusion in the middle of a heated fight. This is, pretty much like the first way of using the decoys, unlikely to work. You can either sit in a different corner than the decoy, or sit on the decoy. Both can confuse the enemy in certain situations. In general, I would not advise you to rely on both uses. The third use is probably the only one which can help you win a round, or even your game. You can bait out the peek of an enemy by pretending to have shot your AWP/Scout. It has become common for AWPers and Scout players to shoot just as they change position, in case someone peeked just as they started to move and some players like to wallbang a rather common spot just before changing position. When you drop your decoy at your feet, and it plays the AWP sound, the AWPer of the opposing team may be incited to peek right into your crosshair.
It is good to know how grenades fly and bounce. This can decide your fate in some games you play, allowing you to precisely predict if your plan is going to work. You should try to incorporate grenades into your skillset, on both sides. Too often do people lose rounds they should have won because an enemy AWPer was standing in a spot where he had clear line of sight on their team. You should start to use your grenades once you have decided that it is the right time to use them. People are often caught off guard by throwing their grenades way too late when a push is commencing, which causes them to die with their grenade in hand. Keep in mind that the ways of using grenades are not limited to my ideas.
Like our content? Support us by getting our merchandise in our shop


