Super Smash Bros. Ultimate: Best Controller Settings
In this article we go over the different pros and cons of each controller, as well as how to tweak your settings in Smash Ultimate.
In this article we go over the different pros and cons of each controller, as well as how to tweak your settings in Smash Ultimate.
When it comes to the best or most optimal controller settings in Smash Ultimate, it comes to be a blend of character specific attributes and personal preference. However, there are a few settings that are universally the best option and will give you the greatest competitive experience.
When it comes to competitive Smash, you have two viable options for controllers: the Nintendo Pro Controller or a GameCube Controller. These two controllers have the size, grip, surface area, and durability to support competitive Smash Bros. Other options exist, like the Joycon w/ Grip and Single Joycon, but these options either limit the number of buttons available or are too small for serious play.
In this article we go over the different pros and cons of each controller, as well as how to tweak your controller settings in Smash Ultimate.
Advantages
Disadvantages
Advantages
Disadvantages
As far as in-game controller settings, most tend to fall towards personal preference. Let's explore each one at a time.
Rumble: Controller rumble is strictly personal preference, as it doesn’t do anything for your gameplay. Your controller will vibrate during run animations, when you land a hit, and when you get hit. I personally like rumble on the Pro Controller, but not on GameCube Controllers. The rumble is a bit more nuanced on the Pro Controller and too heavy on the GameCube Controller for me.
Smash Attack (A+B): This setting allows you to perform any smash attack by pressing A+B at the same time along with inputting a direction. Pressing just A+B alone results in a forward smash in the direction you’re facing. This is setting is best when combined with the “Tilt Stick.”
Stick Jump: Stick Jump allows you to jump by pressing the left stick upwards. In general, I find this option best turned off, as it too often leads to unintentional jump inputs. In Smash Ultimate, you can perform Up+B’s out of shield without having this option on and having it on can sometimes accidentally cost you a stock when you expend your double jump when you didn’t intend on using it. Having the jump input only attached to a designated button like “X” or “Y” is, in my opinion, the best setting. Only use this if you cannot live without it.
Stick Sensitivity: While it’s a bit vague on what exactly this setting does, most serious and pro players prefer this setting on High, saying it make the stick feel more responsive. Go ahead and change this setting to High in order to get the most out of your movement.
There are many different combinations you can create with Smash Ultimate’s button settings, and people are coming up with new combinations every day. However, there’s a few tried and true combinations out there.
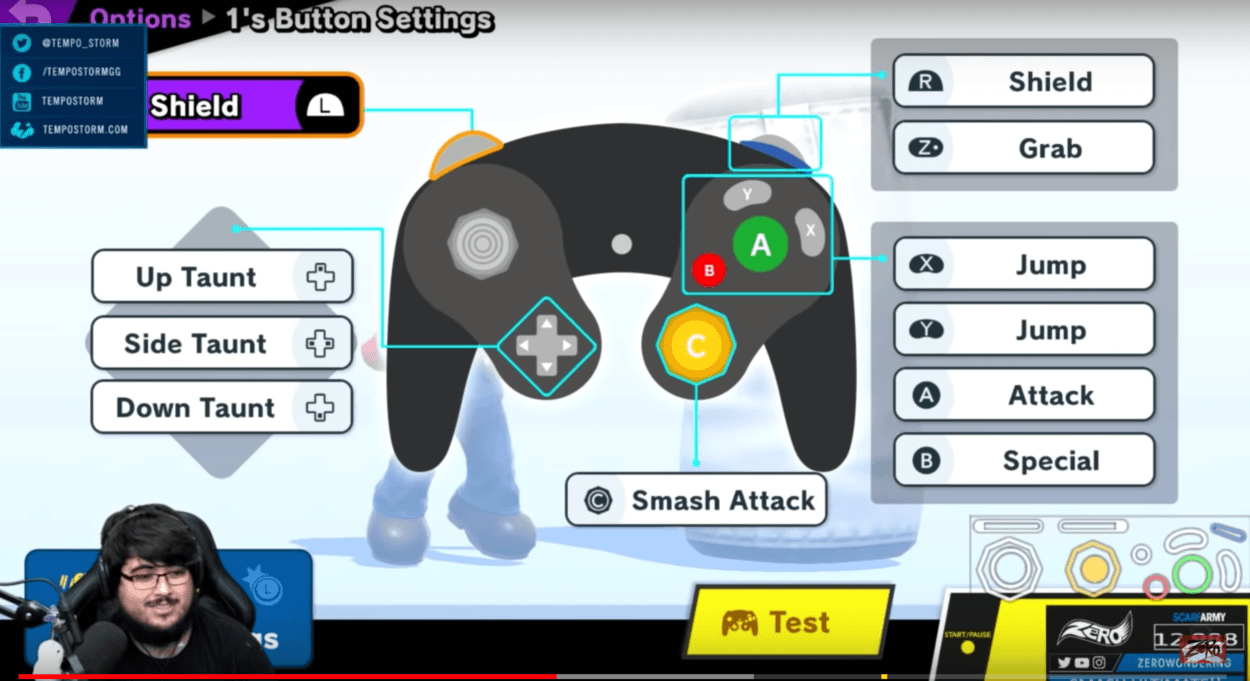
This is the basic Smash Button layout. This button layout has been the same since Melee and will come naturally for many players alike. This is my personally preferred controller layout, as I have been playing Melee for many years, and this controller layout feels the most comfortable to me. One of the benefits to this setting is it allows you to Up-Smash out of Shield by just pressing the C-Stick up while in shield. This is great for characters with fast and powerful Up-Smash punishes on block. The only change to this setting you may want is to change the taunt inputs to shield. With shield applied to the D-Pad, it becomes very easy to perform many inputs in a short time. This is used when buried, asleep, or your shield is broken. By circling your thumb on the D-Pad, it will help you mash out of your helpless state quicker. The following controller setting has this set-up enabled.

Footage taken from Zero's video
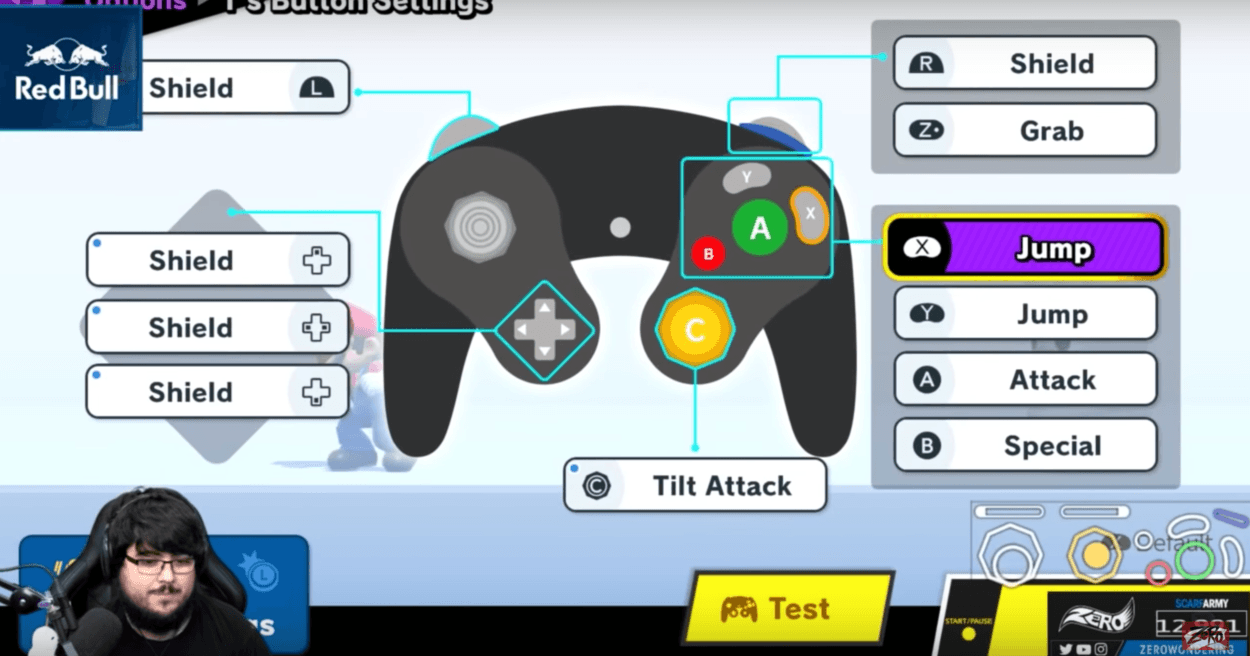
The main and only difference between this controller setting and the previous “Classic” setting is the C-Stick’s (Or right stick on Pro Controller) functionality. By setting the C-Stick’s functionality to “Tilt Attack”, you’re able to perform running Forward-Tilts more efficiently. This allows you to only crouch for a short time and then perform the input, instead of crouching and the delicately tilting the left stick forward in order to Tilt Attack.

Footage taken from Zero's video
When it comes down to it, how you play the game is totally up to you, and there’s a lot of room for creative settings. Be sure to invest in either the Pro Controller or GameCube Controller if you’re looking to engage with Super Smash Bros. Ultimate on a competitive level.
A lot of the inspiration behind this article comes from Zero, a professional Smash Bros. player. If you would like to see his video discussing optimal controller settings, and hear his personal preferences, check out the video linked below. Be sure to subscribe to him for awesome Smash Bros. Content like this and follow him on social media platforms @ZeroWondering.
Like our content? Support us by getting our merchandise in our shop
