An Overview of All VALORANT Settings in the Settings Menu
Understand what every setting in VALORANT means.
Understand what every setting in VALORANT means.
As with any other new PC game, especially if it’s a new one made to be played competitively, one of your first stops should be the settings menu where you’ll be able to customise your experience to your liking. VALORANT has a vast array of settings available, giving you the power to change even the slightest of things. This article contains an overview of all settings in the VALORANT menu and helps you optimize them!
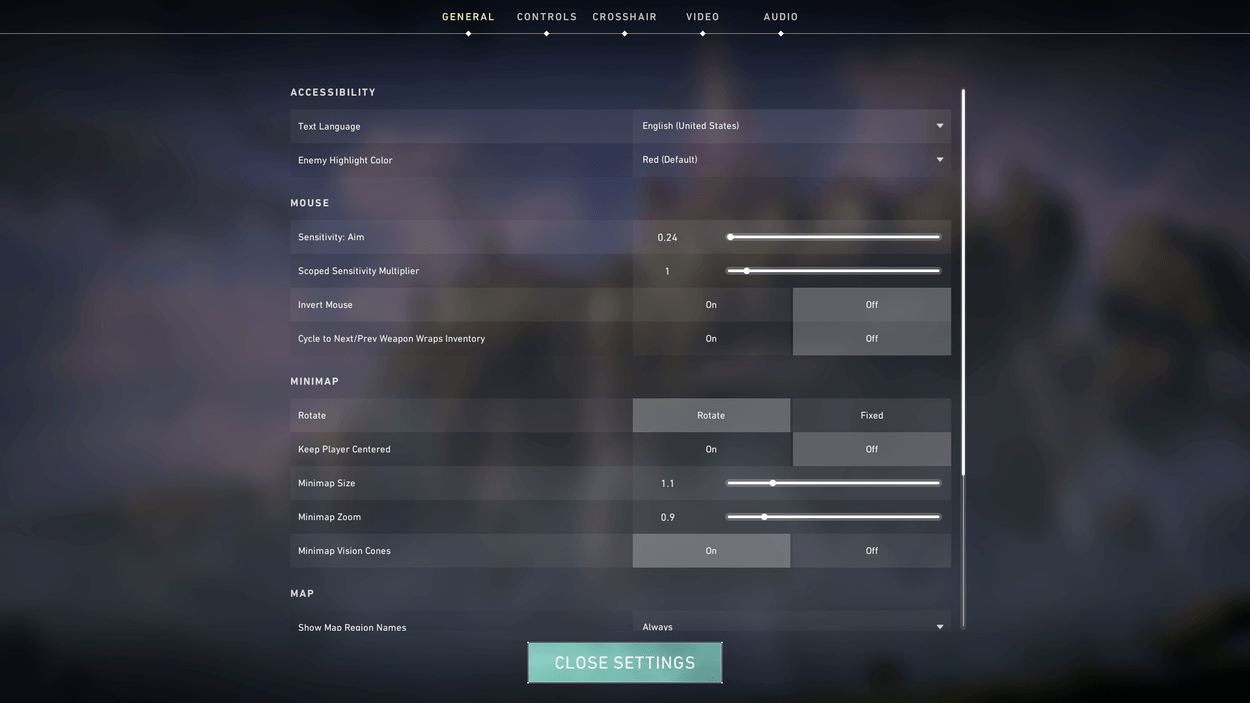
Text Language - Changes the language of the text (might need to change it in the client during installation if it doesn’t show another option besides the one it currently is);
Enemy Highlight Color - Changes the HUD color used for enemies.
Sensitivity: Aim - changes your mouse sensitivity;
Scoped Sensitivity Multiplier - How much your sensitivity changes while scoped in with a Sniper. This number multiplies your sensitivity value (1 to use the same).
Invert Mouse - Changes the directions axis;
Cycle to Next/Previous Weapon Wraps Inventory - If you use mouse wheel to scroll through weapons, you can use it to close the inventory and/or buy menu.
Rotate - If the map rotates according to the way you’re facing or not;
Keep Player Centered - Have your map dot on the center of the map or not;
Minimap Size - Changes the minimap size on the HUD;
Minimap Zoom - Changes how zoomed the map is (the HUD has a limit on how much it is able to show at any given time);
Minimap Vision Cones - Shows the current Field-of-View of the players; appears as a cone on the map in front of each player.
Show Map Region Names - Whether the map has written callouts or not.
Show Corpses - Enables/Disables dead players’ character models on the map;
Show Mature Content - Enables/Disables mature content during gameplay;
Show Blood - Enables/Disables blood when hitting enemies;
Instability Indicators - Enables/Disables gameplay instability indicators (debuffs);
Show Bullet Tracers - Enables/Disables the ability to see light tracers when seeing a weapon shoot (helpful to know where an enemy is shooting through a Smoke or to better align your spray)
The Controls menu is pretty straightforward and a staple on every PC game. This menu allows you to customize every single keybind used in the game and is split into four categories: Movement, Equipment, Communication and Interface. Customize it entirely to your liking.
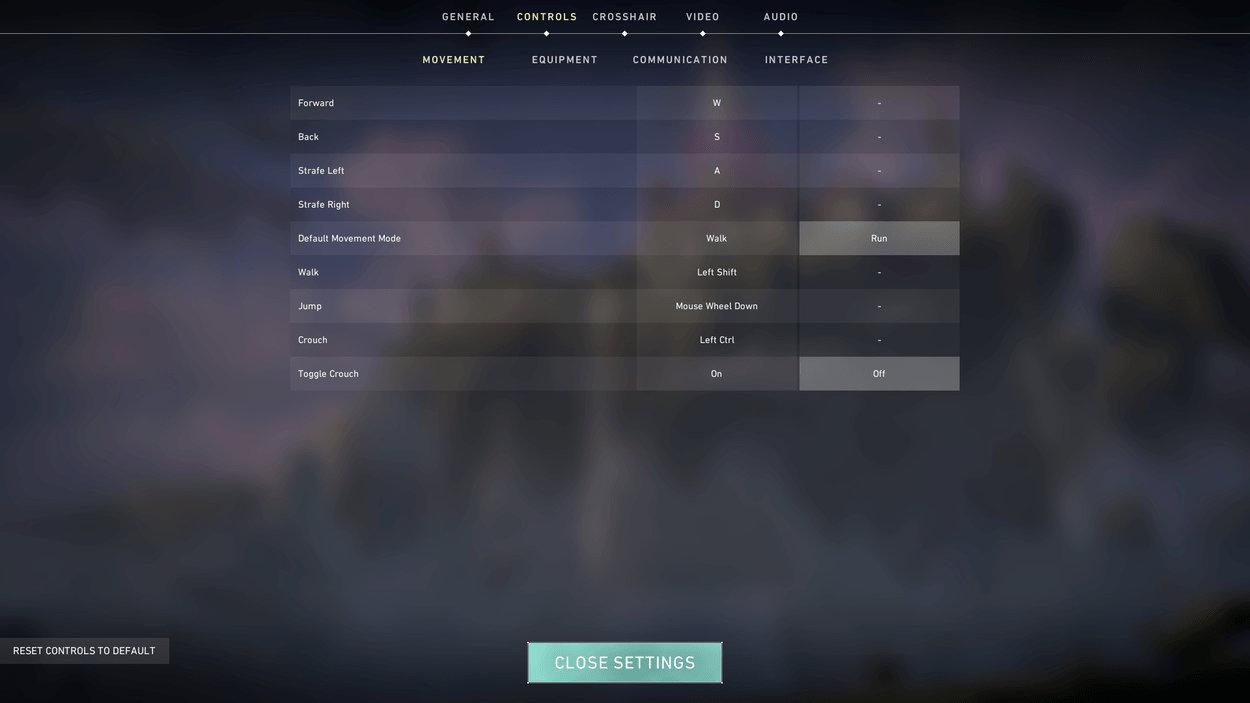
Movement - every option related to your character’s movements;
Equipment - every option related to your character’s action with something other than his body (eg.: shooting, interacting with weapons, planting the Spike);
Communication - every option related to communication in-game, whether text or audio. Ping settings are also changed here;
Interface - every option related to HUD and other in-game menu options.
Allows you to entirely customise your in-game crosshair. Remember that using a knife or a Sniper Rifle changes the way your crosshair behaviours (smaller gap with a knife, wider with a Sniper).
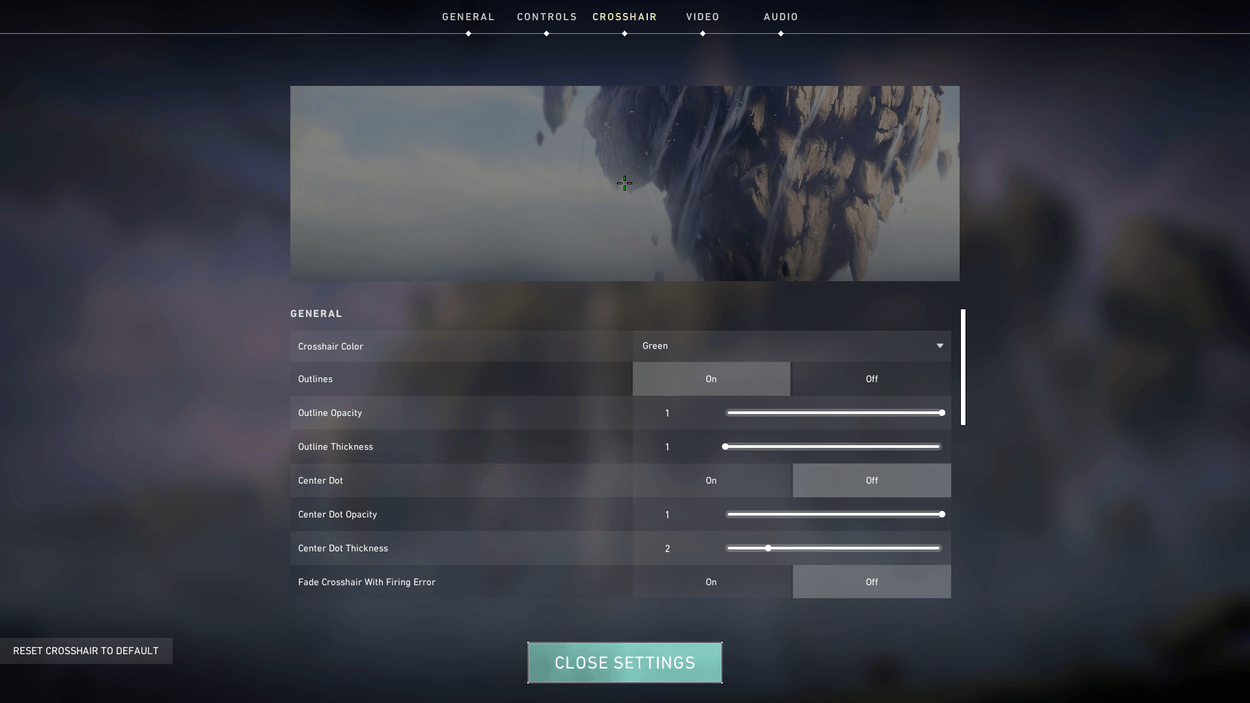
Straightforward options, use it to deeply customise the way your crosshair looks.
The Video tab allows you to change the way your game looks. It’s also the place to go to improve game performance in your PC.
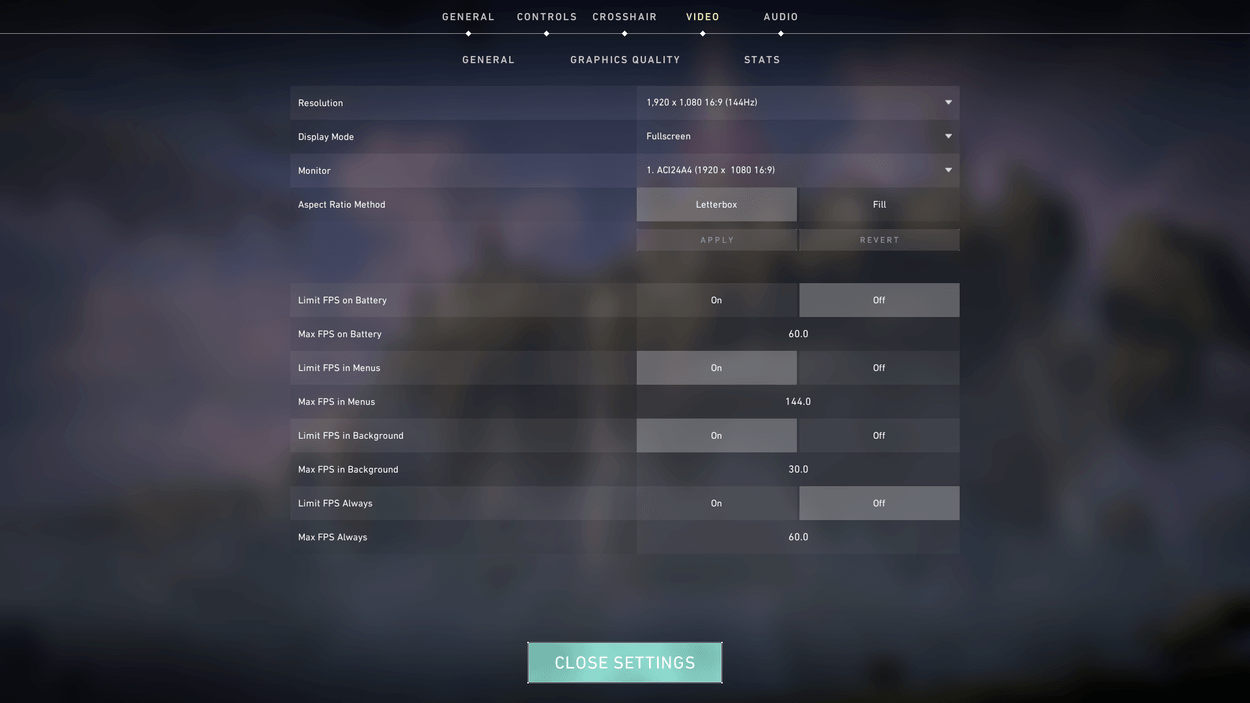
Resolution - Changes the resolution and refresh rate your game is displayed;
Display mode - Changes whether you have your game in Fullscreen, Fullscreen Windowed (better for multitasking) or Windowed;
Monitor - Changes the monitor used (useful for multi-monitor setups);
Aspect Ratio Method - Useful if not using widescreen resolutions. Letterbox makes your game widescreen in 4:3 monitor aspect ratios, while Fill will ignore it.
Limit FPS on Battery - Whether the game limits the displayed FPS’s to preserve battery while on a disconnected laptop or not;
Max FPS on Battery - Set the max FPS the game is allowed to display while running on battery (more FPS = less battery time);
Limit FPS in Menus - Whether the game limits the displayed FPS’s on the main menu or not;
Max FPS in Menus - Set the max FPS the game is allowed to display on the main menu;
Limit FPS in Background - Whether the game limits the displayed FPS’s while running as a background process or not (helps with Windows performance);
Max FPS in Background - Set the max FPS the game is allowed to display while running on the background;
Limit FPS Always - Whether the game limits the displayed FPS’s at all times or not;
Max FPS Always - Set the max FPS the game is allowed to display at all times.
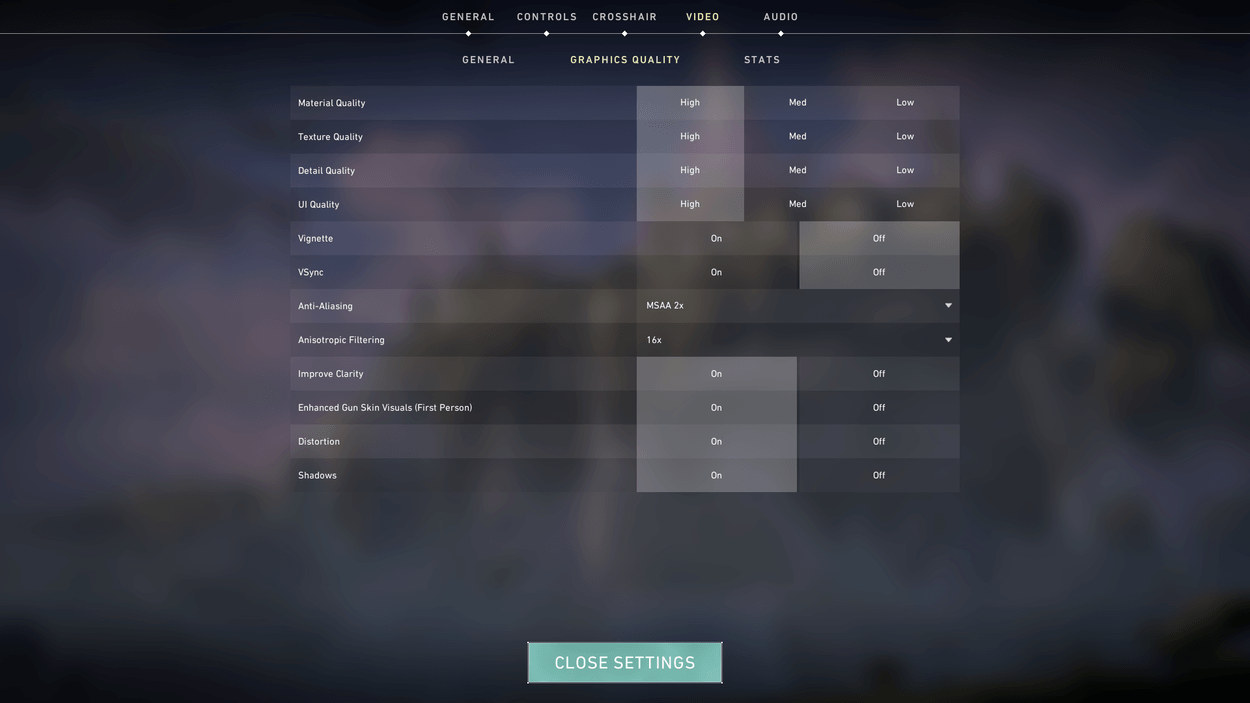
Material Quality - Changes different materials’ image quality;
Texture Quality - Changes texture quality (impact on video RAM);
Detail Quality - Changes game details’ graphic quality;
UI Quality - Changes User Interface’s quality (HUD);
Vignette - Enables/disables vignette effect (darkened screen corners);
VSync - Vsync can help with screen tearing, but gives bigger input lag;
Anti-Aliasing - Video technology that helps smoothing out corners and pixels;
Anisotropic Filtering - Improves the texture’s quality when viewing them from different angles (almost no impact in FPS);
Improve Clarity - Improves visibility at further distances;
Enhanced Gun Skin Visuals - Enhance your weapon’s visuals (only seen by you);
Distortion - Enables/Disables cinematic effect that simulates realism;
Shadows - Enables/Disables shadows (can help with low FPS problems).
These are more technical options, allowing to monitor your game’s performance, as well as the server’s.
Client FPS - Displays current FPS value;
Server Tick Rate - Displays server tick rate (default is 128)
Total Frame Time - Displays the amount of time your computer takes to render a new frame;
CPU Frame Time - Displays the amount of time your processor takes to render a new frame;
GPU Frame Time - Displays the amount of time your graphics card takes to render a new frame;
Network Round Trip Time - Displays ping (in milliseconds);
Packet Loss - Displays possible data transfer issues between your computer and the server.
You can find every option related to in-game sound and voice communication here.
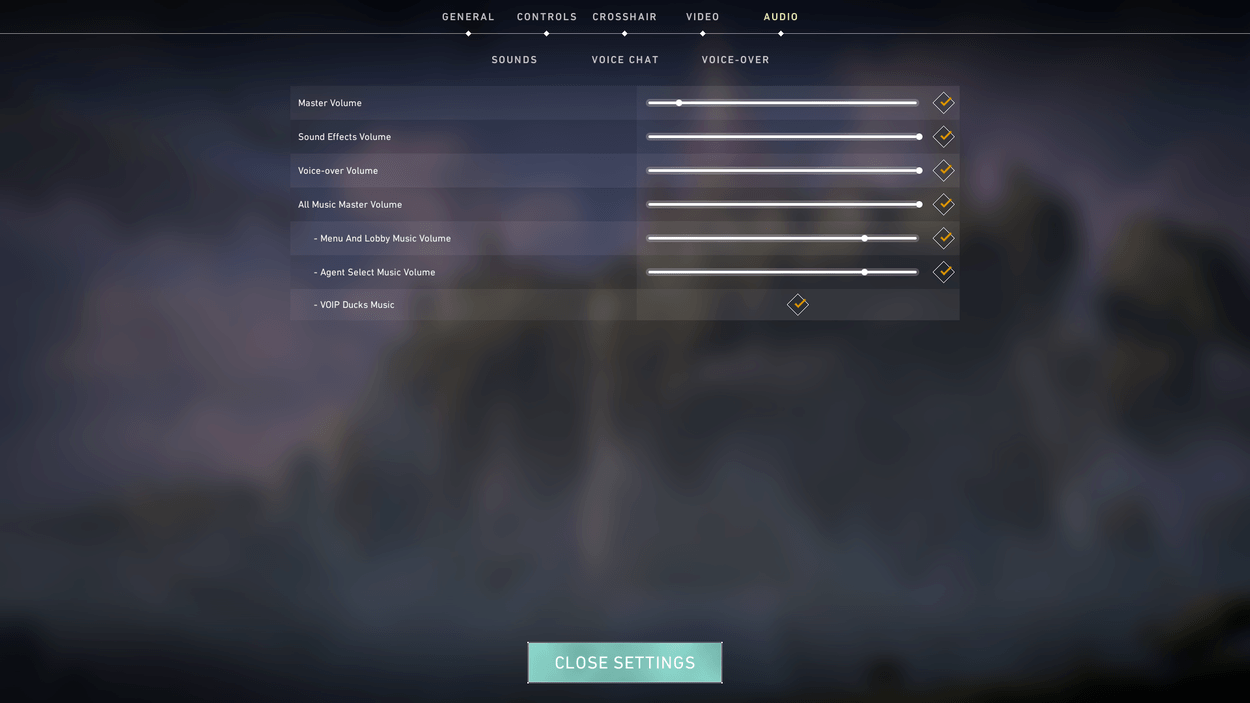
Master Volume - Controls the volume of the entire game;
Sound Effects Volume - Controls the volume of the sound effects (ignores music);
Voice-over Volume - Controls the volume of the game announcer;
All Music Master Volume - Controls the music volume.
Output Device - Changes the playback device (useful if you have more than one);
Input Device - Changes the microphone used (useful if you have more than one);
Incoming Volume - Controls the voice communications volume;
Mic Volume - Controls your microphone volume;
Loopback Test - Allows you to hear yourself for testing purposes;
Mic Sensitivity Threshold - Sets the minimum voice volume needed for the microphone to activate;
Party Voice Chat - Enables/Disables party voice chat;
Party Voice During Custom Game - Enables/Disables party voice chat during custom games;
Party Voice Activation Mode - Sets party voice chat activation method.
Team Voice Chat - Enables/Disables team voice chat (very important in a competitive environment).
Gameplay - Enables/Disables gameplay voice-overs;
Agent Flavor - Enables/Disables Agent’s Flavor lines;
Tactical Callouts - Enables/Disables callouts using game mechanics;
Announcer - Enables/Disables game announcer;
VOIP Ducks Flavor VO - Enables/disables flavor on in-game VOIP systems.
Now that you understand all the VALORANT settings, you can start by optimizing them for the best FPS and performance settings!
For more VALORANT Updates, be sure to follow us on Twitter!
ABOUT VALORANT
VALORANT is a competitive first-person-shooter that places players in a five-verus-five match. The player can choose from nine agents, each with four unique abilities. The game combines elements from games like Counter-Strike with elements from Overwatch and League of Legends. The result is an awesome shooter game where both excellent aiming and smart ability usage is rewarded.