


CS2: All Cache Callouts – Full Guide
CS2’s fan favorite cache is finally back. It’s a complete rework, giving it a completely new look. Here is a quick refresher on callouts for this map.
CS2’s fan favorite cache is finally back. It’s a complete rework, giving it a completely new look. Here is a quick refresher on callouts for this map.
Cache is one of those maps that never really dies. It’s been out of the Active Duty pool since 2019, but players still love it. Whether you’re grinding in casuals, FACEIT or community servers, knowing Cache callouts can seriously improve your game. If you’ve ever played with randoms who call out “He's over there!”, you know how frustrating bad communication can be.
Related: An Essential Mirage Utility Guide for CS2
The map is balanced for both sides, but mid control is everything. If your team can’t hold Mid, you’re going to have a rough time. Unlike more straightforward maps like Dust 2 or Mirage, Cache forces you to coordinate rotations and utility properly. Let's break down every Cache callout in CS2, covering both CT and T sides, so you can play (or at least give calls) like a pro.
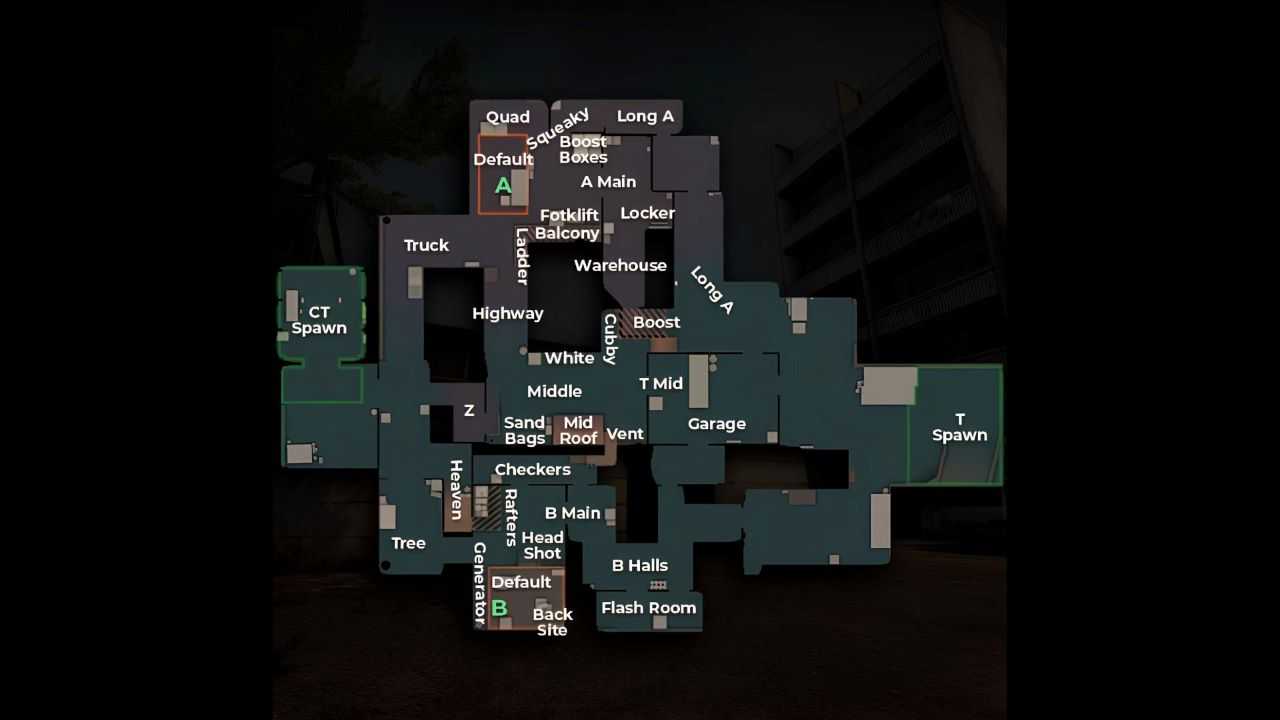
Image Credits: ACW
If you're playing Counter-Terrorist (CT), you’ll need to hold angles, stop rushes and retake sites when needed. Knowing where your teammates are makes it easier to adjust and reposition. Here’s a breakdown of important CT-side callouts.
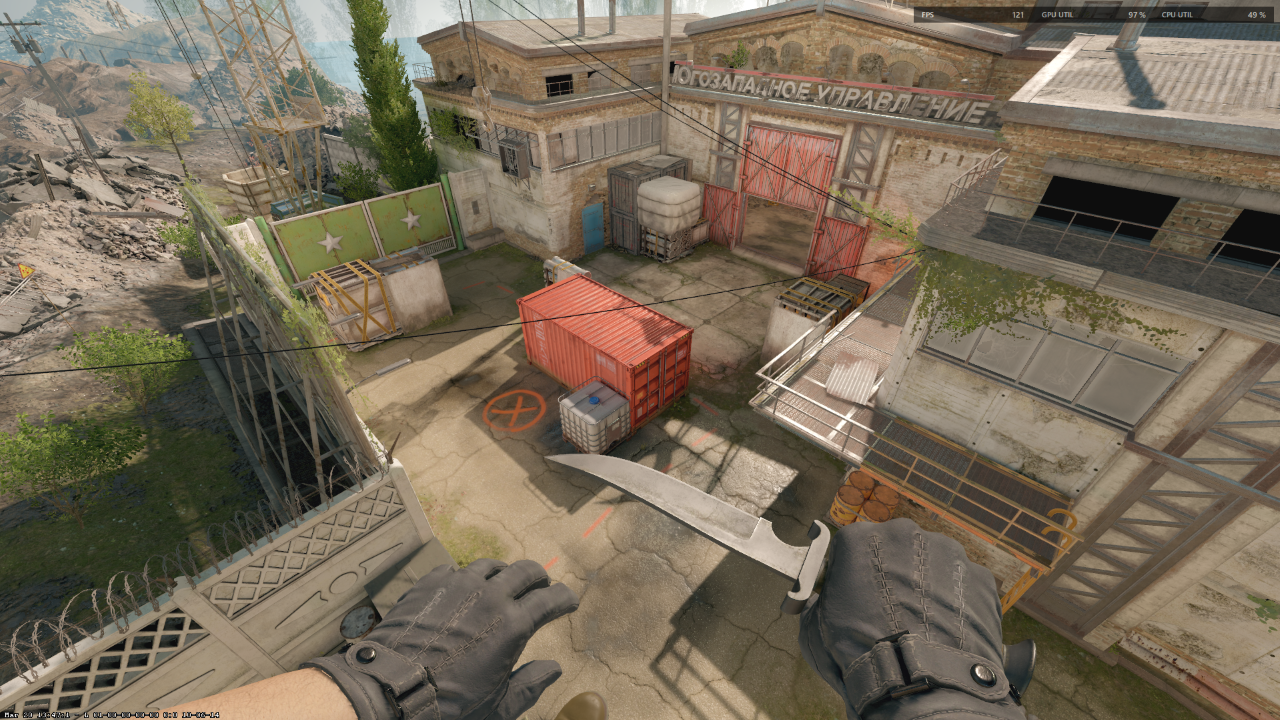
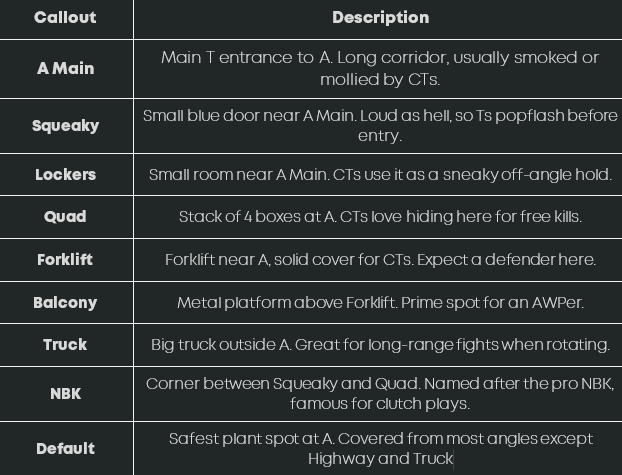
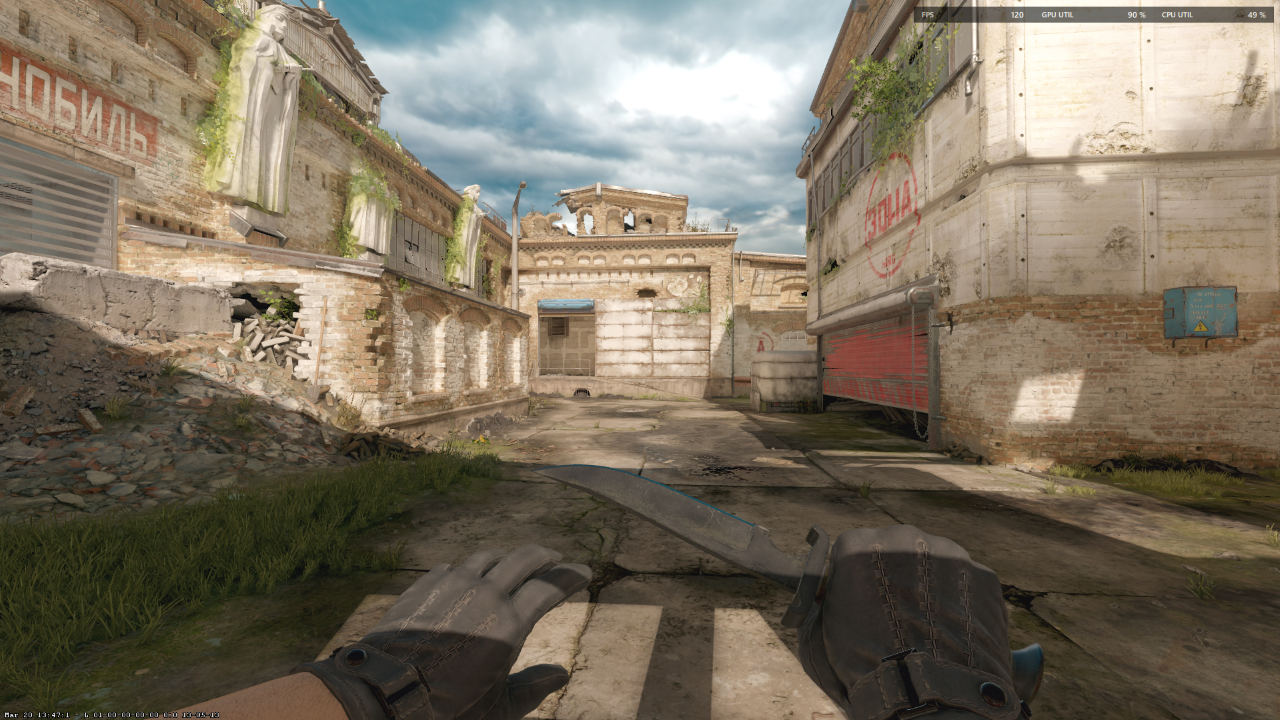
A Site is one of the most contested areas on the map, especially since T executes often rely on Squeaky and A Main pushes.
Mid is the most important part of Cache. Controlling mid means faster rotates and more map pressure. If CTs lose mid, retaking bomb sites becomes much harder.

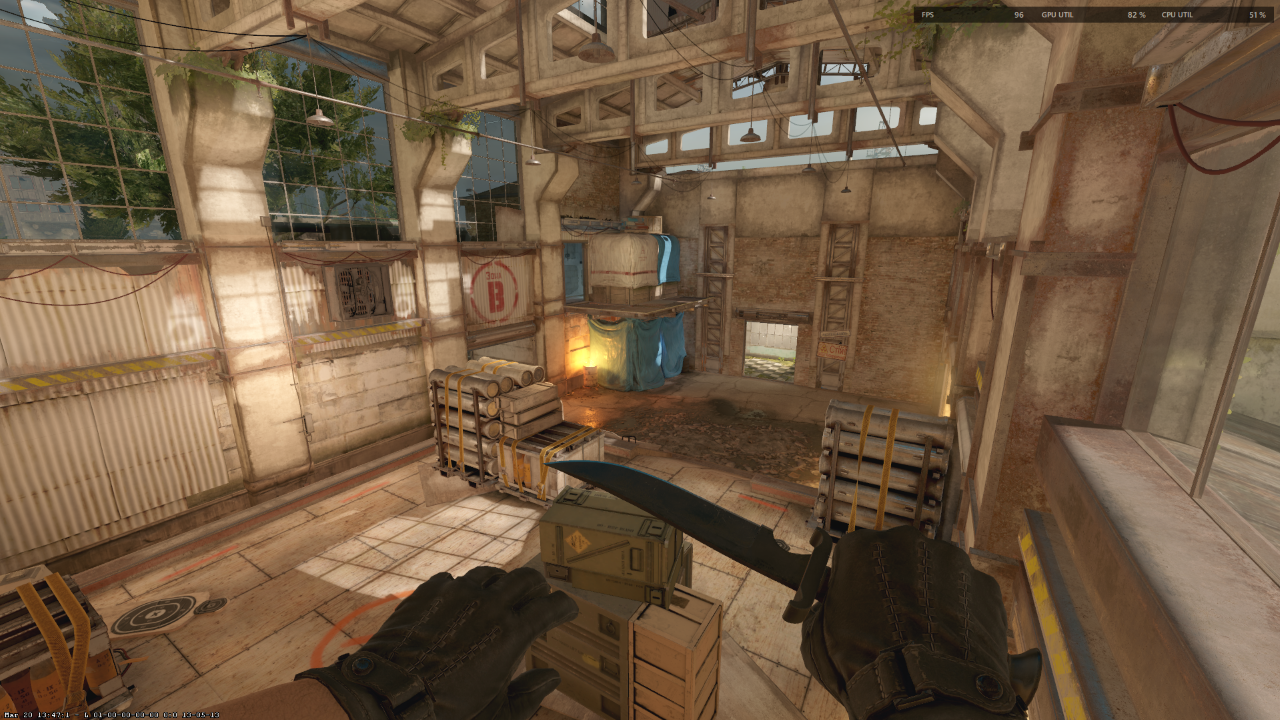
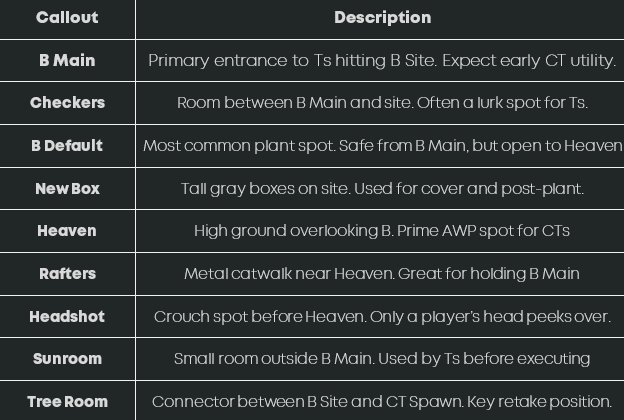
B Site is smaller than A, but it has more vertical elements like Heaven and Rafters. Retaking B is difficult, so holding it properly is crucial.
If you're playing Terrorist (T), knowing callouts helps coordinate site executes, clear defensive angles, and secure post-plants.
Just knowing the names isn’t enough. If you're mumbling random spots or giving half-baked info, you're not helping your team. Callouts need to be quick, clear and to the point so your squad knows exactly what’s going on.
The goal is to make your team’s life easier. If your callouts are clear and fast, you’ll win more fights, make better plays, and stop your teammates from raging about bad info. While callouts are important, maintaining your aim also plays a crucial role in turning the tide in the game. Make sure to check out Tips to Improve Your Rifling.


