


Everything to know about Valorant’s new map, Breeze - Best angles, pushes, and strategies
Breeze is one of VALORANT’s biggest and most intricate maps ever released. Here’s everything you need to know in order to fully master it.
Breeze is one of VALORANT’s biggest and most intricate maps ever released. Here’s everything you need to know in order to fully master it.
Breeze, VALORANT’s newest map, shakes things up more so than any other map the game has seen to date. With countless angles, strategies, and possibilities, Breeze is one of VALORANT’s largest maps, and promotes more ingenuity than almost any other map in the game. Here’s everything you need to know about Breeze — from its most prevalent strategies to the best agents to select on the map.
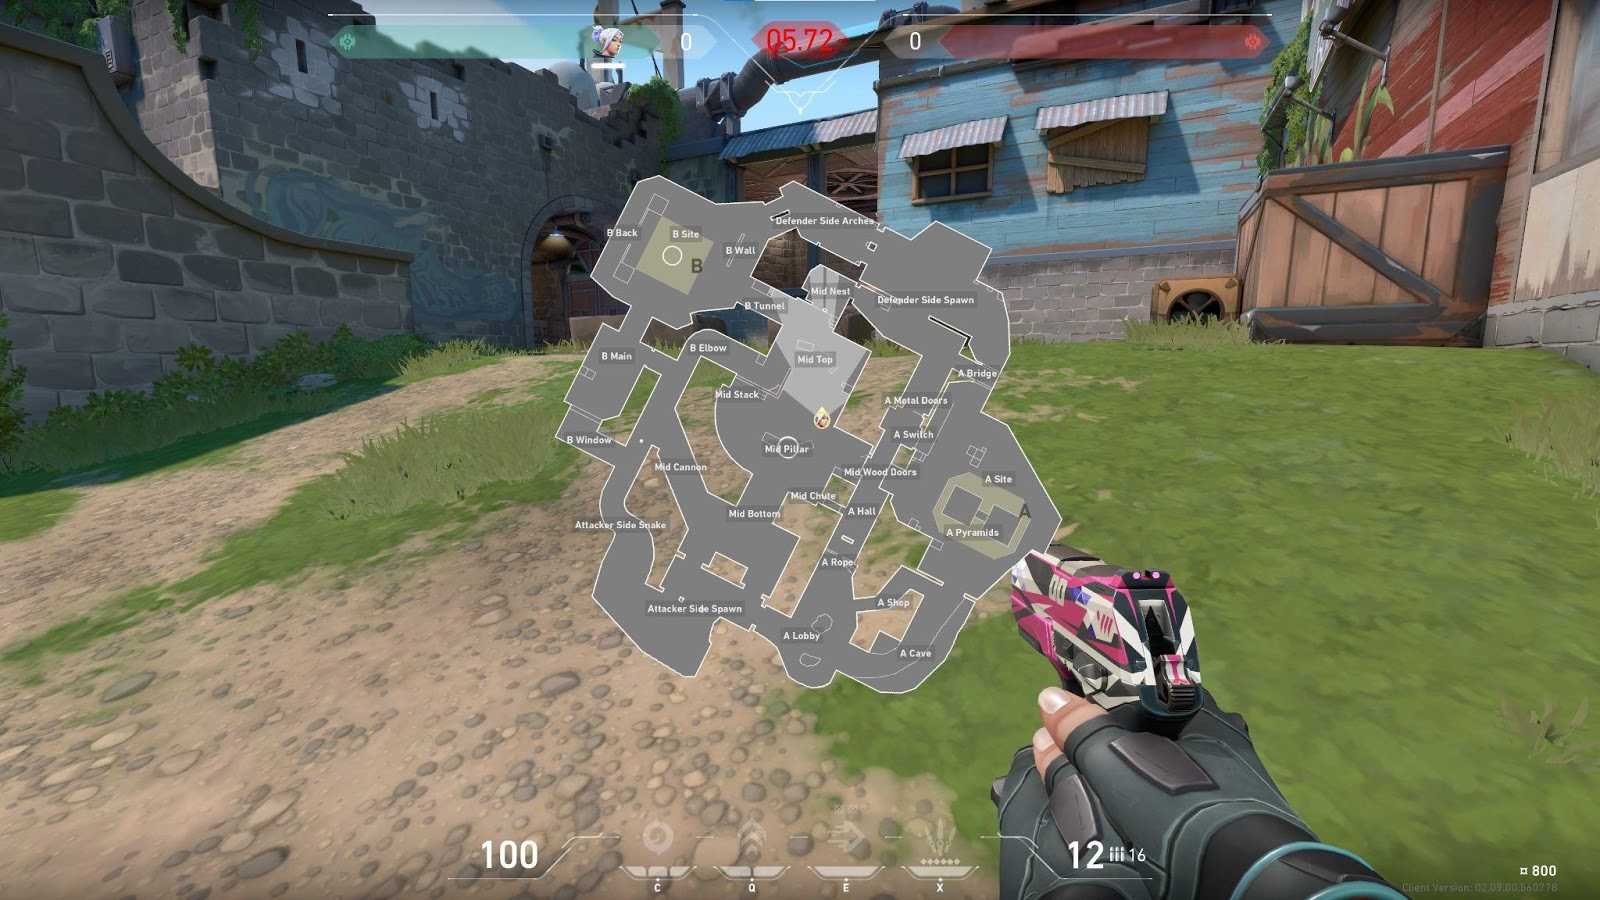
Like all other VALORANT maps except for Haven, Breeze has two spike sites to fight for control over. The treks to A-site and B-site from the attacker’s spawn aren’t long by any means, however, to make up for this, the mid-section of the map is quite large. Several flanking routes for both attackers and defenders can be taken advantage of, as Breeze offers one of the largest Mid areas VALORANT has seen to date from any map.
To further that point, Breeze is one of the largest maps VALORANT has seen, period. With incredibly long sightlines and wide angles to take advantage of, Breeze will require pinpoint accuracy as countless gunfights will take place at a distance.
Because of Breeze’s vast size, rifles such as the Vandal and Phantom will be ideal weapons for long-range gunfights, but the Operator also stands out more so on this map than many others in the game’s rotation. Look to use the Operator in Mid to pick off unsuspecting enemies looking to pull off a rotation. If you’re able to land a shot on a potential flanker can give your team a much-needed numbers advantage during the later stages of a round.
With all of that in mind, it’s imperative that your team controls the Mid area of the map at all times. While holding down a spike site is important — especially in post-plant scenarios — you’ll only be able to do so if your team has control over mid. Try to send at least one player into mid after the spike is planted (if you’re on attack) to try and pick off any unsuspecting defenders trying to get in position for a flank.
The more effective your mid control is on Breeze, the better your site control will be. This map isn’t like Haven, for example, where your entire defensive strategy needs to revolve around the site. Instead, the sheer size of Breeze will allow picks you get around the map to set up plays elsewhere.
Because Breeze is so large, there are going to be many angles to hold down when either defending or attacking. A large majority of the action is going to take place around the Midsection of the map, but that doesn’t mean you won’t be able to find success elsewhere. These are just a few angles to take note of when playing attack or defense on Breeze.
Perhaps one of the most important angles to hold on defense is on the right side of Mid-Nest looking down towards Mid-Pillar. You can easily jiggle around this angle and catch any flankers moving across the middle of the map carelessly with either an Operator or Vandal for an easy one-tap.
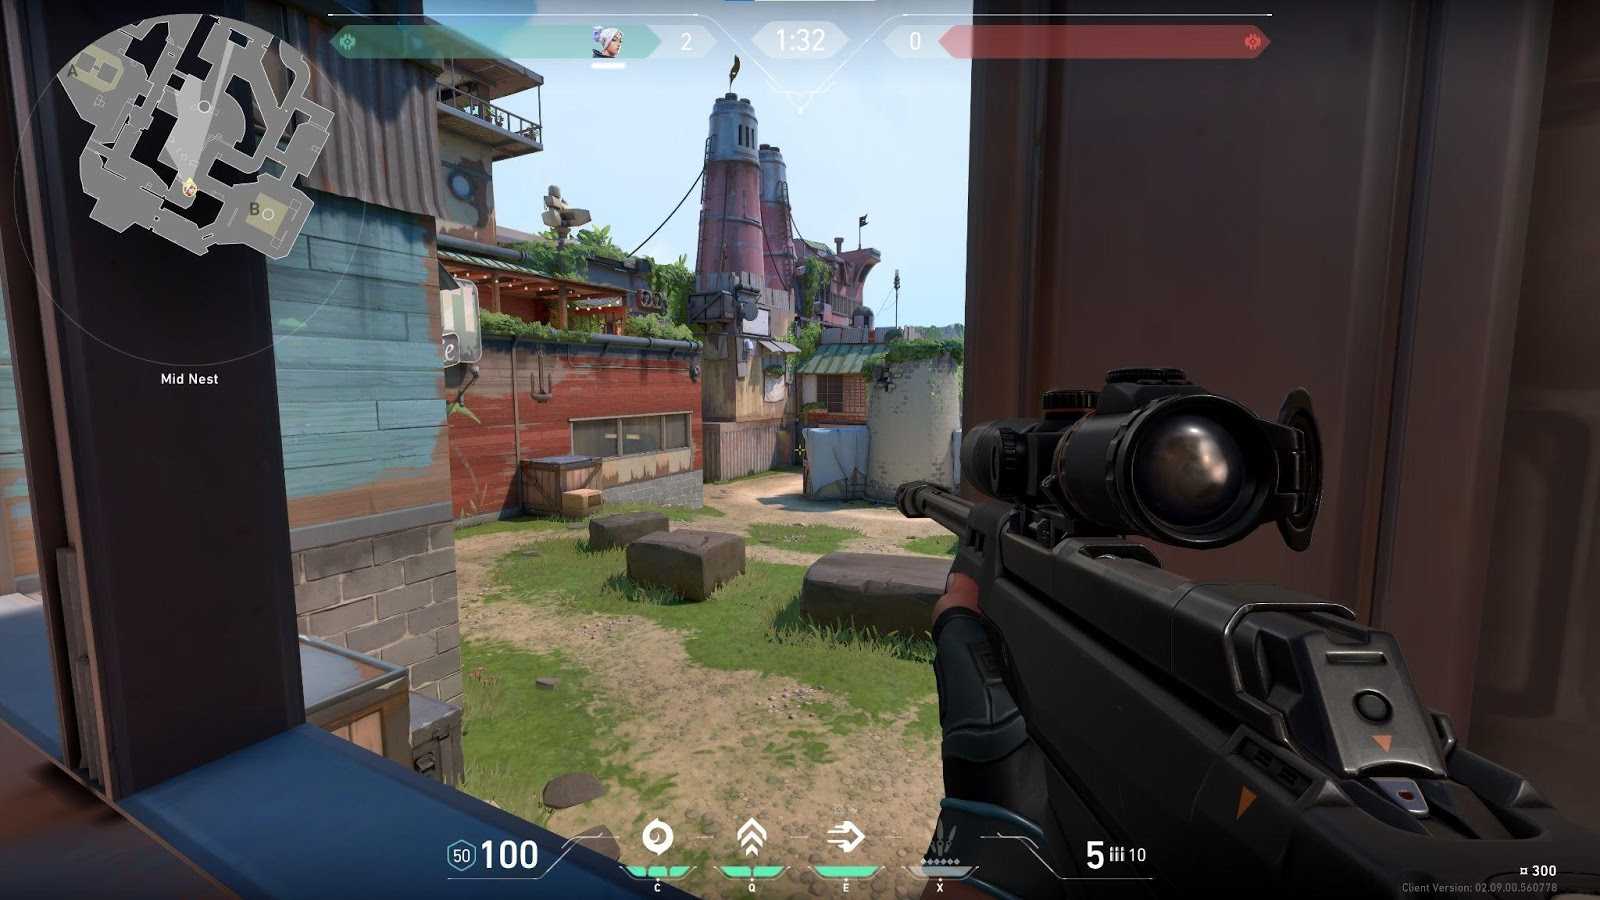
Additionally, you can jump down from Mid-Nest into Mid and hold the angle that separates the Mid section of the map from Elbow if you’re looking to get a closer shot on enemy players. Keep in mind, though, that this strategy will leave you defenseless to any player on the attacking side who might be taking the long way around the map for a potential flank.
Many of Breeze’s angles — especially in its Midsection or around its sites — are going to be favored towards defenders. However, if there’s any angle that attackers can make significant use of, it’s the angle that separates Cave from A-site.
Here, players who use an Operator will feel right at home, as the lengthy corridor that separates the Cave from the site will allow attacking players — mainly Duelists on Jett, for example — to hang back and find a sneaky pick on a defender.
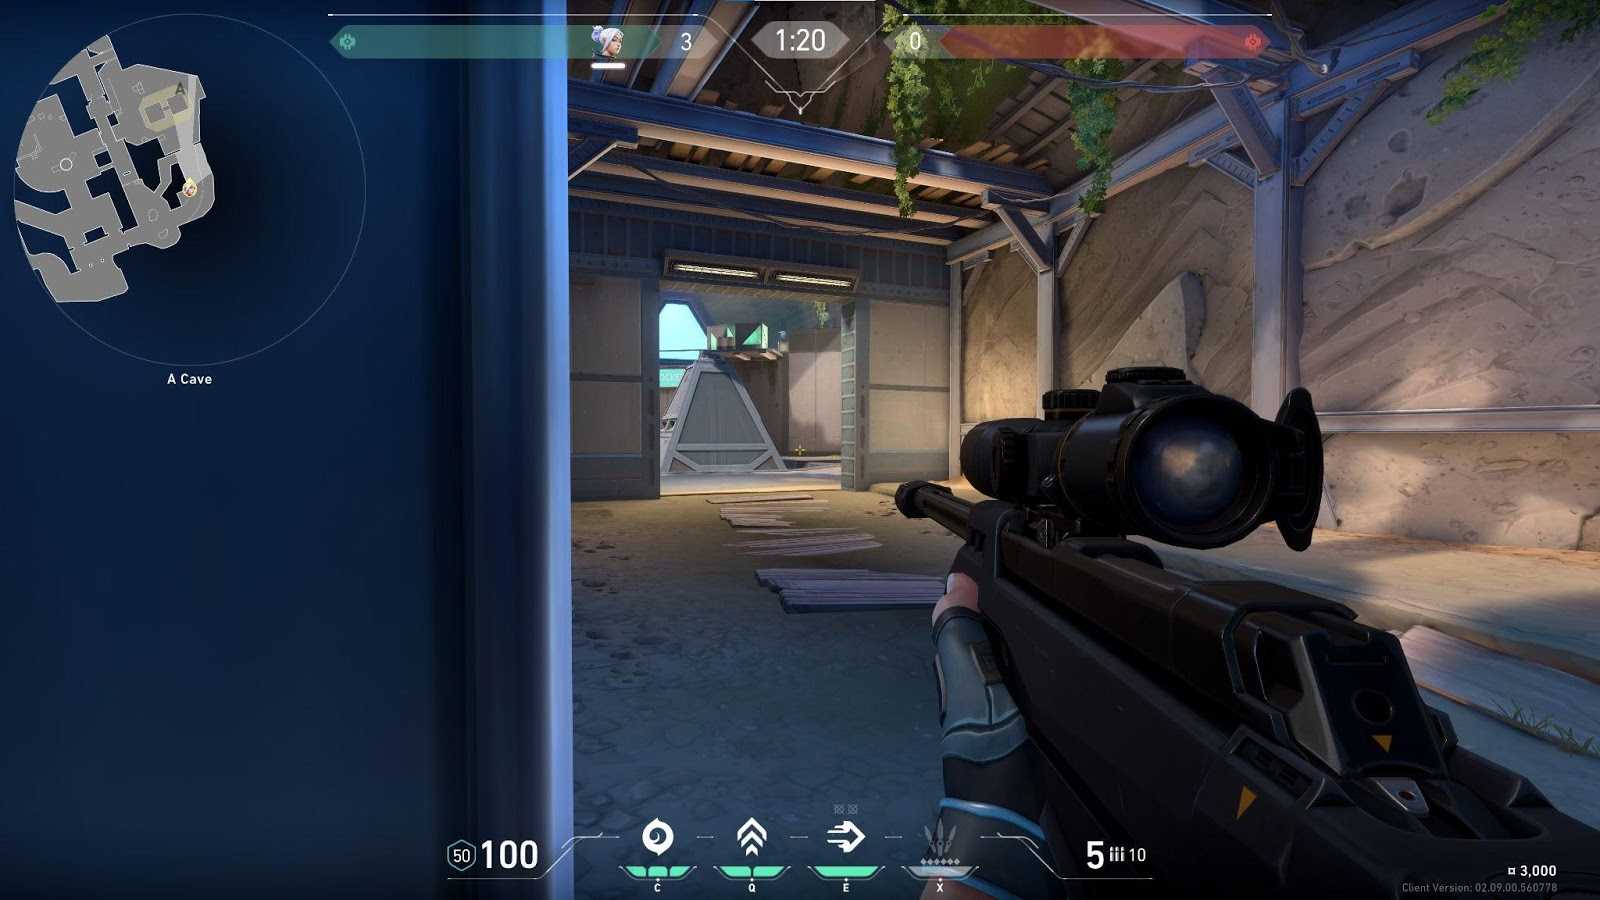
Try your best to remain hidden behind the left-side wall of the cave before quickly popping out for a quick pick. If you sense that you’re going to be flanked from this position through Ropes, use some utility to create distance between yourself and any rotating defenders.
Additionally, there is a similar sniping spot in the form of a traditional nest that looks into B-site from a spot nearby to the attackers’ spawn. While that location isn’t as fruitful as the angle in Cave, you can still attempt to find a pick at the top of a round from there.
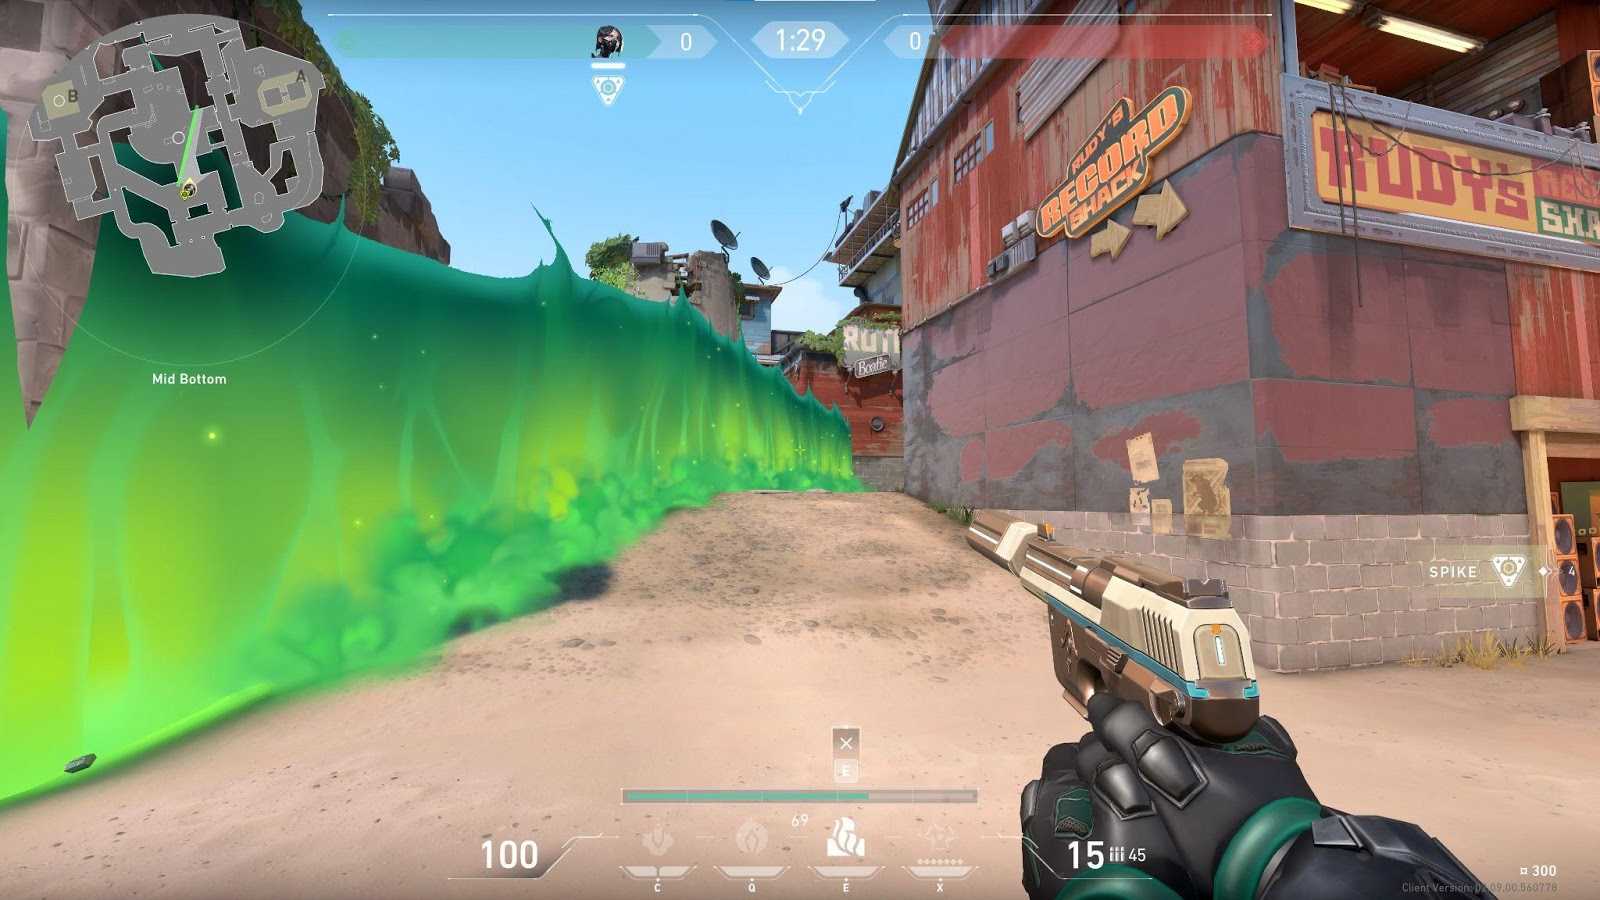
Viper’s strengths on Breeze mainly come in the form of being able to break down the map into smaller, more relevant chunks. With a swift Toxic Screen across the map’s mid-section or along the flanking points of a spike-site, Viper can turn Breeze into a much more focused map that’s a lot less daunting for rotators who might be afraid of getting picked off when crossing through Mid. As an added bonus, Viper’s ability to obscure vision through her smokes and ultimate make her an even stronger pick on a map that relies heavily on vision.
If you’re picking Raze, you’re doing so because you want to deal as much damage to the enemy team as possible through your utility. Luckily, Breeze has many options for Raze players, as they can easily keep enemies locked into situations through their abilities thanks to the tight corners found all over Breeze. Notably, pushing B-site or holding down Mid are going to be two possible scenarios that will allow Raze players to keep enemies cornered and use their abilities to get a kill on Breeze. A well-timed Showstopper can always swing a round in favor of the Raze, while properly placed Paint Shells will inevitably secure a kill if combined with another piece of mobility-limiting utility.
We’ve mentioned the strength of the Operator on Breeze quite a bit in this guide, and frankly, there’s no better agent to wield the Operator than Jett. She shines immensely on Breeze as the lengthy corridors can set up advantageous shots for her, while still allowing her to get in and out of a tricky situation thanks to her high-mobility kit.
With a lot of ground to cover on Breeze, as well, Jett’s unrivaled mobility is a perfect fit in VALORANT’s newest map. Whenever Jett approaches a site on Breeze, she can easily maneuver around the area through several Updrafts and Tailwinds.
With this guide we hope that you feel more comfortable getting started on the new map Breeze. Apply the knowledge from this article in your ranked VALORANT games and you’ll have a better chance at winning!


