Are you struggling to consecutively make it past the early game in Fortnite’s Tournaments or Arena? Or are you always getting third-partied or held by an entire lobby’s worth of AR spraying? Today we are going to go over the fundamental concepts of rotating in Fortnite and why understanding these rules will help you to continually place better in competition.
Why Rotation Is So Undervalued
To begin, let's focus on why rotation is so often neglected within the game. Fortnite at its core is a battle royale, meaning that players have always wanted the core experience to be fighting. But within the competitive scene, placement will consist of almost all the best team’s points throughout a tournament, as fighting is only done when necessary or advantageous. With placement being worth so many points in Fortnite’s Tournaments and Arena, the old-time philosophy of “hot-dropping” is a thing of the past.
Many players take hours deciding on a drop spot, considering its resources, loot, and location to best set them up for success throughout the game. Your ability to rotate quickly once looted will determine whether you have the chance to hold other players for some easy eliminations or gain a great position ensuring your placement into the endgame.
Positioning In the Early Game
Avoid Heavily Contested Zones!
For early games, the best way to know if you should prioritize rotation is by analyzing how many other players are contesting you upon landing. Depending on the bus’s route, your drop spot could have no one or everyone contesting it. Being adaptable in this situation is important, recognizing when to land on the outskirts of your drop spot or to ditch it altogether. Being observant while landing also gives you the advantage of recognizing what secondary locations close by could remain un-looted, which could be useful to rotate too. Learning rotation also means knowing when to fall off to a secondary spot close by when things are getting intense. For example, when landing on the main lodge at Camp Cuddle, you snag a quick elimination but quickly hear more players around you.
Red is dangerous/Green is safer
Falling off to the gas station by the shore will give you more time to accurately assess threats, gather materials, and allow you to decide when it is best to rotate out. Knowing your drop spot well also means knowing how to rotate around the perimeter, especially giving yourself advantages when you can. Knowing how to get elevated positions, which objects give you the most materials, and where to collect shields/ammo are all critical to preparing for the next stage of the game.
What Items to Focus on Early Game
Let’s say that you are not contested at your drop spot. When looting you want to prioritize things that will be hard to come by throughout your journey rotating into the next zone. Materials like metal, ammo for weapons, and health items. It is also important to note that when the first zone becomes available it is crucial to start thinking about a game plan to get there. Asking yourself questions like, how far is the zone? Should I be keeping “white” health meds so that I can loot more? Could I potentially run into people rotating this way? These questions will help you determine whether you can afford to “tank” storm for more loot versus when you should begin to make your rotation.
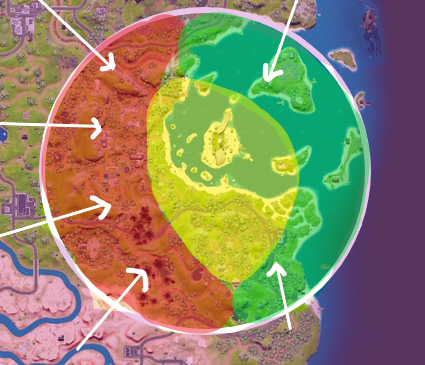
If the zone pulls the farthest possible distance away from you, it is important to recognize that many players will make the mistake of running straight to the zone. Nicknamed “white-lining” players will run directly along the white line on their map as it is the fastest way to avoid taking damage. An important concept to recognize is the map does not account for other players or the popularity of certain POI’s. While it could be faster to run straight through a POI like Tilted Towers or Coney Crossroads, most players will stick to its outskirts to avoid getting pinched or avoid taking unnecessary fire from other players. Giving up an inventory slot for med kits or a med mist when the zone pulls far could be extremely beneficial to ensure that you’re getting to the zone quickly and safely.
Red is risky/Green is safer
Mid Game Decision Making
Moving into the Mid Game we begin to discuss things to prioritize while rotating and the most important concept of player congestion. When rotating into a zone it is important to recognize which side of the zone is going to be more heavily populated. Positioning yourself on what is known as the “dead” side of a zone can be an important factor in avoiding unnecessary fights. This relates back to the topic of using “white” meds to enter a zone where you want to rather than where you must due to health constraints. The populated side of a zone will tend to have more fights and more risk of losing your chance at placement. The one downside to playing the dead side of a zone is that you could lose the coin flip. If the zone pulls towards the populated side without the proper means to rotate you may be out of luck.
Green is Dead Side/Red is Populated Side
Throughout the Mid Game is also when you need to prioritize using your materials effectively. Use wood materials when rotating as they can be re-farmed easily while moving but save your hard materials for basing once you’ve reached an advantageous position. What defines an advantageous position changes from game to game, but the key points of high-ground, natural cover, and ability to rotate are always important to consider. When you choose to rotate in the Mid Game depends on how far the zone pulls away from you and what challenges you might face along the way.
If you rotate early, you could possibly be focused by the lobby or you could sneak your way into the zone while others are deciding their moves. Rotating later might mean the ability to reuse other builds saving you materials, but with the pressure of the zone pushing you. If you are playing a tournament or arena may determine if you look to take fights during the Mid Game. If Storm Surge is a concern, looking to tag enemies as they rotate or focus fire on other occurring fights can be a good way to ensure placement. Remember to use concepts such as recycling launch pads, sliding down hills, and following old builds to move while saving materials.
Recognize that other enemies will be looking to get free damage on you while rotating and may even move in to finish the elimination to refresh their materials. If you do take damage while rotating, make sure to box with hard materials immediately and heal up. There may be a chance that the opponents that damaged you continue to apply pressure, either hoping to eliminate you or pressure you to burn your materials. Remember that you would rather burn through the materials you have gathered and live, than die and risk placement.
End Game
Moving into the End Game rotation becomes more about adapting quickly than hard concrete concepts. Recognizing where the zone pulls, knowing when to change layers to avoid congestion, and when to take fights are all important parts of rotating throughout an endgame. Knowing when to “tank” storm damage is also important, especially if the zone pulls back into old builds or up terrain. Make sure to utilize hard materials and only use wood when you are either not being focused or when you have no other materials left.
Understand that each different layer of a moving end game zone has different considerations to how they are played. If for example, you are playing ultimate low ground, you may conserve materials but also be heavily challenged by players who have run out of materials to work with. High ground is great, but if you aren’t the highest up you could be pressured or run out of builds to maintain height and be forced to drop. The middle ground is the perfect blend of being able to use the sprint feature to save materials by running through others builds and being able to adapt to going up or down terrain. In the end, whoever has rotated while using concepts will generally be the team that comes out on top.
Recapping the Rotation Must-Knows
Now that we’ve walked through rotation at every point in the game let’s recap with the most important concepts to get you placed higher right now! In the Early Game, remember to consider the population of your drop spot and know how to maneuver around it effectively. Being able to move efficiently around your drop spot will prepare you not only to snag advantageous kills in the early game but to set up your success for the journey to come in the midgame.
During the Mid Game, try your best to consider which side of the zone will be “dead” versus populated and move to an advantageous position. Focus on being in a position that allows you to rotate down terrain and use old builds/natural cover when moving in the open. Don’t be afraid to burn some wood when rotating and always box in hard materials to avoid being sprayed.
For the End Game, remember situations can change quickly and that being adaptable is the most important component of survival. Depending on how many materials you have left, play the moving layers accordingly and confidently. Remember to look for a refresh elimination when you see the opportunity but to always prioritize placement even if that means tanking storm damage.
Conclusion
These concepts will not only prepare you for rotating in the new season but continue to help grow your confidence when rotating effectively. There is always something to learn from being lobby-focused or third-partied, even if it can feel helpless during the match. Remember that everyone has a scuffed game sometimes and that’s okay. Focusing on improving by implementing these rotation concepts into your gameplay and watch as your placement becomes more consistent. Best of luck at the start of the new season and be sure to check back for more detailed improvement guides here soon.