


How to Set Up CSGO Buy Binds
Don’t waste time shuffling through the CSGO buy menu! Our guide walks you step-by-step through the process of setting up your custom buy binds.
Don’t waste time shuffling through the CSGO buy menu! Our guide walks you step-by-step through the process of setting up your custom buy binds.
Picture this, you’re playing a game of Counter-Strike:Global Offensive. It’s the match point, and the nerves are high. You quickly shuffle through the buy menu to buy your gun, armor, and much-needed utility. However, you misclick on the menu and buy the wrong weapon! Nothing is more disheartening than making a minor slip-up, like accidentally purchasing the wrong equipment.
There’s an ultra-convenient and straightforward way to guarantee you never purchase the wrong items again. Fortunately, players can create custom buy binds that allow you to purchase all the equipment you need by clicking a few chosen buttons. This means you won’t accidentally misclick when navigating the buy menu and save time! What’s more, using buy binds allows you to drop weapons for your teammates faster.
Our guide offers you an awesome resource that makes creating your binds extremely easy. Additionally, we outline how you’ll input the buy scripts into the game console or your custom config!
There are two methods in setting up your buy-binds. First, we’ll go over how to enter each bind manually using the developer’s console. This handy tool is accessible by enabling it through your in-game settings. After enabling the console, it’s typically bound by default to the tilde (`) key. You can find this key under your “ESC” button in the upper left portion of your keyboard.
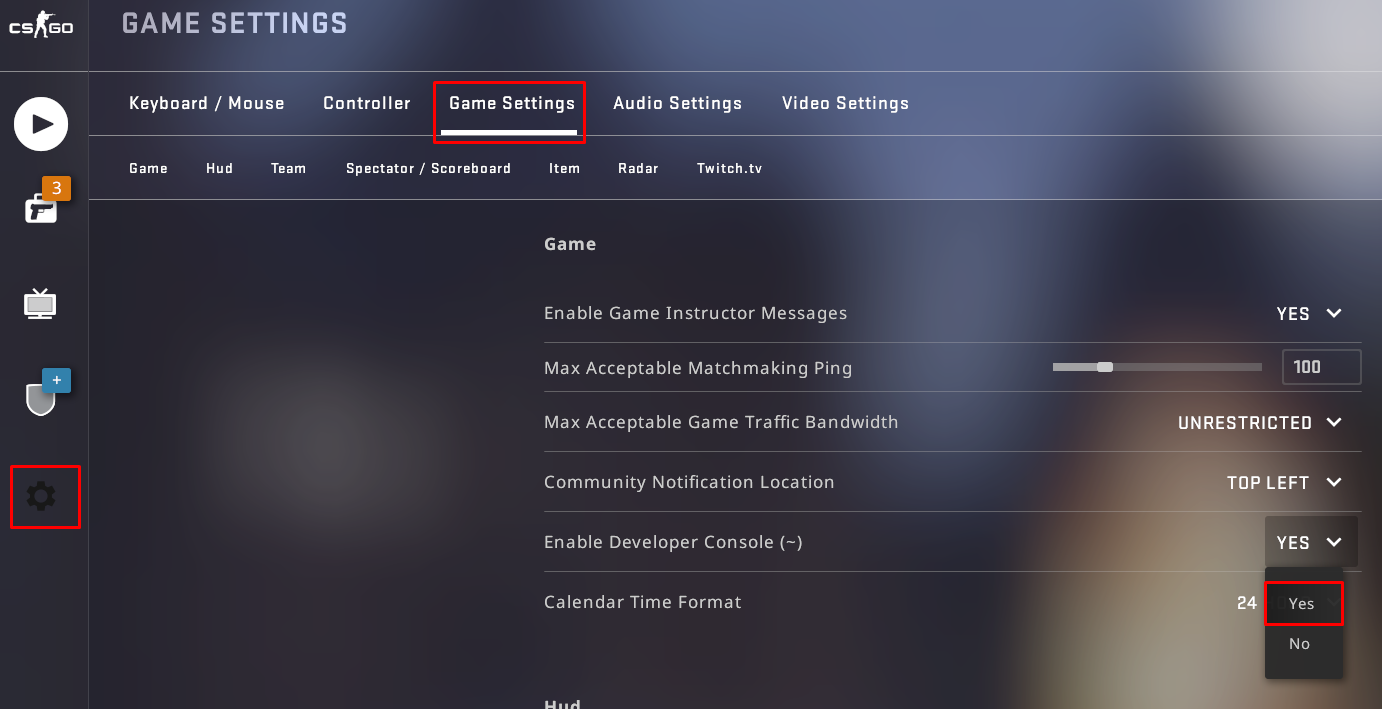
Having the console enabled is highly suggested. Not just for buy-binds, but for inputting any bind or command you might need.
When you open the developer’s console, you’ll notice a text box. This is where you’ll input the buy binds once you’ve created them. It’s important to remember that you have to enter the bind line by line. You cannot copy and paste multiple lines of code into the console. When you’ve typed or pasted the command into the text box, hit “enter” after each line.
I recommend going into an offline or private server while inputting your commands into the console. You can immediately test your binds in the offline server to ensure that they’re working properly!
The second method involves editing your auto-exec file. We won’t go over creating a custom CS: GO config in this guide. But, if you’re interested, feel free to check out our auto-exec/configuration guide before continuing to set up your custom buy binds.
Once you’ve set up your auto-exec/config file or have accessed your previously created config, all you will do is copy and paste your desired binds into the file. Make sure to save all the changes you’ve made when you’re done.
There’s no significant advantage in creating a config over entering the commands into the console. The binds will work the same way and just as efficiently. However, custom configs are more convenient because all of your game preferences are saved to a file that you can access and copy.
Once you’ve decided where your buy binds will go, it’s time to start writing the scripts! If writing your binds is new territory for you, don’t worry! Adding them into your config or console will only take a few minutes.
Before we start, consider which keys you feel most comfortable binding. You can use practically any key on your keyboard, which leaves lots of room for customization! Bindable keys include the function keys (F1, F2, etc.), navigation keys, keypad and extra keys – get creative!
Another piece of advice is to use keys that you’ll easily remember and won’t accidentally misclick. You’ll want to make sure you don’t misclick any keys that are close together when you’re quickly buying your equipment.
All of the weapons in CSGO can be bound to any key. Consider which items you use the most, those are the equipment you’ll want to make bindings for first. Remember, it’s not necessary to bind every weapon! You will still have access to the buy menu and can purchase any non-typical weapon.
The simplest way to create buy binds is to head over to the CSGO Buy Binds Generator. This web application is a tool that allows players to customize their scripts. When using this application, you’ll choose any key desired and choose which item you’d like to bind.
A feature of the CSGO Buy Binds application is there are two generation options available. The “Multi-key Generator” allows you to set up scripts for multiple keys in a single go. For example, if you wanted to purchase an AK-47, kevlar + helmet, and a molotov by clicking the right navigation key while also binding the left navigation key to smoke the application produces:
The Multi-Key Generator is great, especially if you already have all the keys you want to bind in mind. Furthermore, it’s handy when inputting the commands into your config file. Simply copy and paste the generated code block, and you’re done!
The second option is the “Single Key Generator.” With this option, you’ll be creating a purchase script for only one key at a time. As an example, when choosing to bind purchasing an AK-47 to the up navigation, the generator produces the following command:
The Single Key Generator is just as valuable as its counterpart. However, creating the scripts one at a time might make the process slightly longer. Though, it’s the better option if you’re popping in to make a bind for only a key or two!
After creating your binds, you’ll drop them line by line into your console or save them in your config file, as mentioned in the guide previously.
Let us know how setting up your buy binds went on Twitter! Stay tuned to Dignitas for more Counter-Strike Global Offensive guides!


