


How to stretch your CS2 resolution
Are you interested in stretching your in-game resolution? Follow along our step-by-step guide to learn how to stretch your resolution and remove those distracting black bars using the NVIDIA control panel.
Are you interested in stretching your in-game resolution? Follow along our step-by-step guide to learn how to stretch your resolution and remove those distracting black bars using the NVIDIA control panel.
Many Counter-Strike 2 players choose to game on a variety of aspect ratios and resolutions. For instance, you might have heard that your favorite professional player uses a 4:3 aspect ratio when they play. However, if you’ve tried to use the same 4:3 aspect ratio without making some minor adjustments, you might have noticed that your screen doesn’t look exactly like theirs. That’s because you have not set up your desktop to stretch your resolution properly! If you’re interested in learning more about aspect ratios, resolutions, and how to stretch them, you have come to the right place!
In simplest terms, an aspect ratio is the width to height ratio of an image. Aspect ratios are expressed as “x:y.” The default aspect ratio for monitors and most games is 16:9, commonly referred to as “native.” Each aspect ratio is designed to support specific resolutions. In CS2, there are three options for aspect ratios: 4:3, 16:10, and 16:9. Furthermore, non-native aspect ratios can be displayed stretched or with black bars.
Different aspect ratios have their pros and cons. There isn’t any single “best” aspect ratio. However, there are a few aspect ratios that professional players have popularized. For one, the 4:3 aspect ratio is considered the most widely used ratio in professional CS2. Therefore, many competitive players have chosen to follow along in their footsteps. However, there are die-hard 16:10 users. What’s more, over the last few years, there’s been a resurgence of native players.
Your monitor’s resolution represents the number of height and width pixels visible on the screen. A higher resolution means a clearer and sharper visual image overall. Typically, higher resolutions are favored in CS2 because of the optical clarity they offer.
As we mentioned before, aspect ratios can be displayed stretched or with black bars. Each configuration has its advantages, but it’ll take some testing on your part to choose what’s best for your gameplay. For our guide, let’s go over how your game is affected by stretching the resolution.
When you stretch your game’s resolution, the height to width ratio is lowered along the x-axis. The distortion across the x-axis causes player models to appear “wider” and “bigger,” making it easier to aim at the enemies.
After you’ve chosen the the 4:3 or 16:10 resolution you want to stretch, you’ll first have to make some in-game adjustments.
Step 1: Open CS2
Step 2: Navigate to the “Display Settings”
Step 3: Choose your aspect ratio.
When selecting your aspect ratio, you’ll notice there are three different options. If you want to stretch your resolution, make sure to choose either 4:3 or 16:10 because 16:9 resolutions can not be stretched.
Step 4: Select your new in-game resolution.
Remember that it’s always more advantageous to choose a higher resolution. If you’ve decided to use the 4:3 aspect ratio, we suggest selecting the 1280x960, 1024x768, or 1280 x 1024 resolutions. The first two resolutions we mentioned are extremely popular among CS2 players. Furthermore, all of the suggested resolutions will offer good clarity in-game while being stretched.
Step 5: Save the changes by selecting “Apply changes” at the bottom of your screen.
After saving the changes, the game will automatically refresh. Once the refresh is complete,you will notice black bars on the sides of your game.
Following the rest of the guide will help you stretch the resolution of your game so that the black bars are not visible. Before continuing to the following steps, remember to keep your CS2 open.
Step 6: Minimize CS2 into the taskbar by alt-tabbing out of the game.
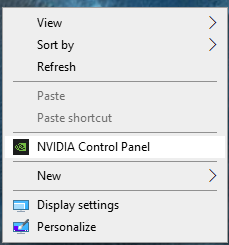
Step 7: Once CS2 is minimized, open the NVIDIA CONTROL PANEL by right-clicking on your desktop.
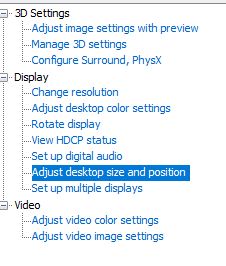
Step 8: Navigate to the DISPLAY section on the left-hand bar in the NVIDIA Control Panel. Under Display, select “Adjust desktop size and position.”
Step 9: Make sure the monitor you prefer to play CS2 on is selected under option 1. The monitor you choose in this section is the monitor that will display your new stretched resolution in-game. However, when the game is not active, your monitor will return to its default resolution.
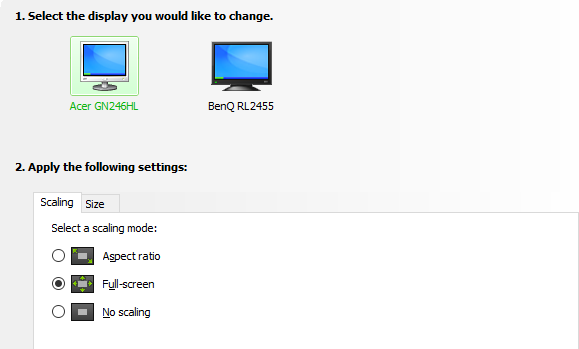
Step 10: After selecting the monitor that you wish to display the stretch resolution, select your scaling mode as “Full-screen.” The full-screen option stretches the desktop to fit on the entire display. Any application will be stretched to fit the desktop regardless of its aspect ratio and resolution by selecting full-screen.
Step 11: Select “Apply” to save the display changes.
Step 12: Once you have applied the changes, the monitor will refresh automatically. Then, an “apply changes”window will pop up. The notification is asking you to confirm the desktop changes you’ve made. Select “yes,” and the window will close out.
If you have an AMD graphics card, the steps are slightly different than the NVIDIA process. However, it’s still quick and not much more difficult!
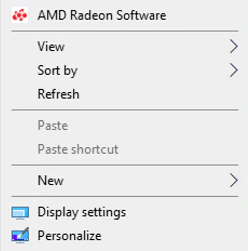
Step 1: Right-click on your desktop and select “AMD Radeon Software.”
Step 2: Once the Radeon Software application is open, select the Gear icon in the top left hand side.
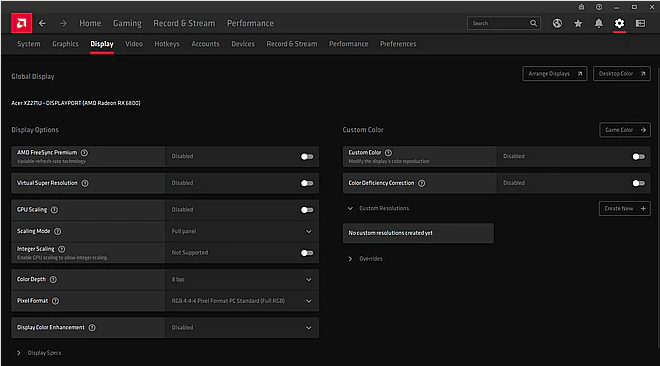
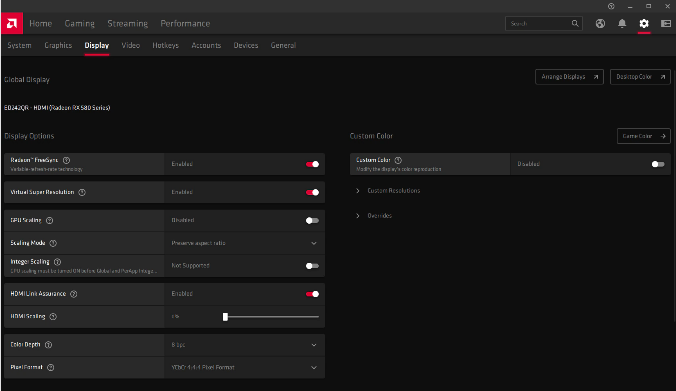
Step 3: Navigate to the “Display” tab.
Step 5: Choose “Custom Resolutions” and click on “Read & Accept the EULA.” Review the agreement and click accept.
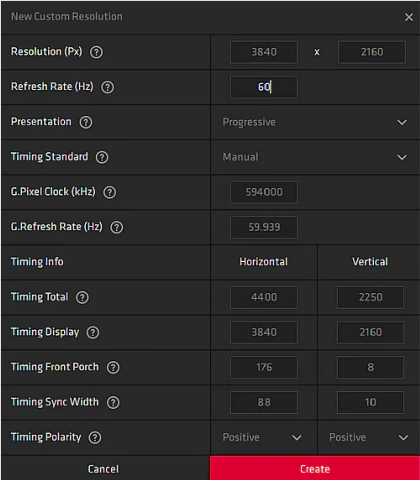
Step 6: Click on “Create New” to make your custom resolution.
Step 7: Fill out the custom resolution profile with your desired resolution.Be sure to fill out the “Resolution (Px)” and “Timing display” with the same chosen resolution.
Step 8: Once you create the profile, go back to the display menu and enable “GPU scaling.”
Step 9: Then, set your scaling mode to “Full panel.”
Step 10: Exit Radeon and open your Window’s display settings by right-clicking on your desktop.
Step 11: Set your monitor’s display to the same resolution that you input into the custom profile and keep the changes when prompted.
Step 12: Follow the instructions on how to change your in-game resolution found in the NVIDIA section. Make sure you use the resolution in-game that you used for the custom Radeon profile.
After you’ve kept the changes, make CS2 the active application by selecting it in the taskbar. Since you have changed your display settings, you will now see that the game is stretched across your entire screen and that the black bars are no longer visible!
Now that you’ve set your desktop up to display different aspect ratios in their stretched format, continue to play around with the other resolutions to find your perfect match. Did you decide to use the exact resolution as our guide? Do you think you have found the next popular resolution? Let us know on Twitter! Stay tuned to Dignitas for more Counter-Strike 2 guides.


