While Killjoy has proven to be an extremely valid and easy to use agent, Cypher is still an absolute demon when used correctly, but his abilities require the user to know what they are doing to be effective in any way. This is especially the case on Split. Whenever I start a comp game on Split and I see the enemy team has a Cypher on it, I shiver a bit. If Cypher knows what he is doing, a slow push onto B is virtually impossible, and he can stall a whole team by himself on A-Site with the right utility. Today, we’ll be teaching you how to make your enemies shiver the same way I do.
B-Site
B-Site is going to be your go-to site for Cypher to set up on, with his easy to execute one-way to his frankly, overpowered, cameras, he is an absolute demon on this site as an anchor. We’ll be showing you the main setup, and some alternate utility spots to use to shake things up.
Here is an overview of your setup on B-Site.
First off, let’s start with the camera. This camera spot is extremely powerful due to the fact that you can see enemies inside Garage and they will not be able to see the camera without pushing up, where you can then activate your one-way or peek them, and it can also see enemies pushing B-Heaven. Simply just sit on the box under B-Heaven, jump and aim at the top of the building below, try and get it as high as possible, if it is too low it may be seen from Garage.
Here is a view of the camera, it can also see the back of site if angled downwards.
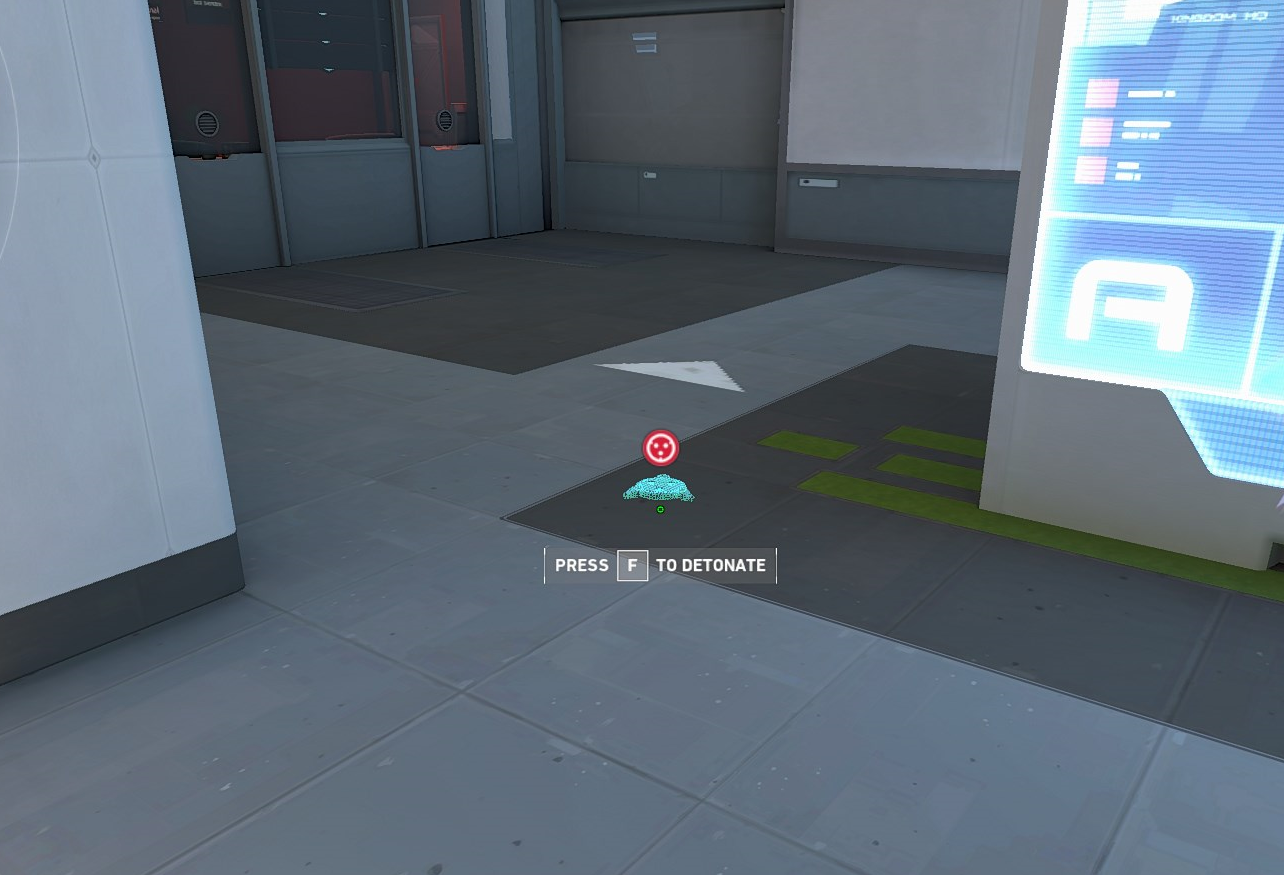
Next up are the tripwires, the first one all you need to do is throw it at the trashcan out of Garage and make it land past the doorway. This wire is extremely simple but hard to see and is often ignored during a fast push onto site, and in conjunction with a one-way or cage, can get a free pick.
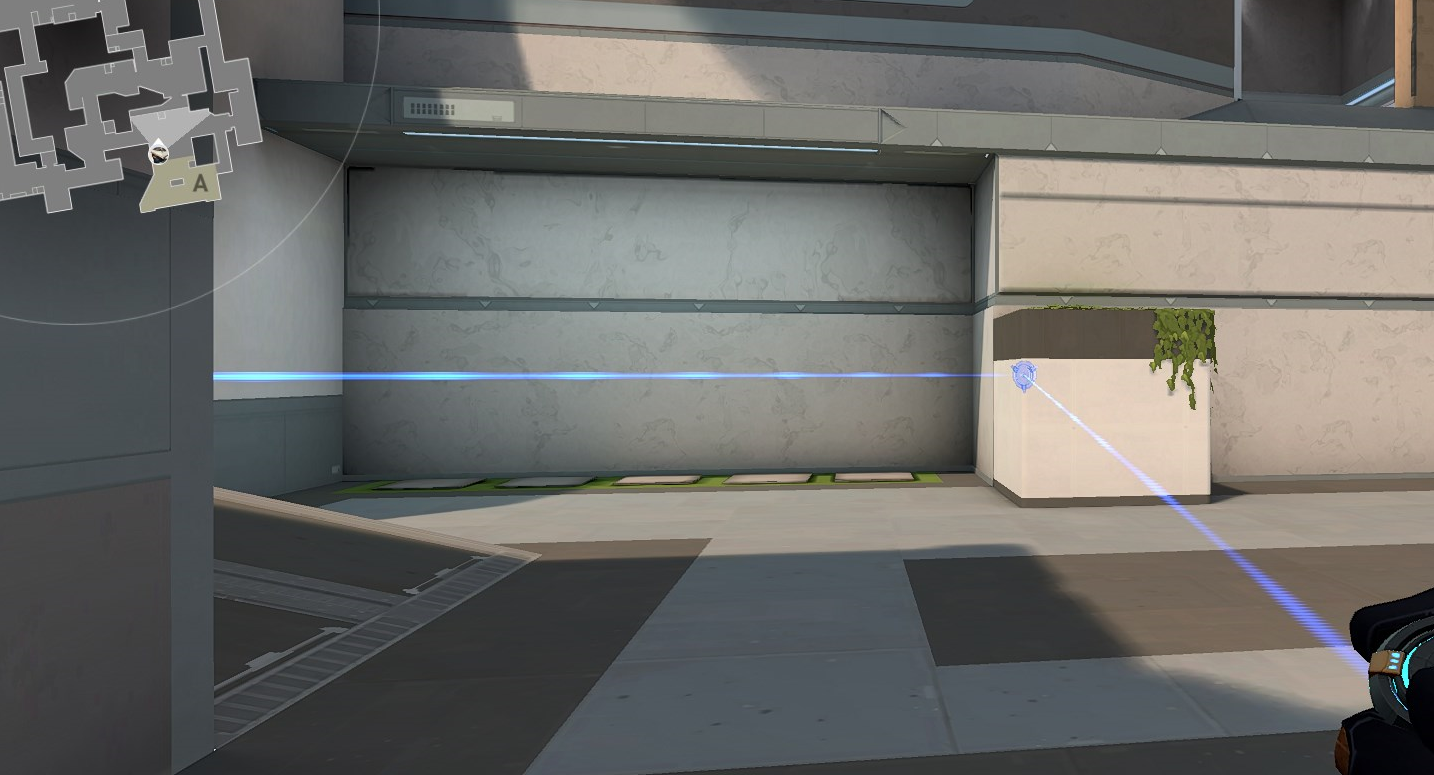
The second wire is a simple tripwire to use so if enemies have pushed out of Garage you can focus on the right side of Pillar and can be made aware if enemies push towards B-Heaven, so you can be prepared. Just throw it on the wall and make sure the other side of the wire lands on the stairs and not on the crate.
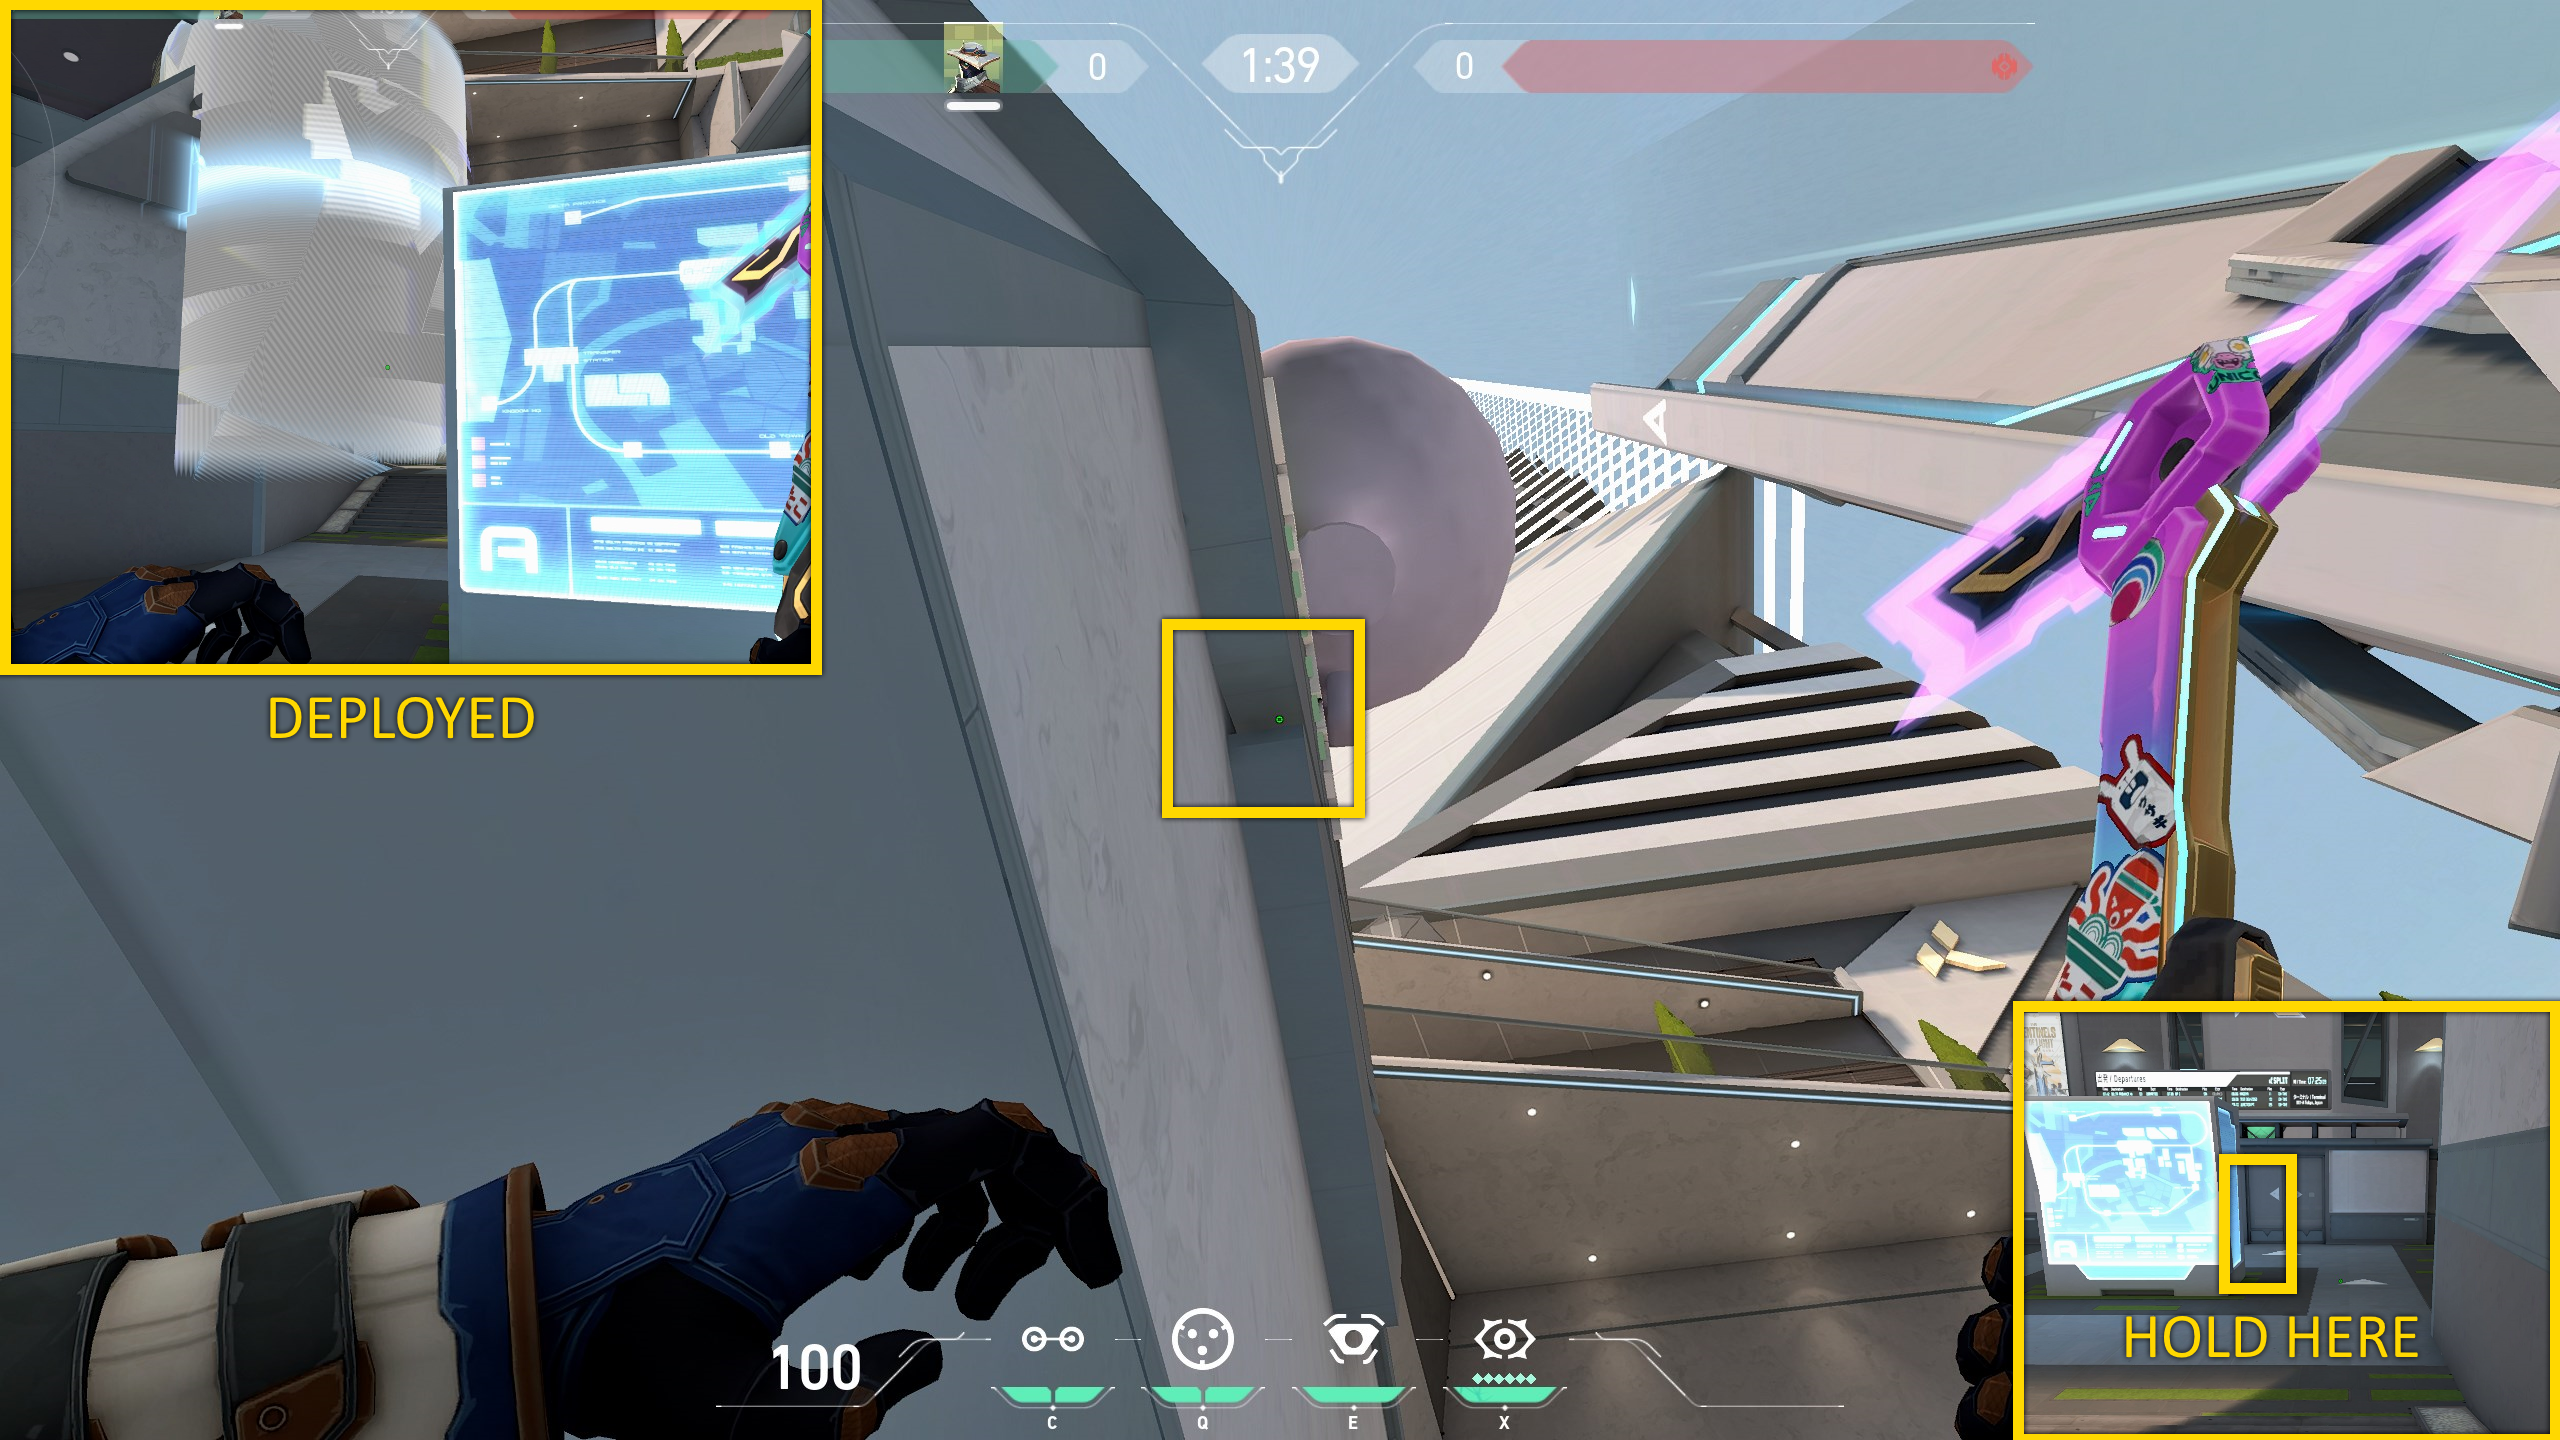
Next is the one-way. This one-way is extremely potent and will basically stop any push. The enemies can only see you if they are at the very back of site, and if they are pushing, you can easily pick them all off. Just stand in the doorway shown, line your crosshair up with the center of the wooden beam it’s on, and throw it, where your crosshair is vertically does not matter as much, but try and make the cage land towards the center of the doorway. Hold this one-way from the back of site or Pillar.
For some alternate cameras, throw one in the corner of the shutter shown below, this camera can see into Garage and can be hard to see.
A-Site
While A-Site is not as viable as B-Site, if your teammates keep losing A-Site, or are expecting your utility on B, it would not be a bad idea to switch it up, and start setting up on A. Here is an overview of the setup on A-Site.
First off is the camera, this is a simple camera but gets a great overview of the site, A-Main, and A-Heaven. Just throw it on the wall shown below.
Next is the one-way for A site. Just hold it from the back of site and you can see people running in site without them seeing you. Simply just throw the wire in between the two protruding panels on the wall shown below. This is not a pixel-perfect lineup and should be fairly simple to execute.
Below is another cage that should be used when holding on the spot shown above and should just be used to escape to elbow if the enemy advances onto site, just throw it on the spot shown below.
This following tripwire is really good because it catches people as they push into your one-way rather than before, so you can get an easy pick on enemies pushing in. Just put it on the corner of the box below.
Also useful is a tripwire that covers enemies pushing from Ramps to A-Heaven and enemies pushing from Ropes to A-Heaven. This tripwire is extremely useful if you are solo anchoring the site. Just throw it on the angled wall shown below.
To wrap up our coverage of the A-Site, here is a simple setup for Ramp. Just throw your cam on the spot shown below, cages in the front of A-Heaven and towards the back of A-Heaven, and a tripwire in the same spot as the one above. Hold towards the back of heaven and when enemies push just activate your cage. This setup is good if you have someone else holding the site.
Attacker Cameras
Just as important are cameras and set-ups for Cypher to use on the attacker side or for a retake. The first two cameras are really good cameras to get info before your team pushes into A-Main or for a lurk. For the first one just stand on the box towards the back of A-Main and jump forward, throwing your camera on the billboard, this camera is pretty hard to do, and requires some practice. For the second camera just throw it on the spot shown below while on the same box. Switch between these two cameras to avoid them getting shot instantly.
One key use for Cypher’s camera on attack is putting one Middle to gain info of the defenders holding there. Throw it on the tree shown below. This camera is also really good at baiting enemies to shoot it so you can peek it when they shoot at it, catching them off guard.
The final attacking camera for B-Site, this is a really good way to get info on who is holding B-Heaven, Site, or under B-Heaven. Just throw it on the wall shown below.
While there is an overall lack of variety for Cypher on Split, what he can do is extremely powerful and he continues to prove himself as a powerful anchor to fear on any site. As long as you keep in mind these spots, you can easily hold a site or successfully get information for your team. We here at Dignitas fully hope that you make your enemies rage at your setups and take every step with caution in fear of getting caught on an annoying wire of your own ingenious and diabolical design.