


The Best Overall Settings for League of Legends
Do you have the right in-game settings to perform? Let’s walk through all the settings you need!
Do you have the right in-game settings to perform? Let’s walk through all the settings you need!
Achieving peak performance in League of Legends obviously involves optimizing your gameplay, but don’t think that your settings don’t play a significant role! The wrong settings can inhibit your ability to play and even perceive the game, but the right settings can allow you to thrive in your own unique way.
To ensure you are taking full advantage of the in-game settings, we have to highlight them all.
Here are the following settings you might not have considered:
The general settings are pretty simple and none of these should show drastic alterations in gameplay. You may find that once you have changed these settings, you’ll feel the difference. Let’s move onto the interface!
Here are the interface settings that you should definitely consider checking out:
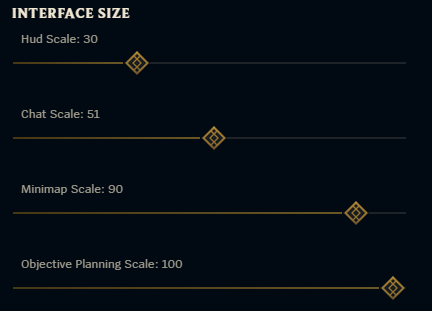
These interface settings are small changes, but if you’ve always been playing with the default settings, you’re missing out!
Controlling the camera in the heat of the moment will make or break your gameplay when you climb to more competitive ranks. You can’t just rely on watching what’s on your screen. You need to unlock the camera to see what else is lurking around the Rift.
Remember, in League of Legends, information is key. You need to gather as much information as possible to make the most informed decisions and using your camera to scout the Rift is critical to that.
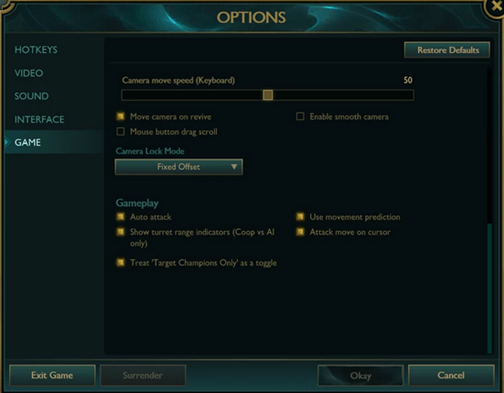
The Game settings play a large role in the mechanical side of the game. The minute details that cannot be overstated. Here are a few that you need to check out:
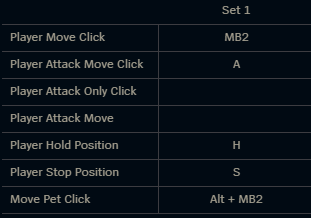
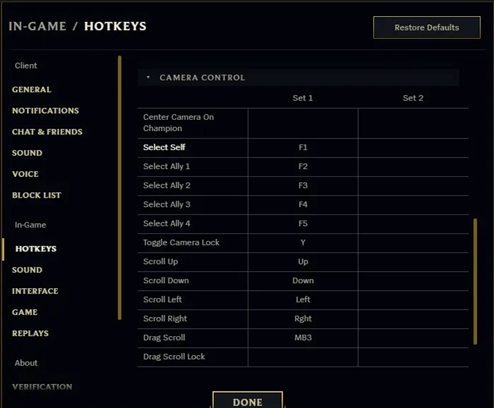
Even more important than the Game settings are the Hotkeys. The Hotkeys are the customizable settings that enable the player to play to their peak potential.
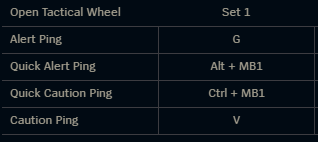
Quick Bind is a very important setting for actions like pinging, recalling, or opening the shop. This improves your responsiveness during gameplay. But, here are the other options that you should be using in your games:
There are four main types of key bindings worth noting:
All of these are standard binding setups but should definitely be used!
‘Target Champions Only’ is another key binding that will work wonders when used. This button will allow you to toggle your attacks to target the selected only if they are a Champion. This makes turret diving and fighting in minion waves much easier!
‘Attack Move’ is an important hotkey to ensure you can move around the map efficiently and minimize the clicks required to perform the same task. This allows you to make one single keystroke to attack something rather than two. If your selection with this single keystroke is not on anything attackable, you will instead move to that position. This is a great way to check bushes without first walking into the bush and then attacking the target in the bush. With this, the command will walk you into the bush and attack as soon as possible.
The ‘Stop’ movement command will stop your Champion from moving and attacking. This is important when remembering that if your last input command was simply to walk somewhere like a bush, as soon as something is within the range to interact with, your Champion will do so automatically. When camping a bush with teammates, this is a terrible way to ruin your ambush because it can give away your plan before the enemy has walked close enough to guarantee the ambush works. The ‘stop’ command will prevent your Champion from making any type of attack or movement unless you intervene in some way.
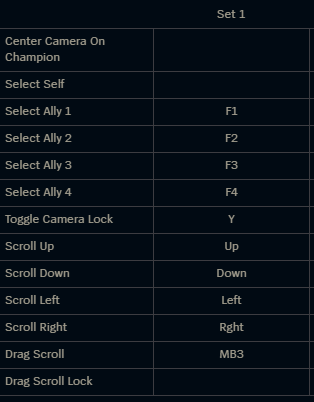
The standard camera controls that you should use are locking/unlocking your camera, and recentering your camera on your Champion. Another important feature of using the camera is to re-center your camera around each of your teammates. This can be done with the ‘F’ function keys.
If the mouse you use has any customizable keys that you can use in your gameplay, consider using it to quickly strike a key with the movement of your mouse. For example, when you want to indicate to your team that the enemy has warded an area, you want to be able to quickly hover where the ward was placed, use the “Area is Warded” key. By using a mouse button for this communication instead of the keyboard, it leaves you able to still cast all your abilities in the heat of the action!
It’s also a good idea to consider what’s more important for you, the immersive experience or the competitive experience. If you’re trying to optimize your settings to play at your most efficient level, then you’ll want to turn off some of the ‘candy’ experiences like background music, eye candy graphics, etc. With that in mind, let’s move onto the AV settings.
The most important piece to remember about Video settings is to balance visuals with performance. Here are some key settings to review:
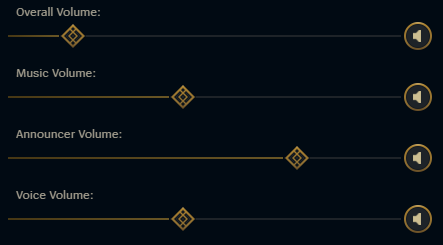
Here’s what to consider about the sounds of the game:
All these settings are worth experimenting with to find what works best for you. Keep in mind that preferences can vary from player to player, so feel free to customize your settings based on your comfort and playstyle as they change from month to month and even from year to year! Don’t forget, you should regularly check for updates and optimizations in the game's settings menu as new features may be added over time.


