The Ultimate Killjoy Ascent Guide For VALORANT
Killjoy currently has the highest win rate in the game and has a 60%+ win rate on her best map, Ascent. This guide will go over Killjoy lineups, setups, and strategies on Ascent.
Killjoy currently has the highest win rate in the game and has a 60%+ win rate on her best map, Ascent. This guide will go over Killjoy lineups, setups, and strategies on Ascent.
Since her release, Killjoy has been a stable pick on Ascent because of her powerful defense. Attackers only have a few options routes to get on a site, so her traps can often get lots of value. Her influential ultimate can alter the outcome of rounds by making site takes and retakes much easier.
Killjoy’s specialty is in her defensive setups. She is very good at holding down A, but she is even better at B. Trying to push a Sova and Killjoy defending B can feel almost impossible.
Her first setup for the B site is called the Toaster Oven. When attackers try to push the B site, most of them will be coming in through Lane because it’s the fastest way in.
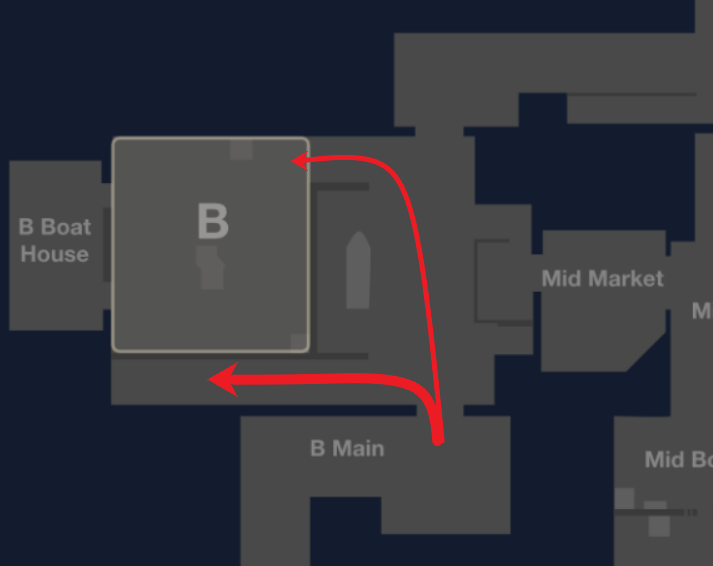
This narrow path is perfect for Killjoy’s traps because enemies will have nowhere to escape. To do this setup, place your first Nanoswarm on this intersection of the thin bricks.
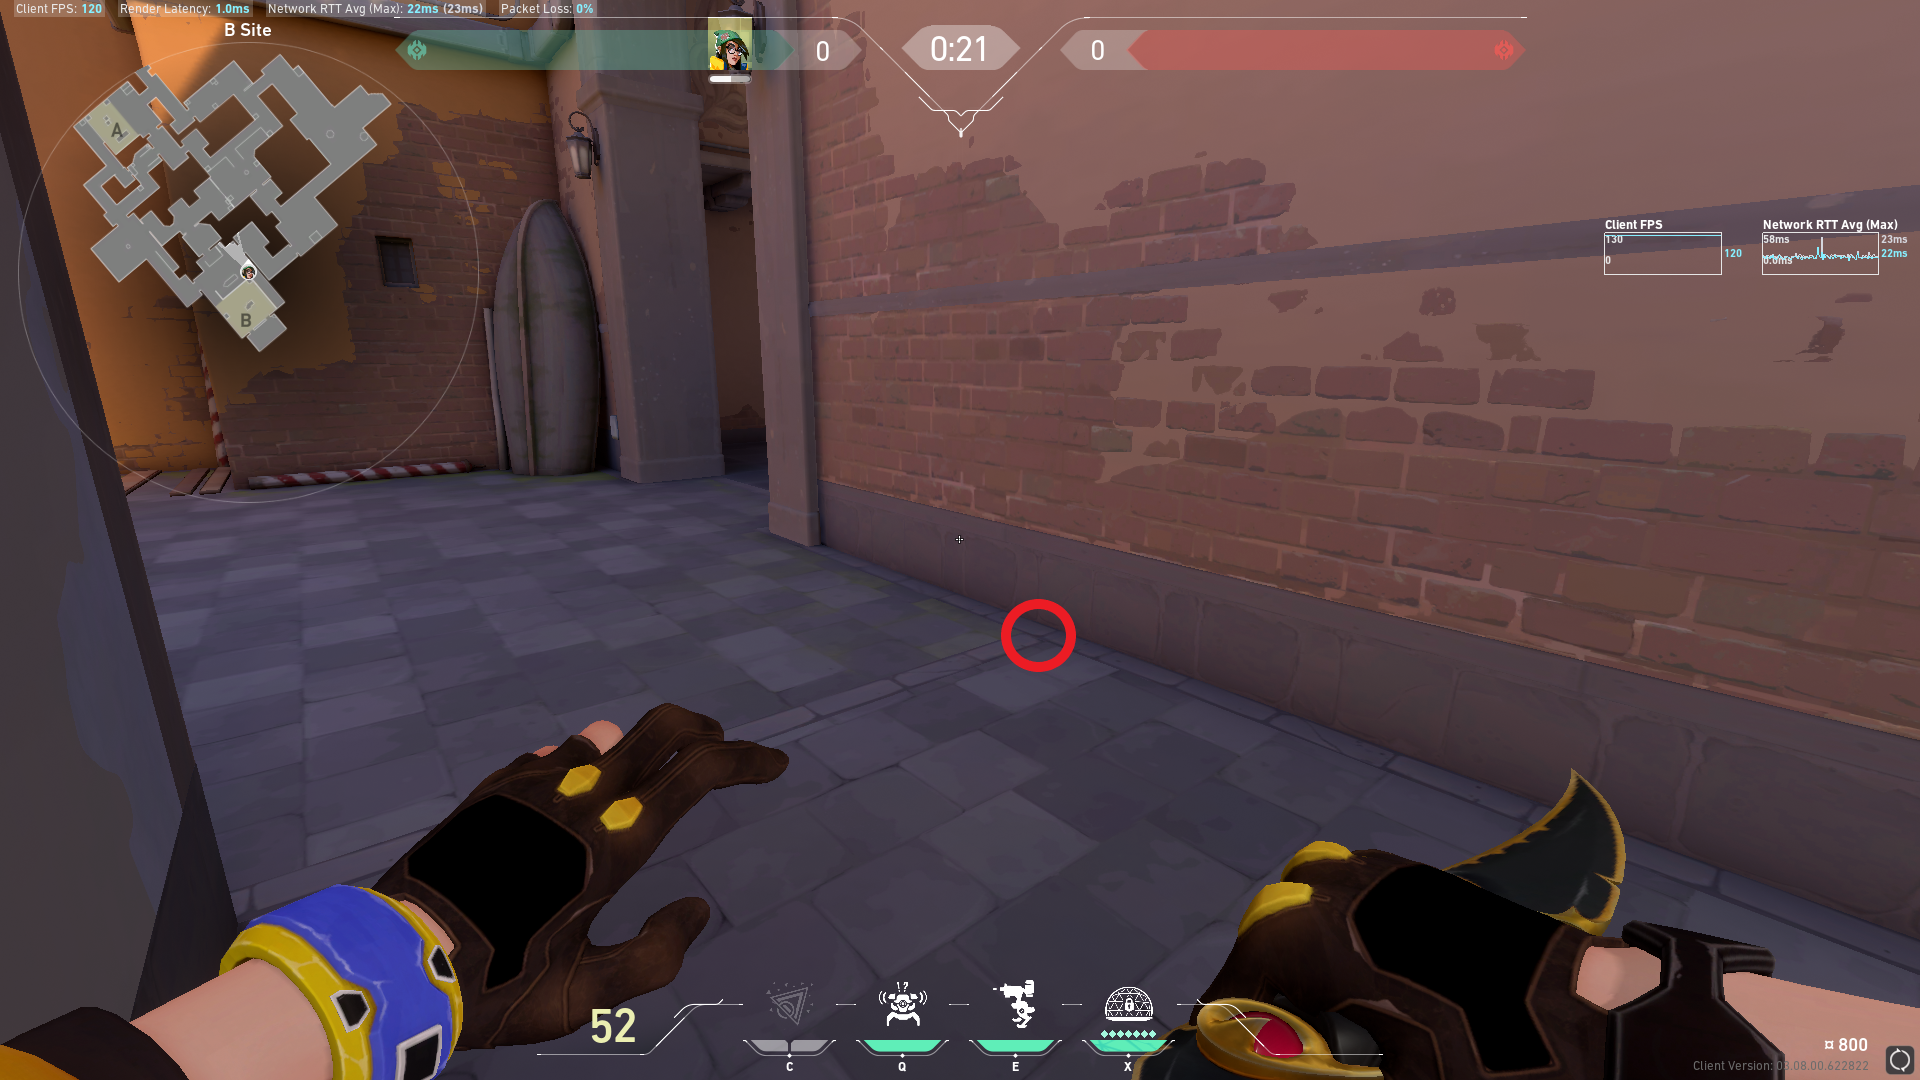
Then place your second one on this cracked brick.
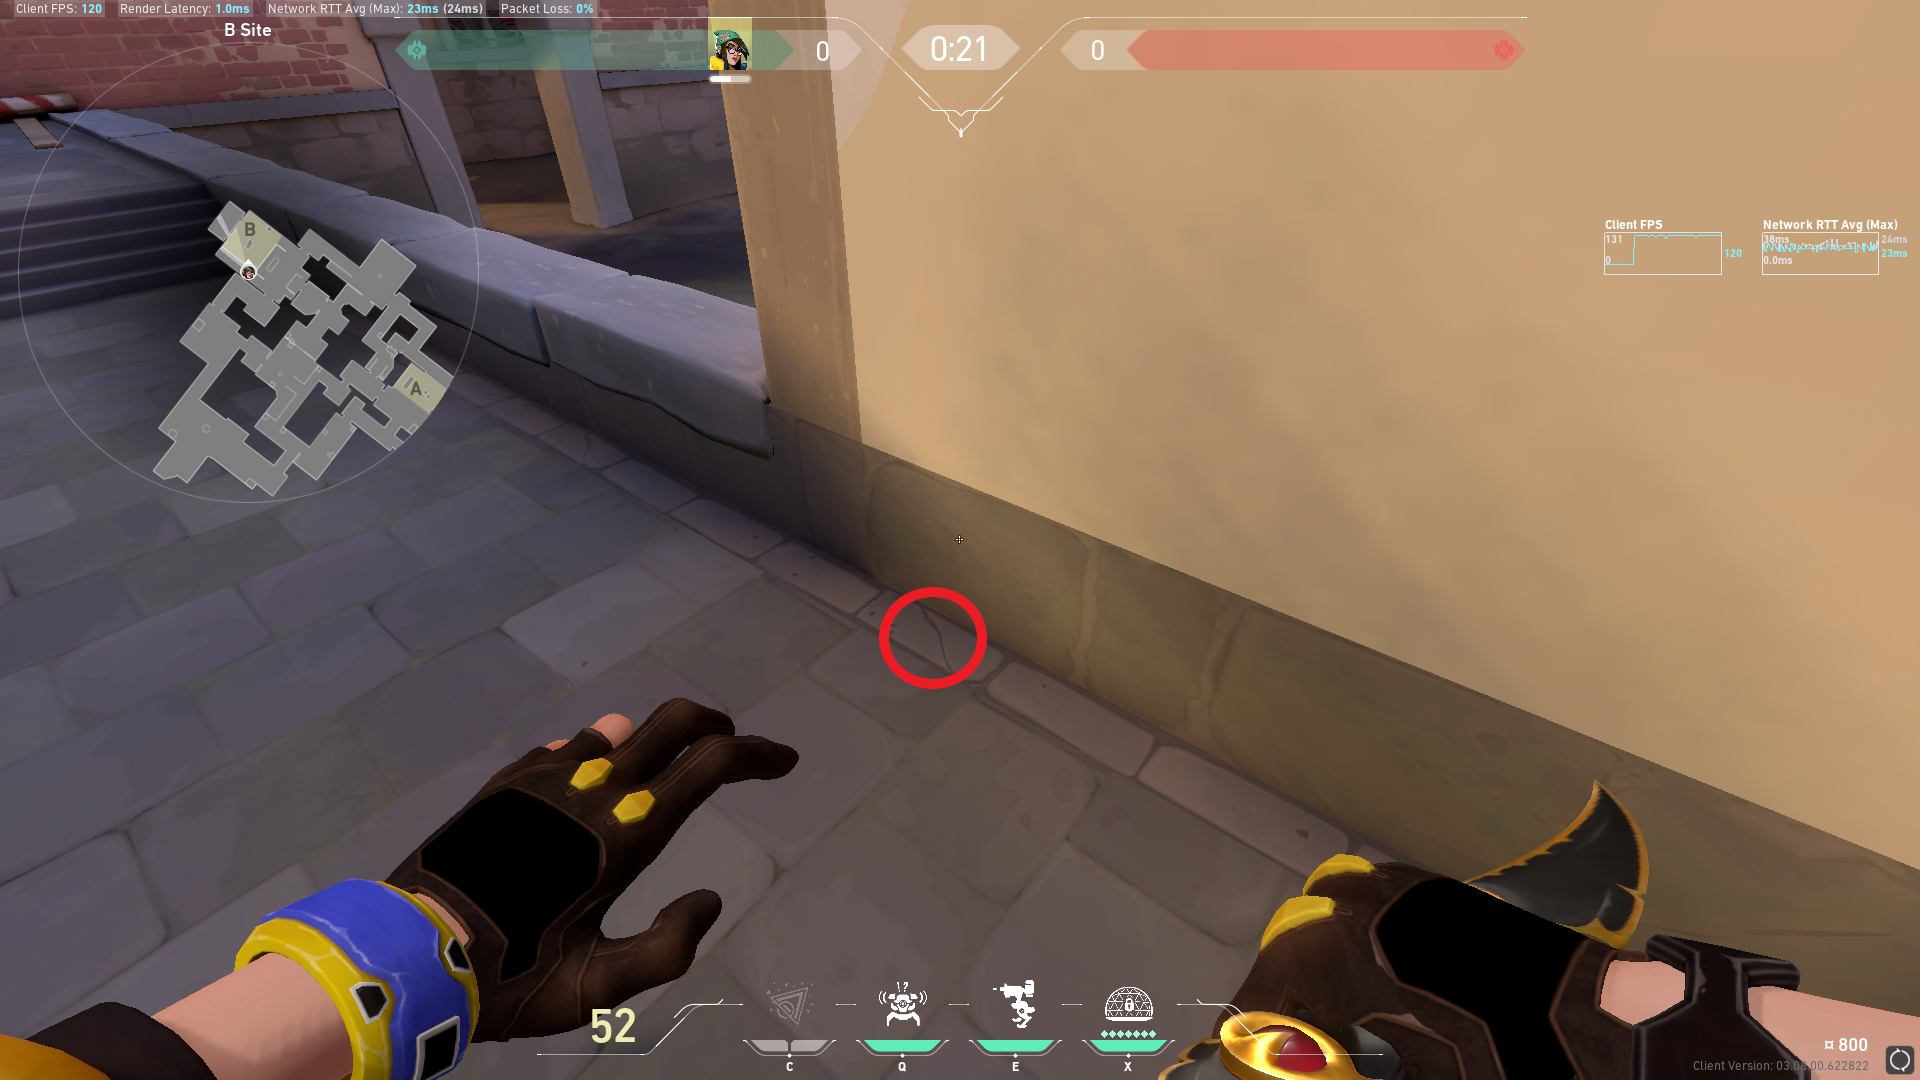
These two Nanoswarms can cover a very large area. Although there are two cracks between the Nanoswarms, the cracks aren’t large enough to fit, so attackers will continue to take damage.
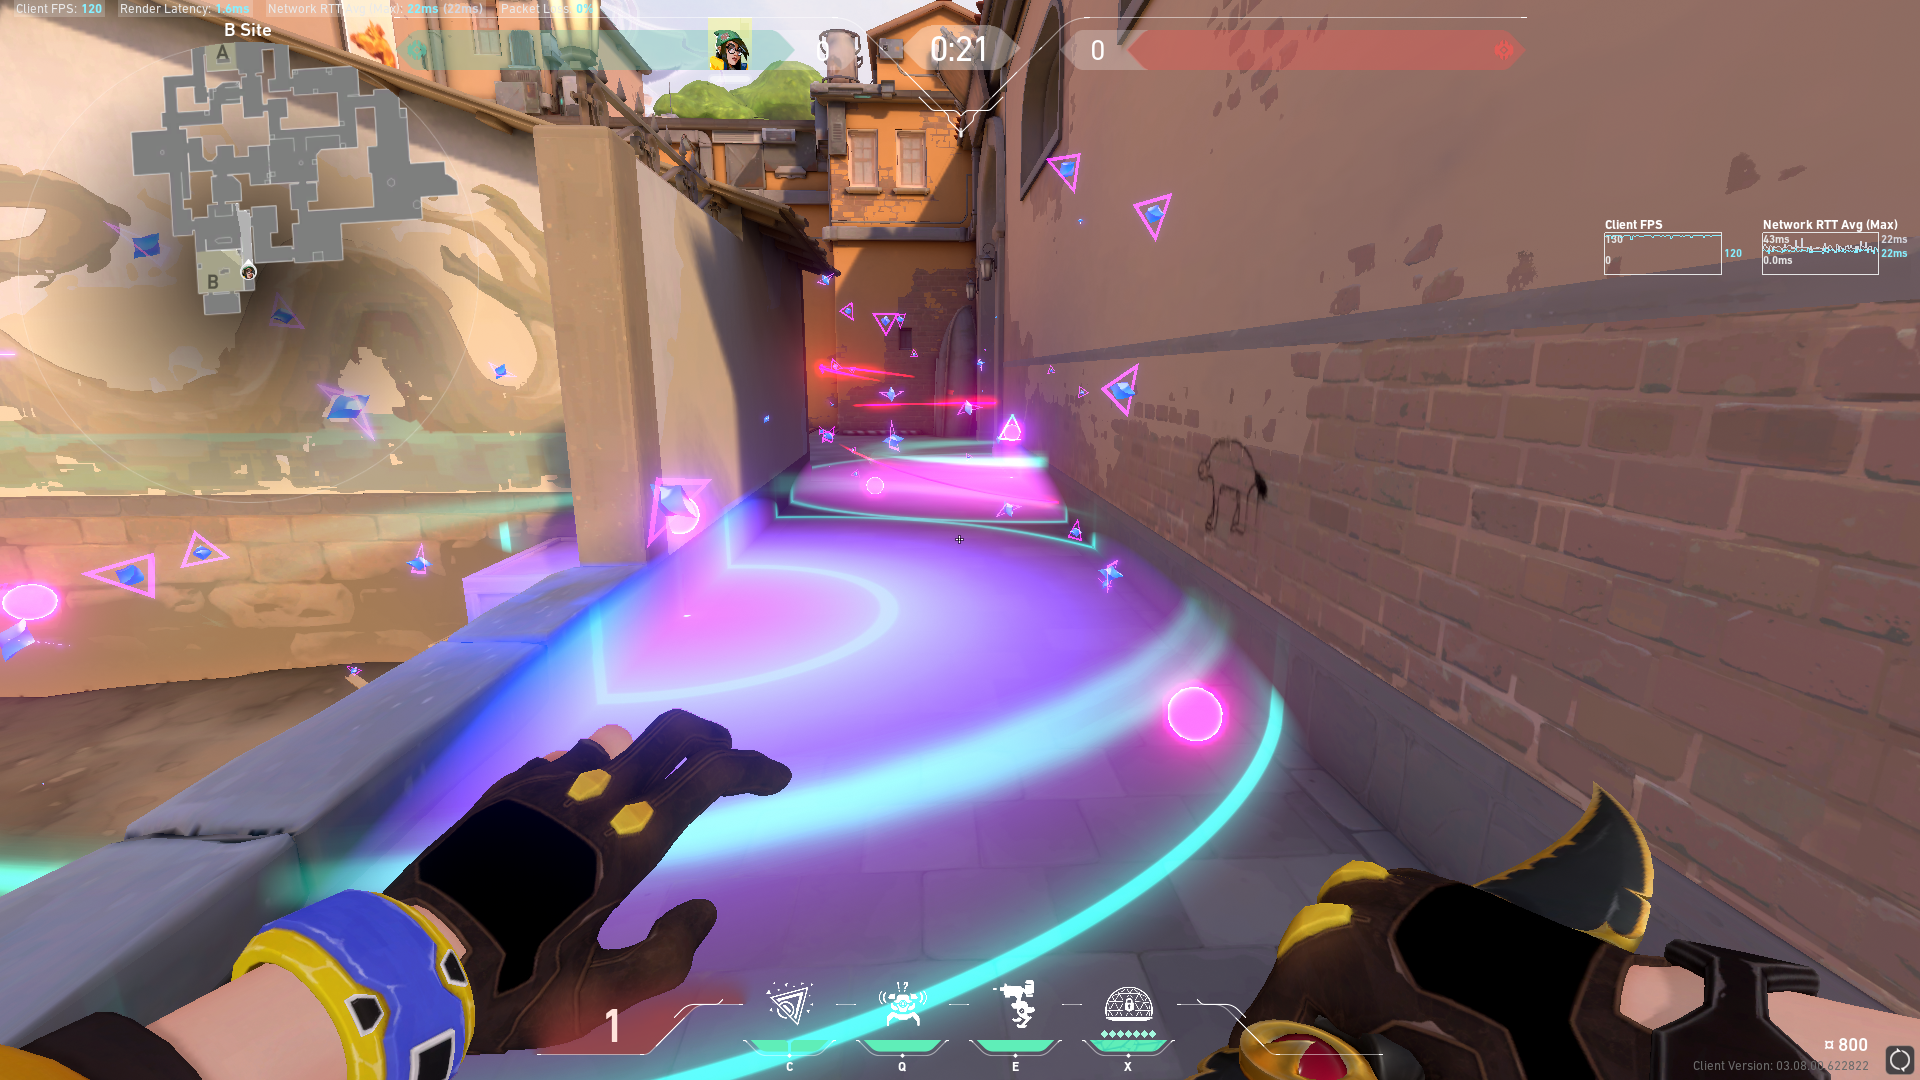
You should also place your Alarm Bot in Lane. Your Alarm Bot will act as your signal for when to activate your Nanoswarms. As soon as your Alarm Bot goes off, activate your Nanoswarms. You can place your Alarm Bot closer to the entrance or farther back. The first will give you more time to activate your Nanoswarms. The latter will let enemies push farther into the middle of your traps. Both are effective, so you use whichever one you prefer.

Attackers have two choices when you activate your Nanoswarms: to go forward or to go backward. If they go forward, you’ll be ready to shoot them from on-site. They will be effortless kills because they’re just paying attention to getting out of the mollies and will be vulnerable. If they go backward, they’ll be exposed to your teammates playing in Spawn or Market.
Eventually, your opponents will catch on to your Toaster setup and start either avoiding Lane and breaking your traps with Shock Darts, Grenades, or other abilities. A counter to them breaking your Nanoswarms is this Toaster Variation Setup. To do this setup, place your first Nanoswarm in the corner between the door switch and Lane.
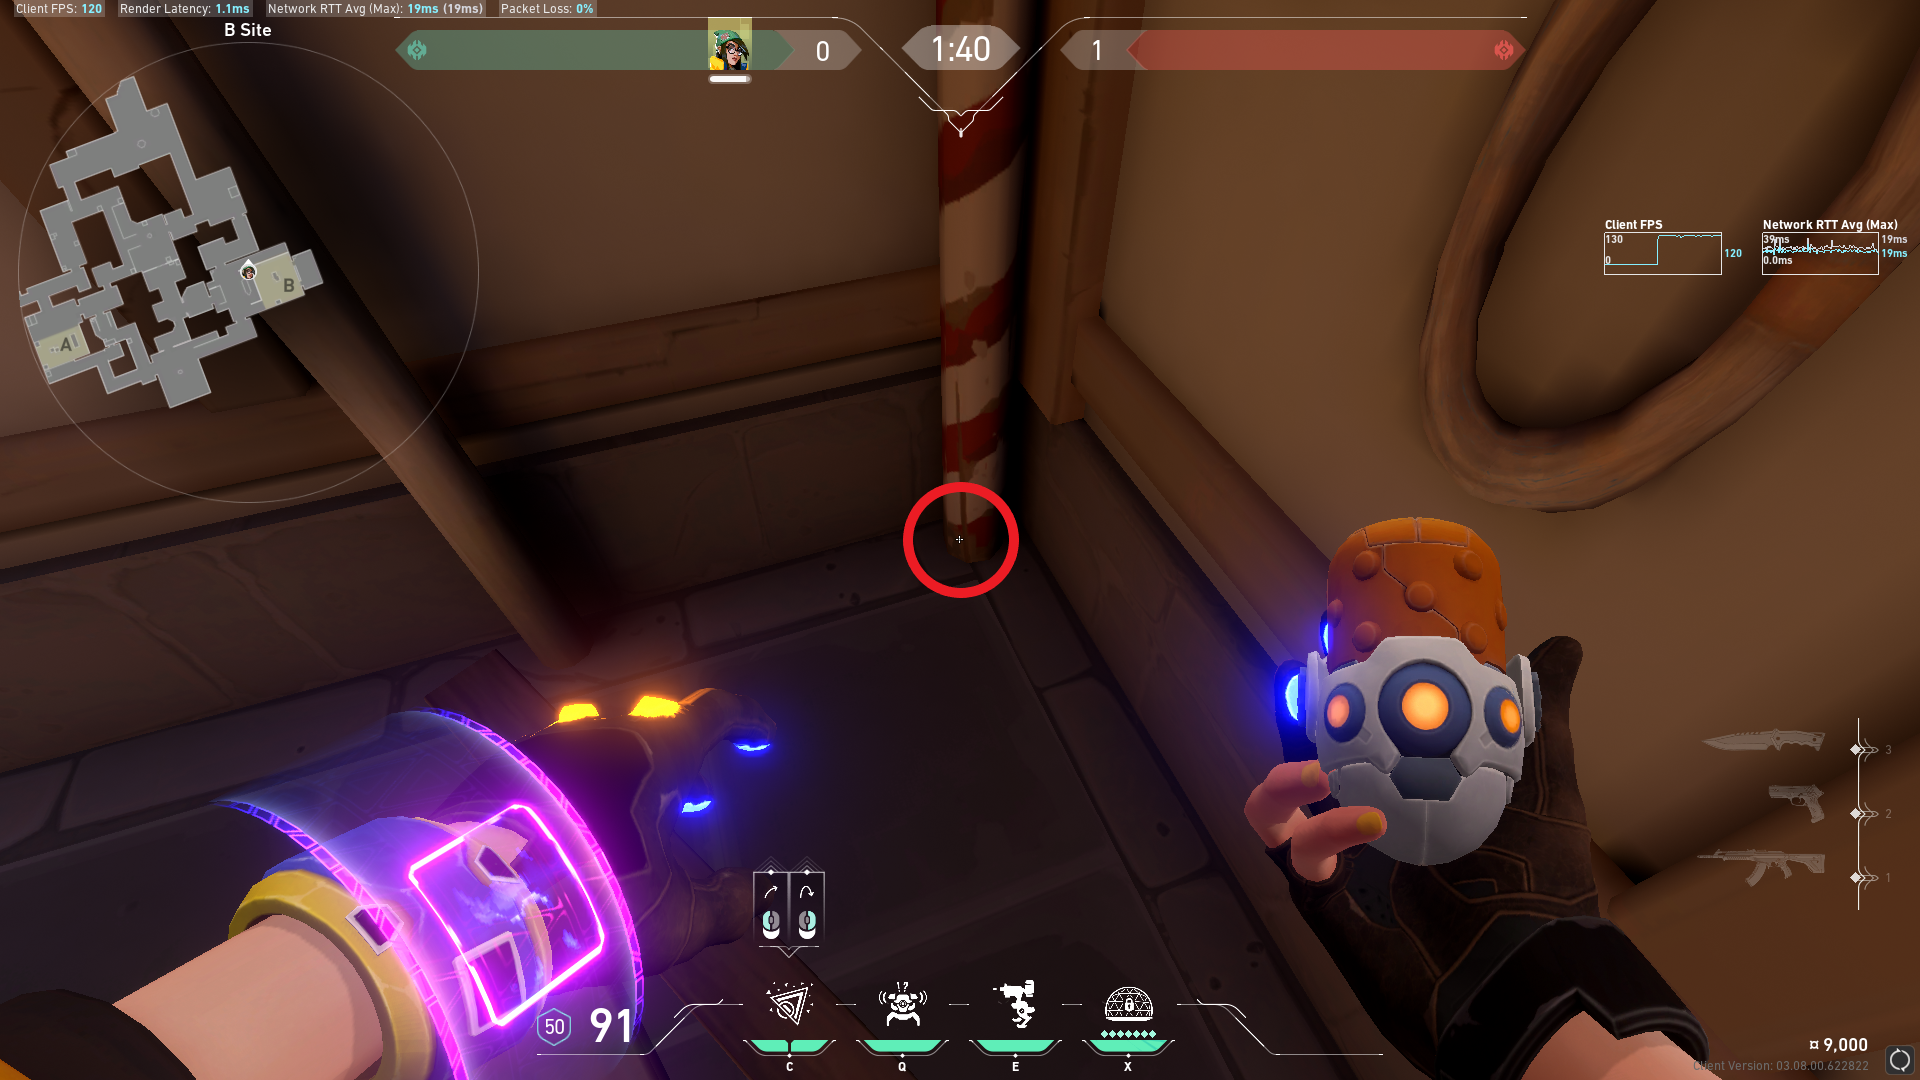
Then place your second Nanoswarm on the ledge at the end of Lane.
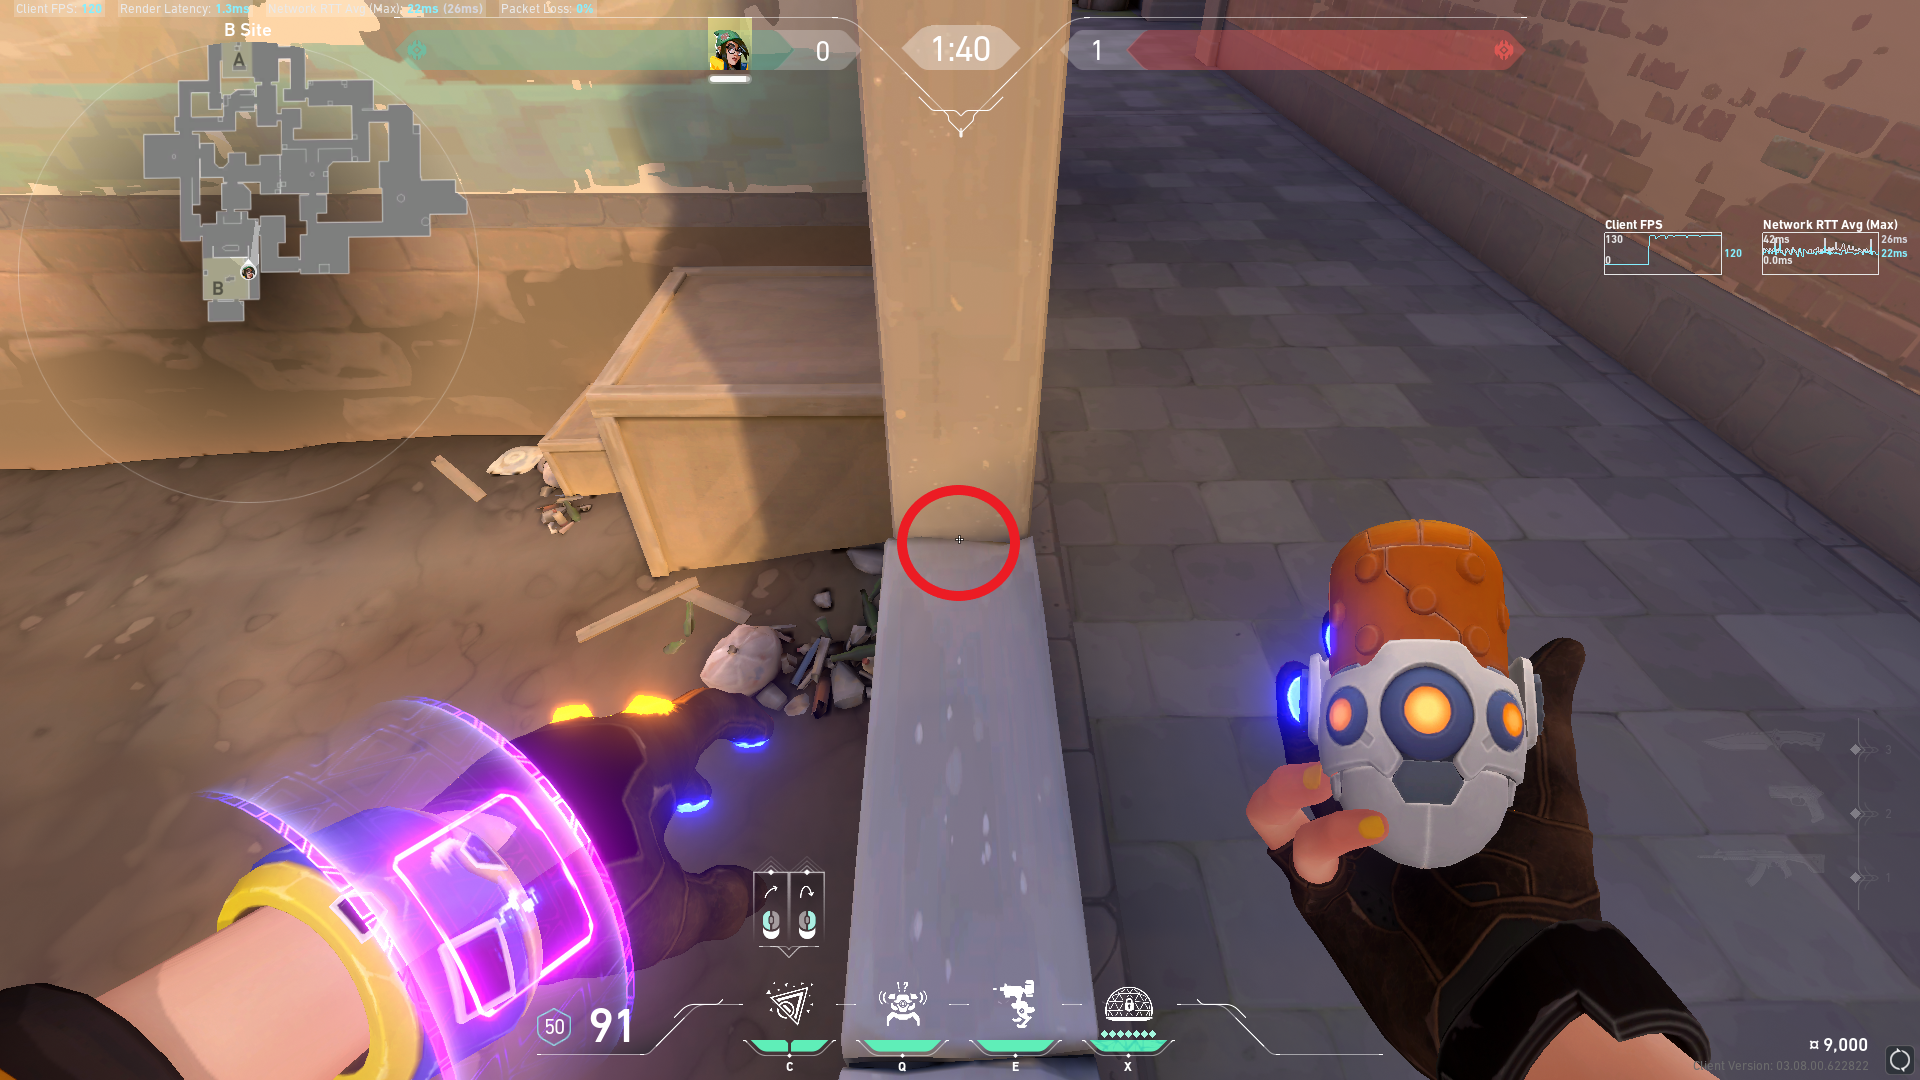
These 2 Nanoswarms will cover slightly less area but will be much harder to break with utility.
Attackers almost always close the Market doors as soon as they get into the B Site. This setup will stop attackers from closing it immediately. First, place your Alarm Bot behind the door switch.
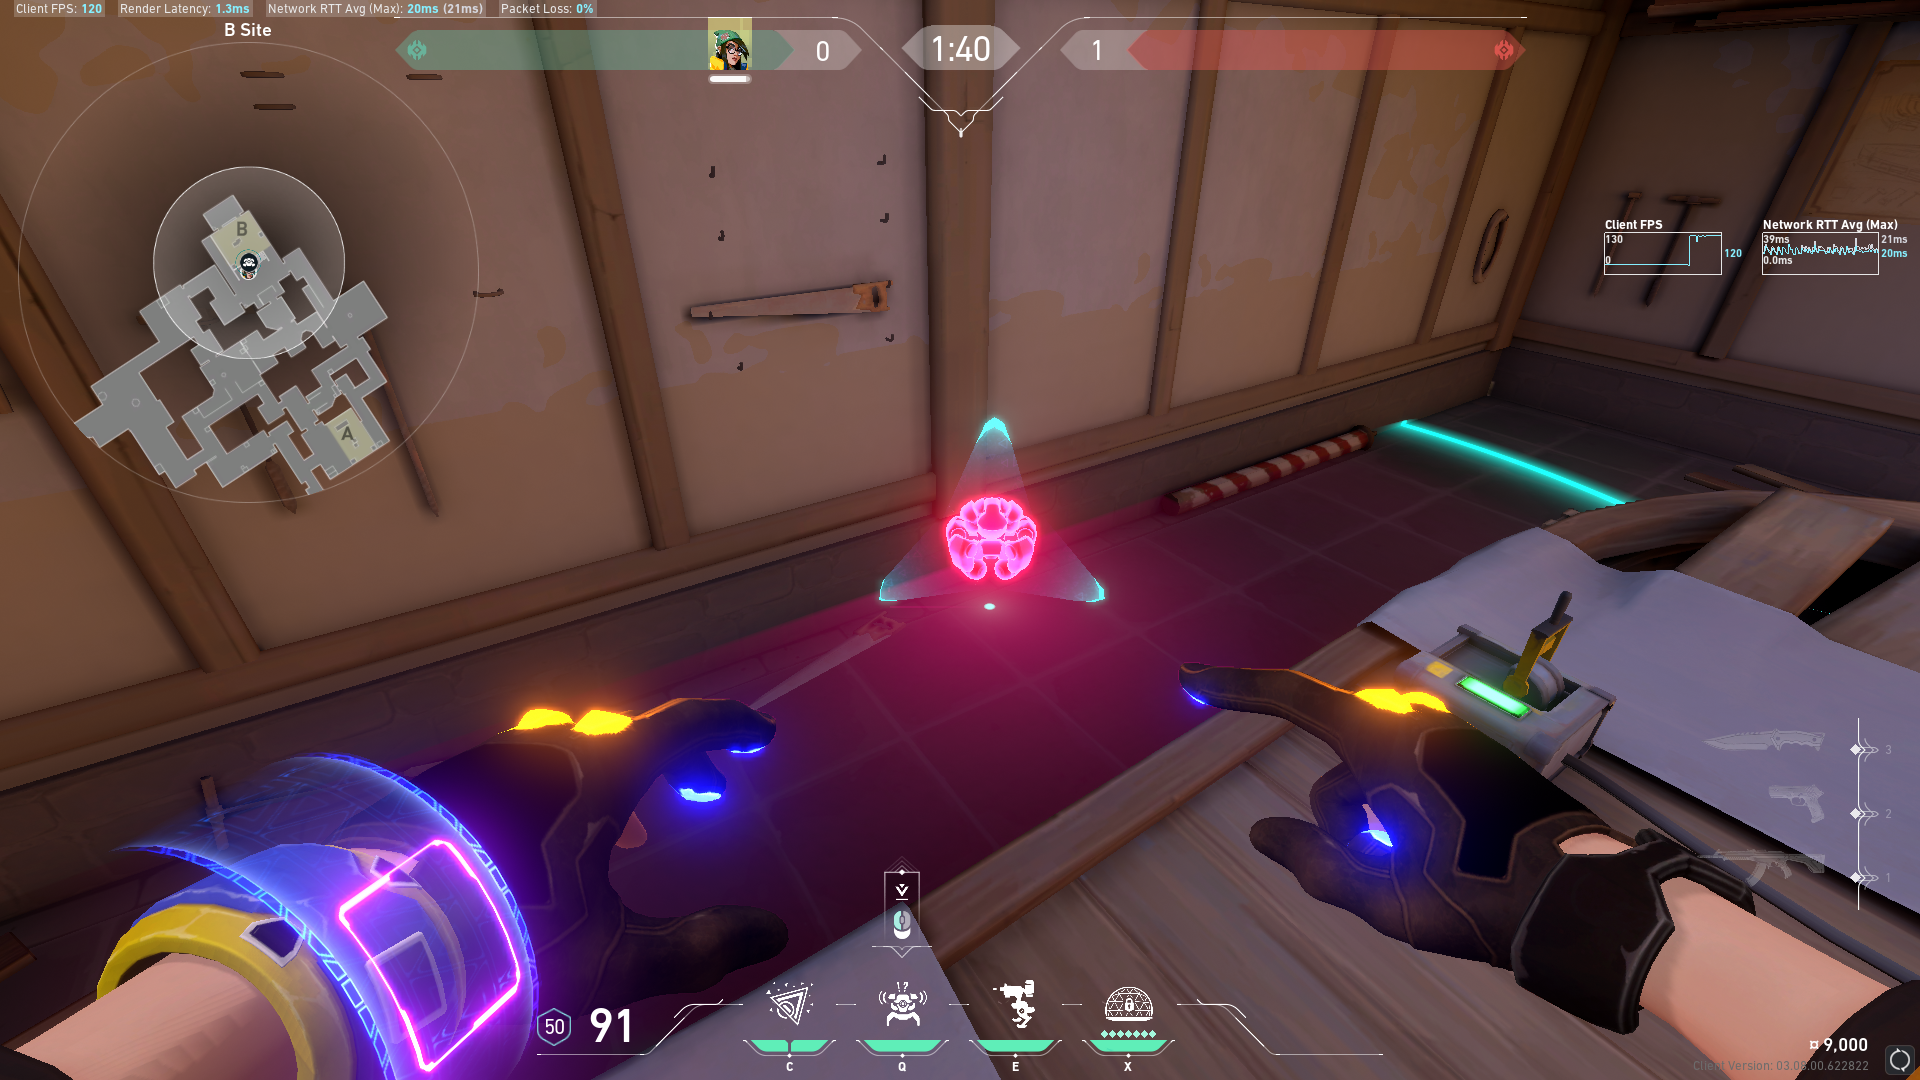
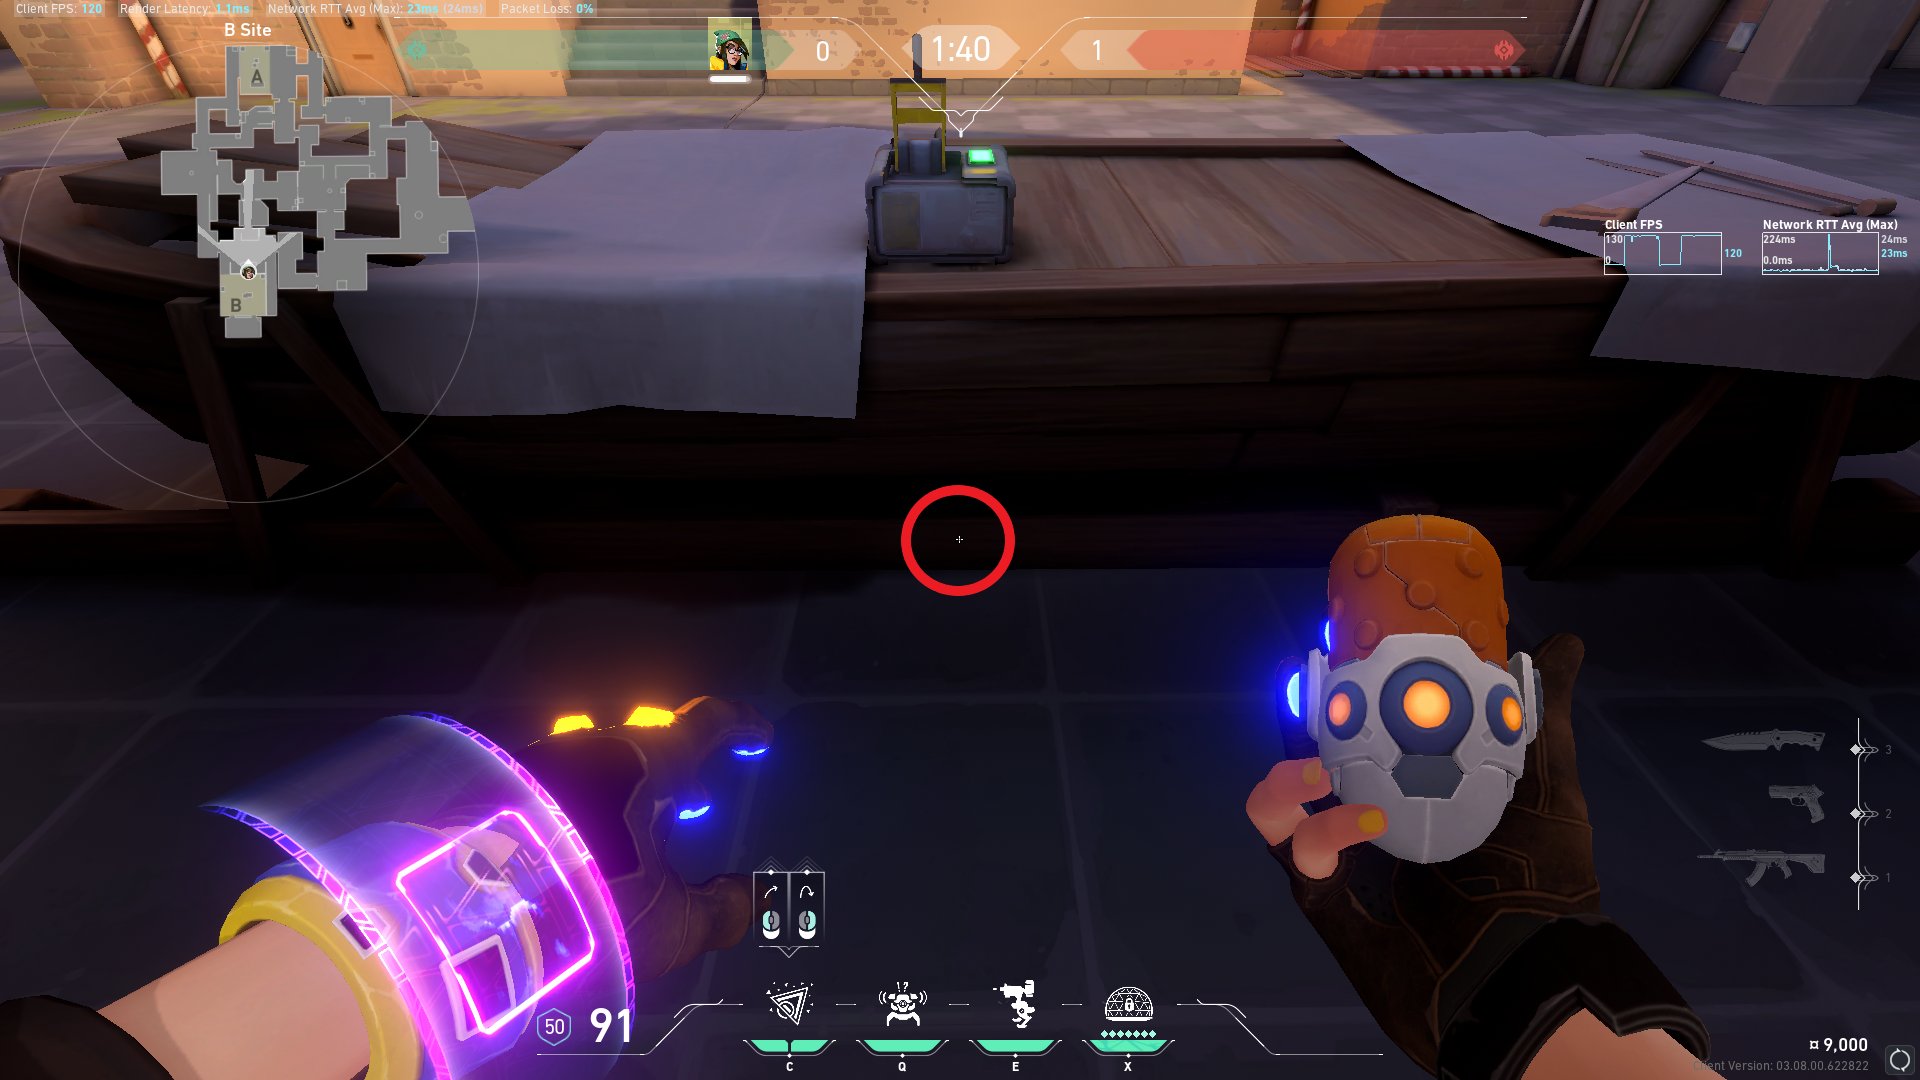
Then stand with your back against the switch wall and aim at the bottom plank of the table. Left-click so the Nanoswarm will go inside the table. This setup will delay anyone that tries to close the Market door, and they’ll be in a very exposed position from Market and Defender Spawn once their smokes go out.
Mid is a very important part of Ascent, and attackers may start using it to execute split-site takes. To slow the attacker's push, place your Nanoswarm and Alarm Bot. This will delay the attackers long enough for a teammate to rotate to assist you. The placement of these traps doesn’t have to be that precise.
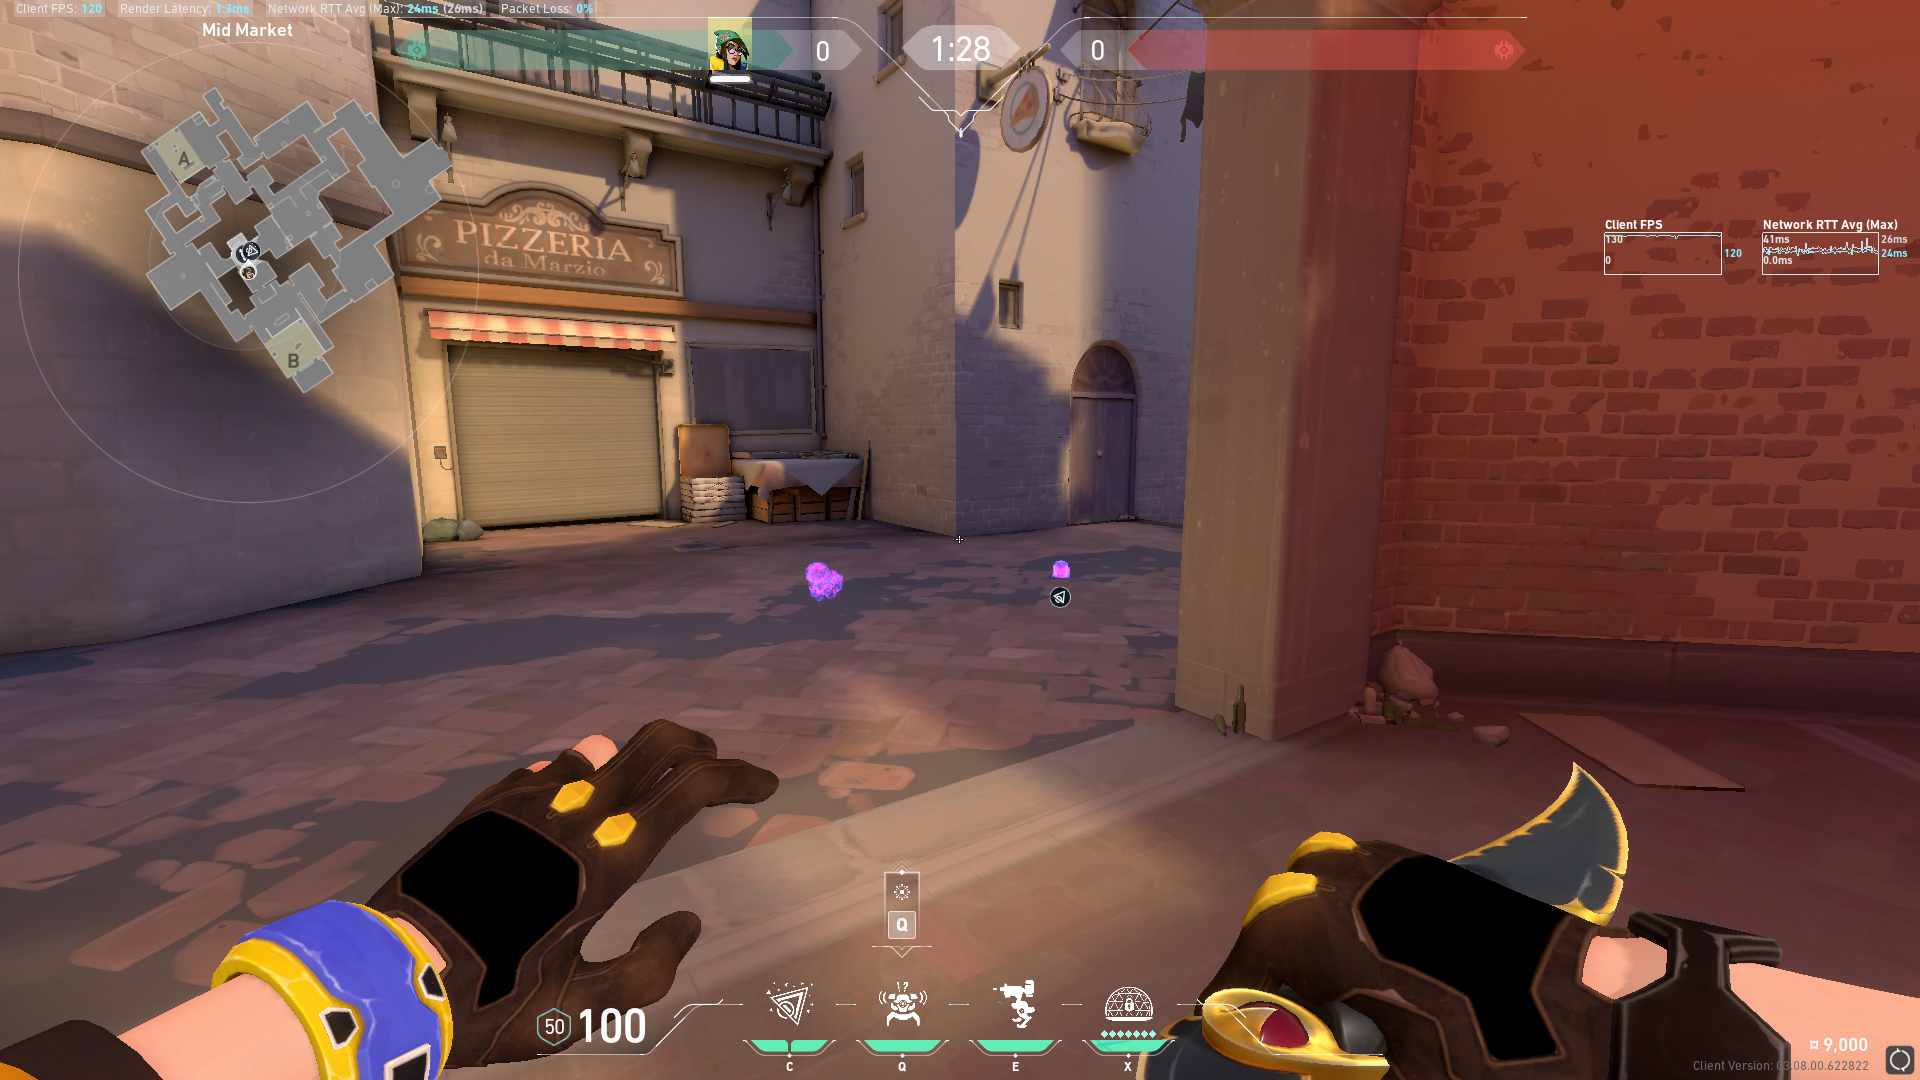
Once your teammate rotates, you can hold a potent crossfire with them.
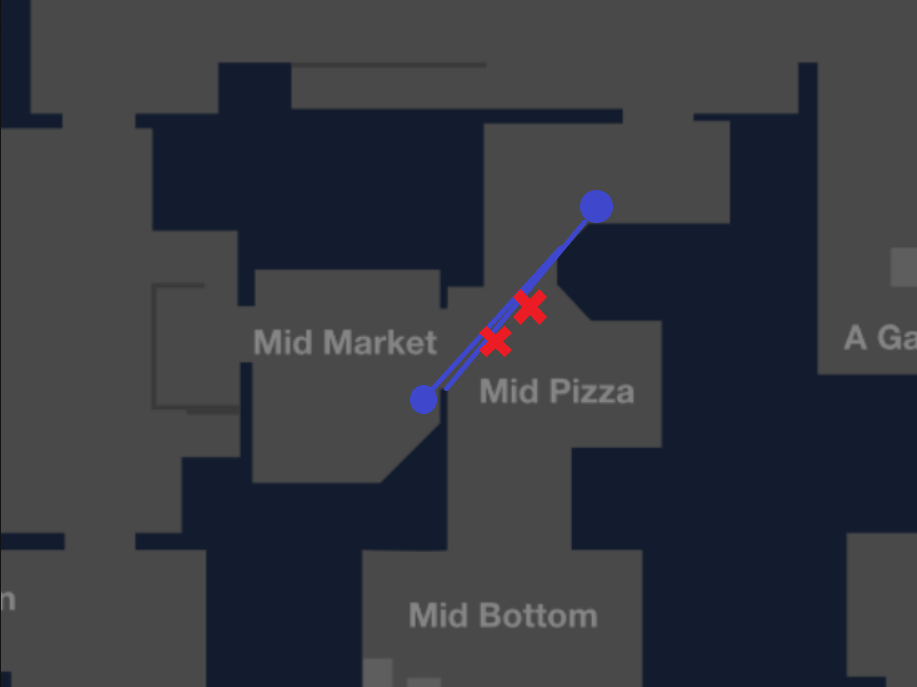
There are two common turret placements on the B site.
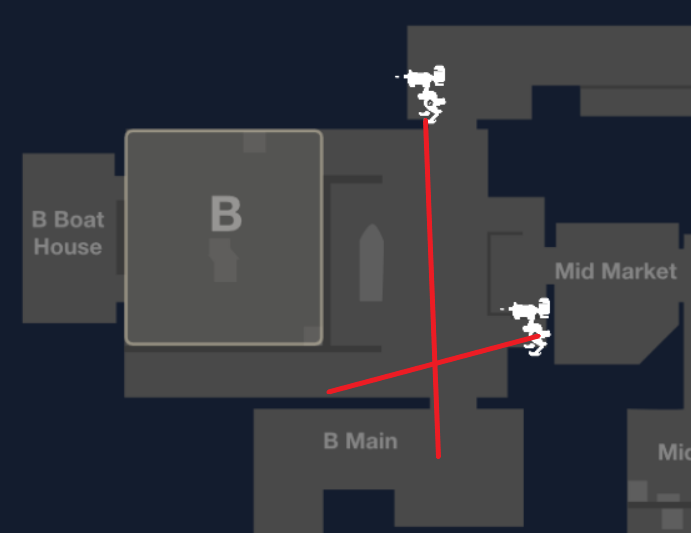
The first one is on top of the barrels in Defender Spawn and watches into B Main. This is a very useful turret because on the top of it peeks out, so it’s hard to hit. Especially on pistol rounds, from long range, it will take a while to break and will slow down pushes and deal important chip damage.
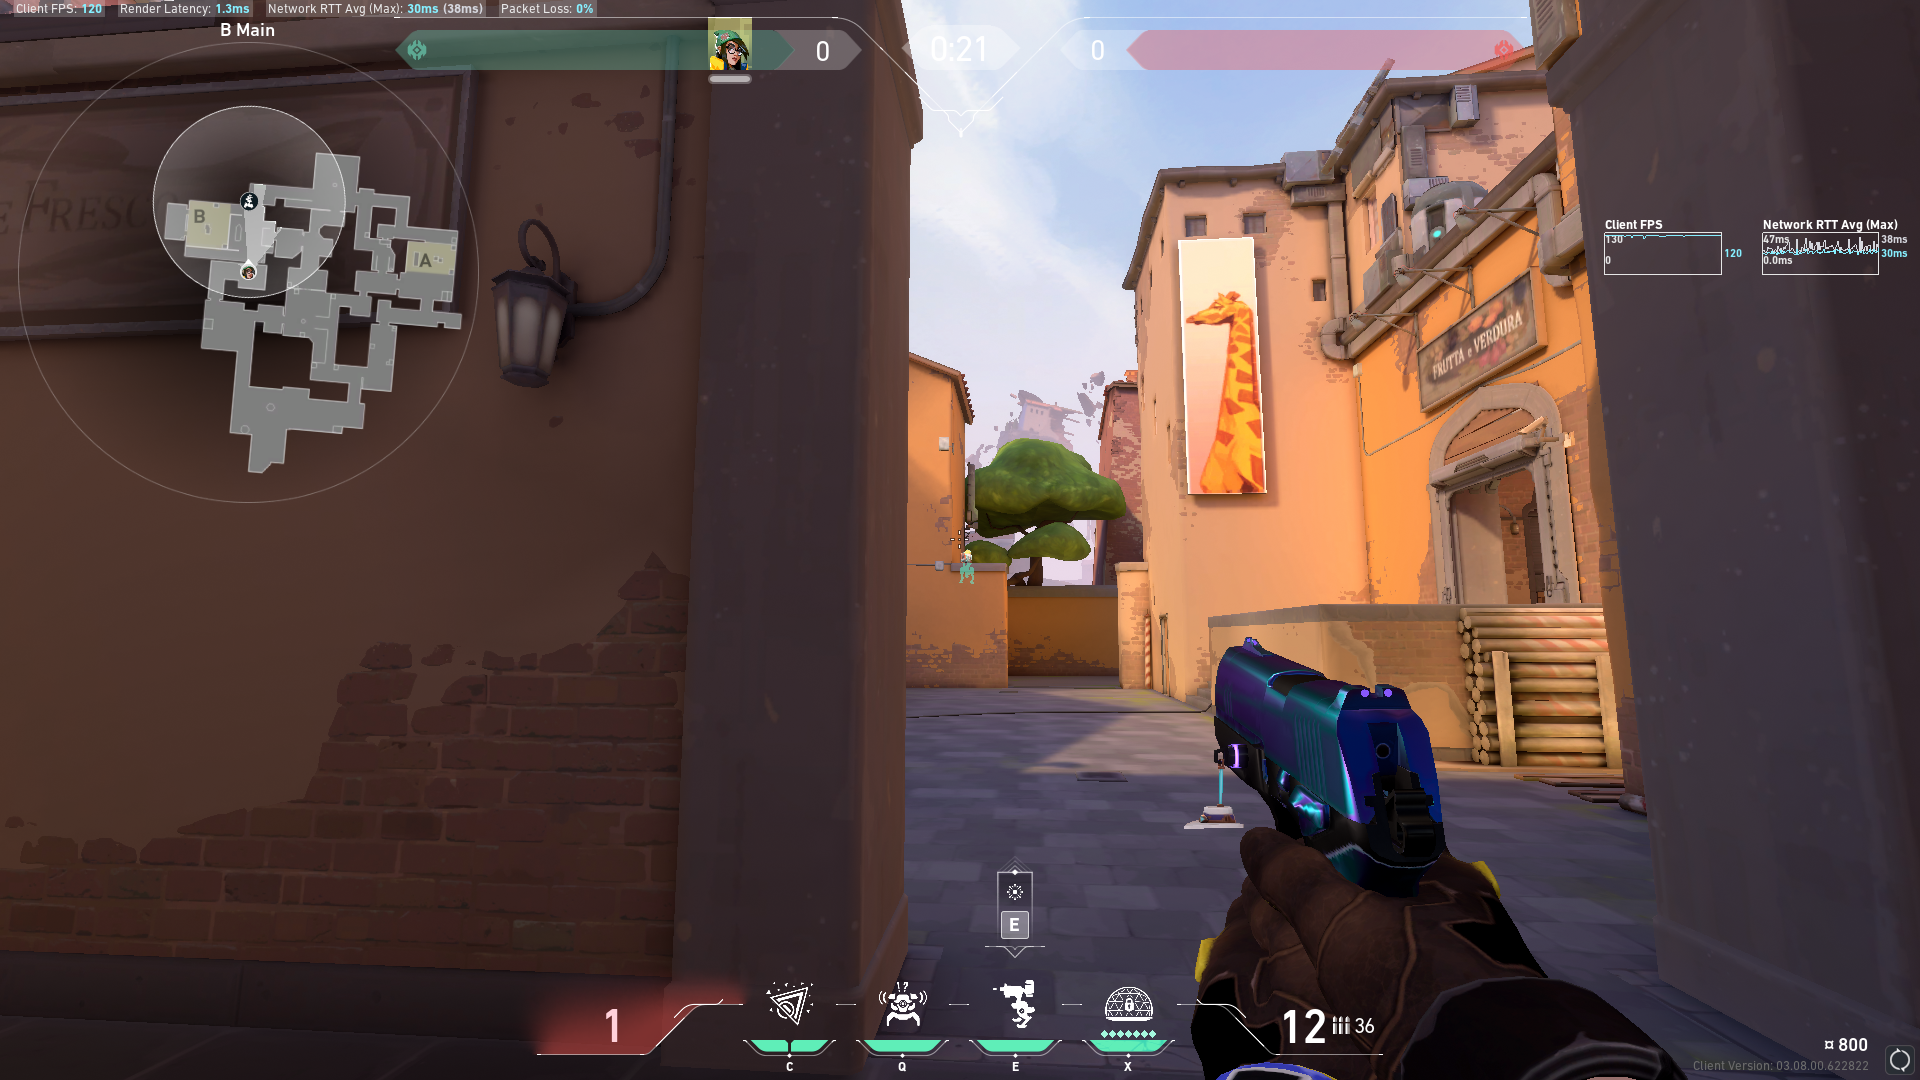
The second one is strong when used with the Toaster setup. If you place it as deep in the Logs Cubby as possible, it won’t shoot enemies in B Main, but it will shoot your enemies that push Lane. Your turret will make it even harder to escape because its bullets will slow them down and deal additional damage.
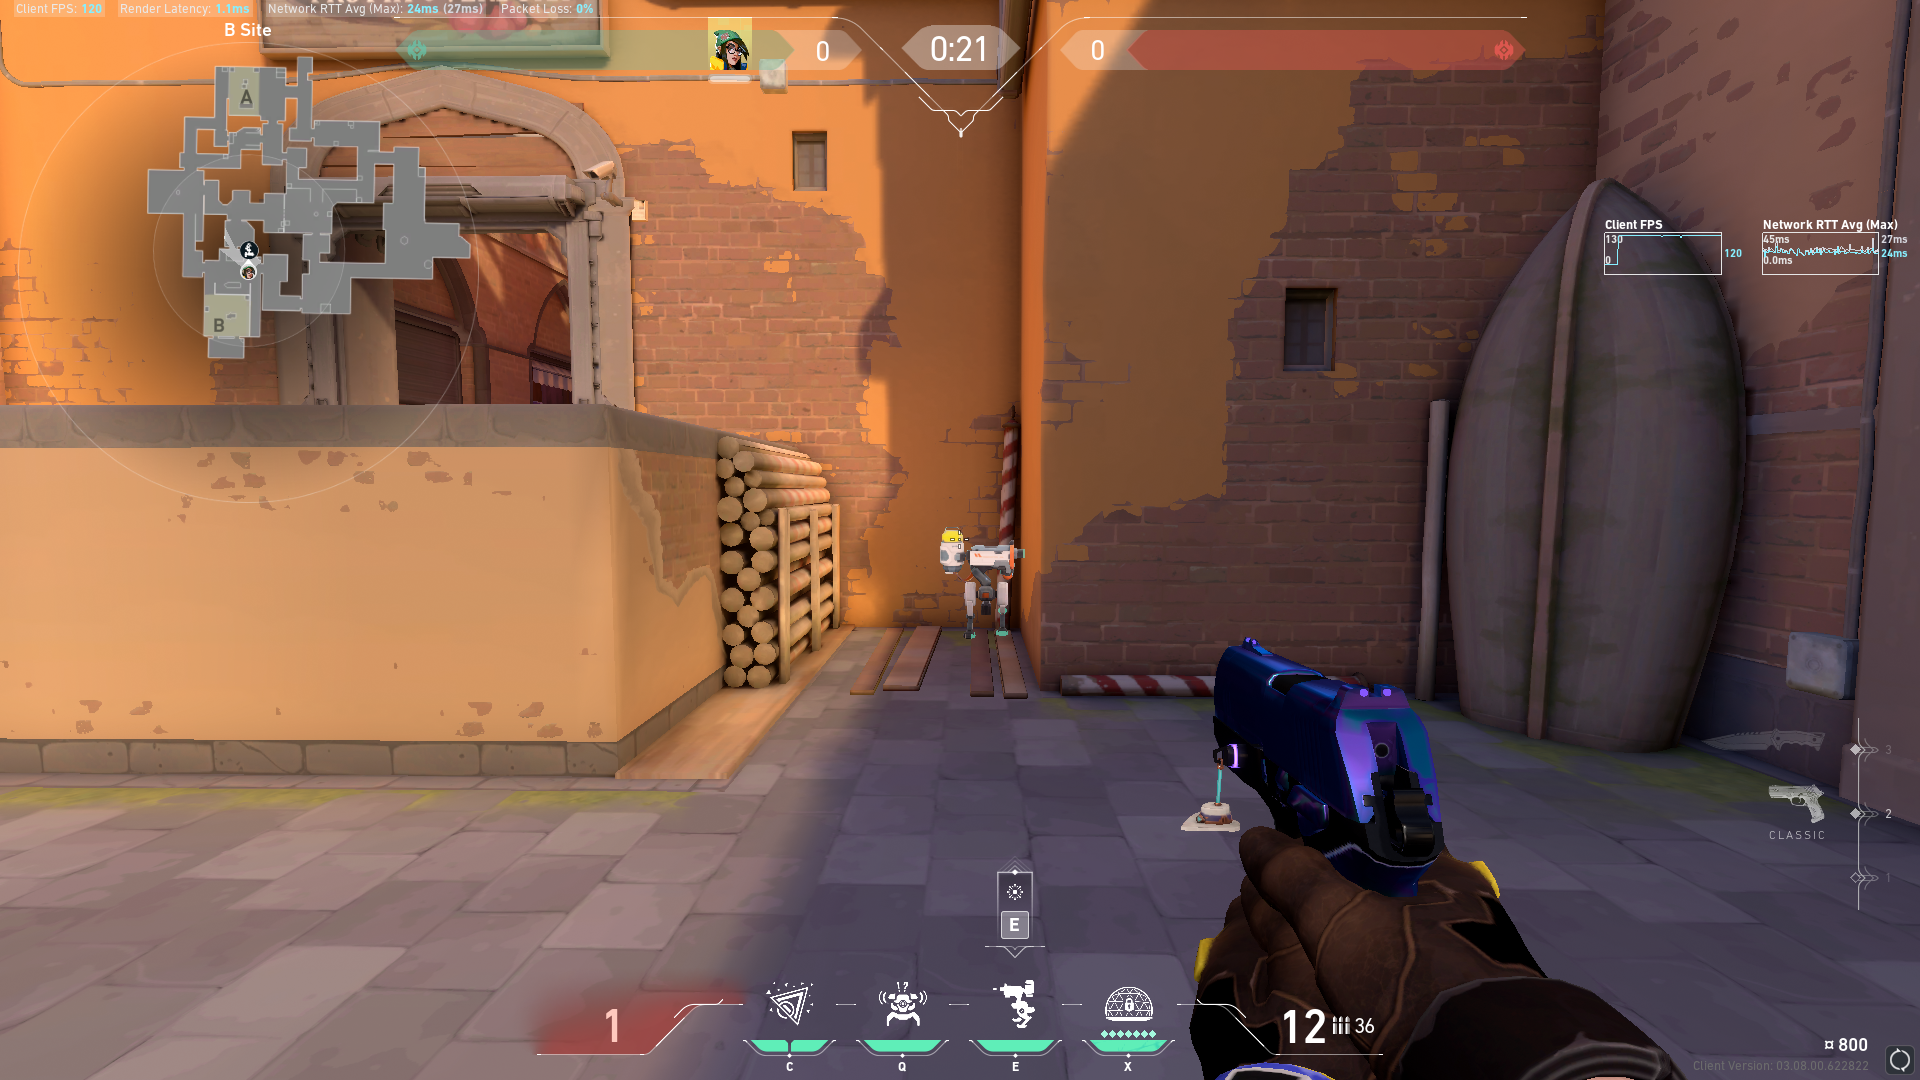
The previous two are the most common and generally the best ones, but these turrets are also fine depending on the situation.
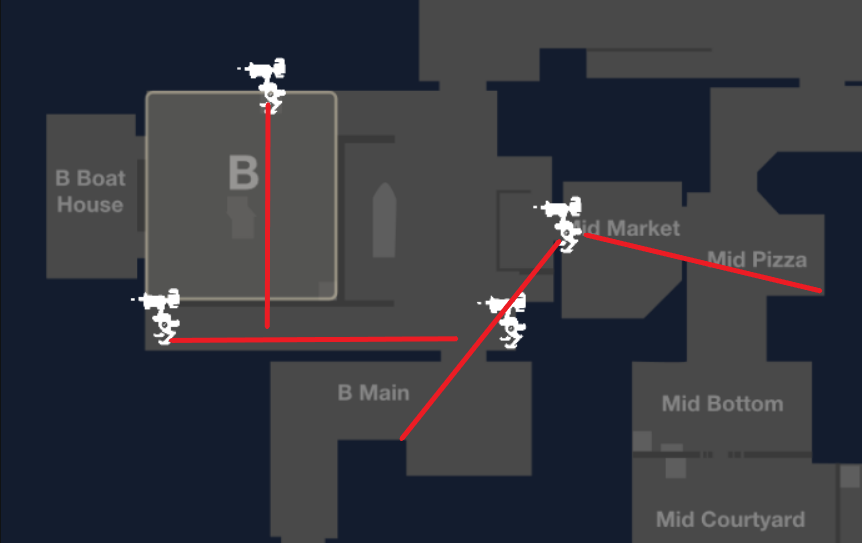
The first one, on the Radianite crates on-site, will shoot enemies as they come out of Lane. You can play inside the Boat House and play off of its contact to kill enemies. The second turret, on the far left, will be at an off-angle to shoot at enemies as they come out of B Main. This will force them to turn away from Markets and Defender Spawn to kill it. The third turret in Markets should be used when you don’t have a teammate playing there. It will act in their place and give you a warning if anyone pushes B Main or Markets.
The last turret will watch very aggressively into B Main. You can sneak into the cubby or play by the entrance and play off of its contact. This is a good strategy for save rounds to fight close-range battles in B Main.
Attackers often push the Tree Room while taking A, and it’s another tight area perfect for Killjoy traps. One simple setup is using these 3 grates. Place your Alarm Bot on the middle one, and your Nanoswarms on the other two.
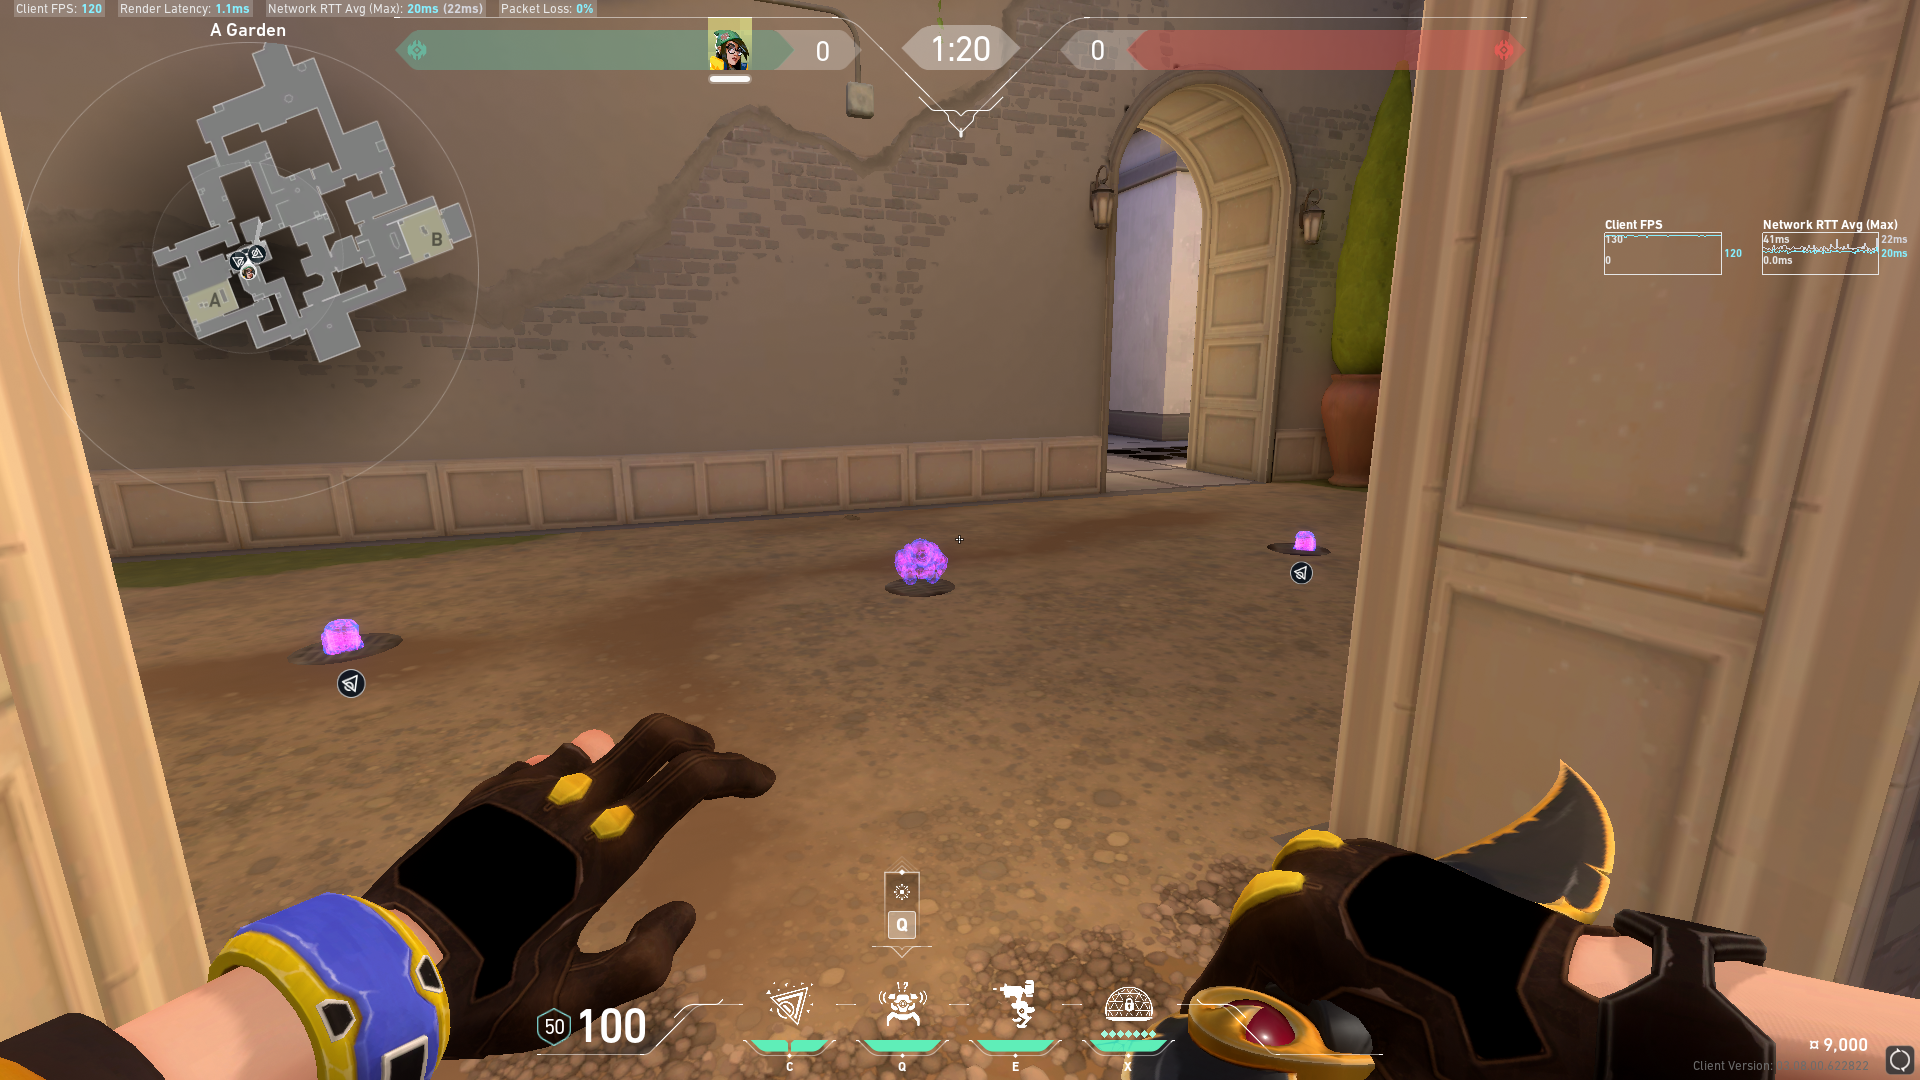
This deadly setup will cover all of Tree Room except for this crack. So, you should be ready to kill weakened enemies running for it.
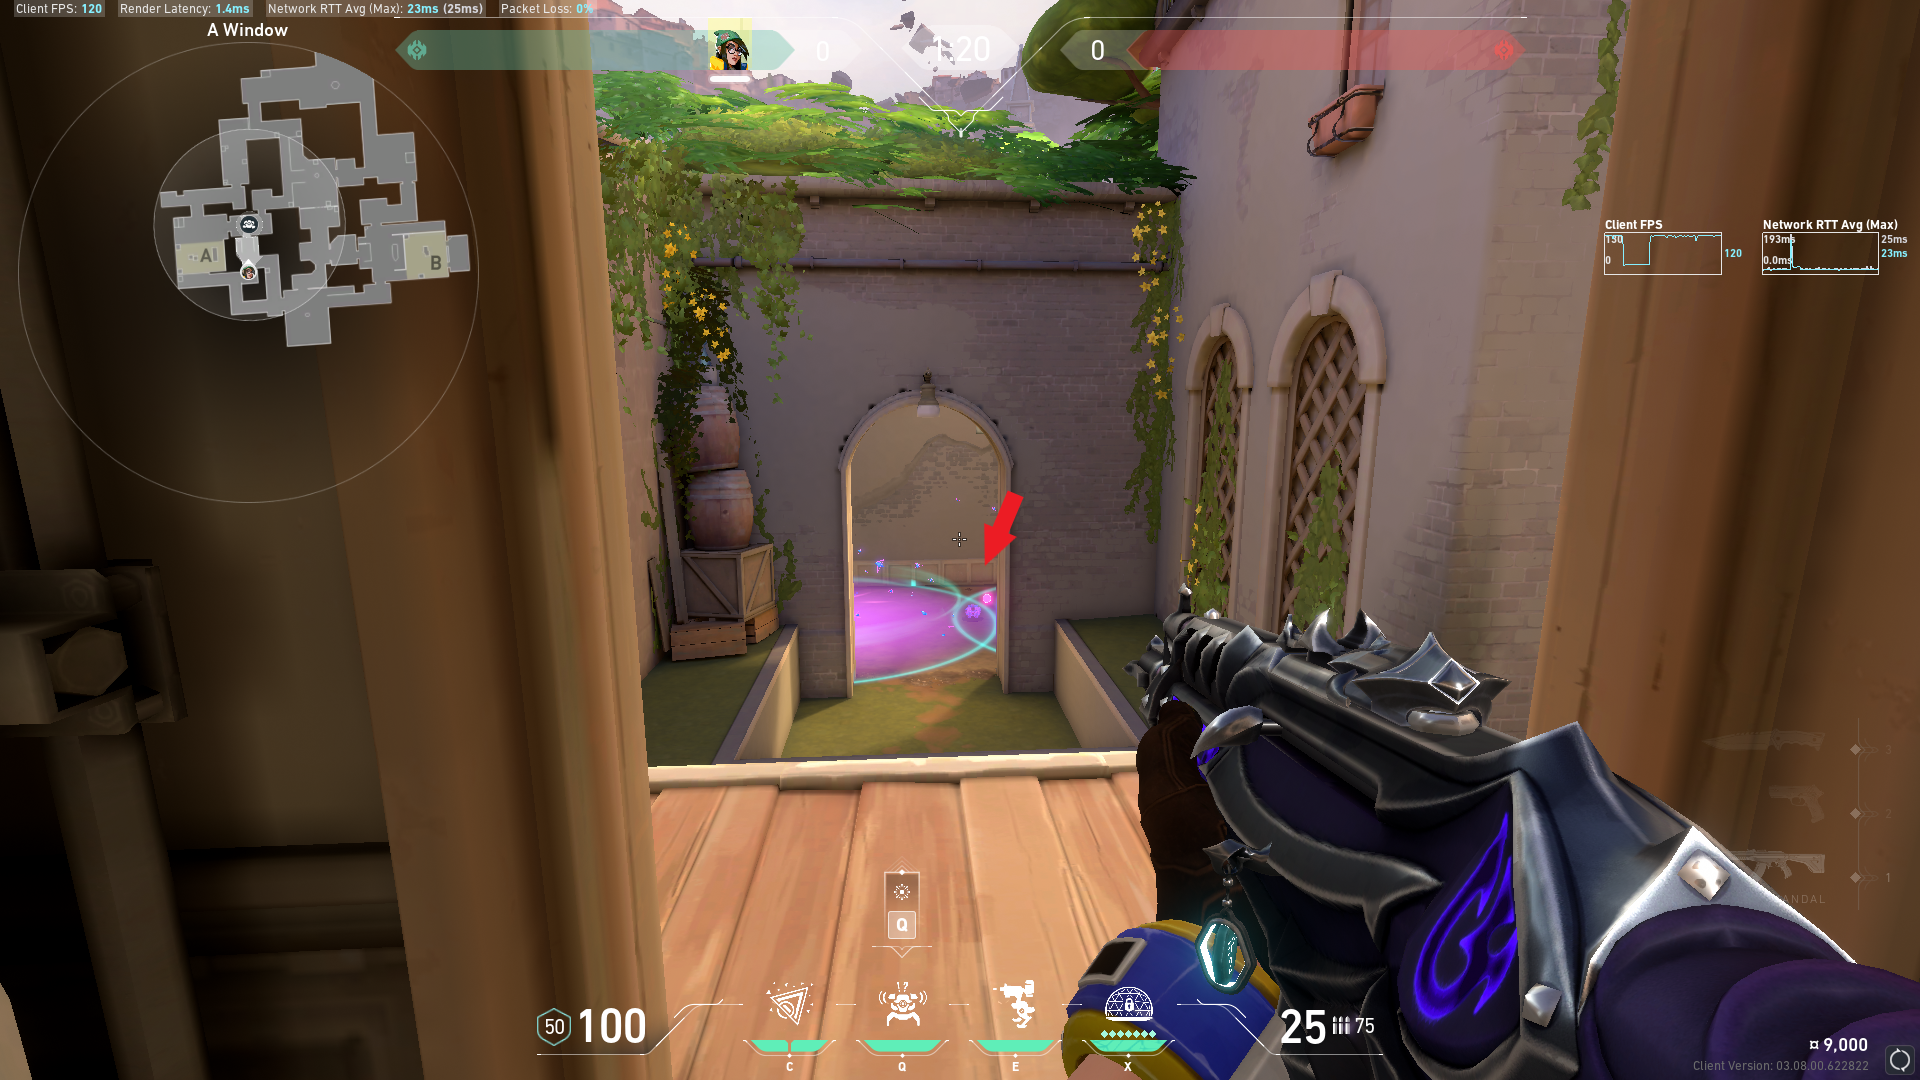
Just like the B Site, attackers will almost always go to close the door on A too. This setup will damage any players that try to close the door or go towards the Generator to plant. First, place a Nanoswarm on the wire by the switch.
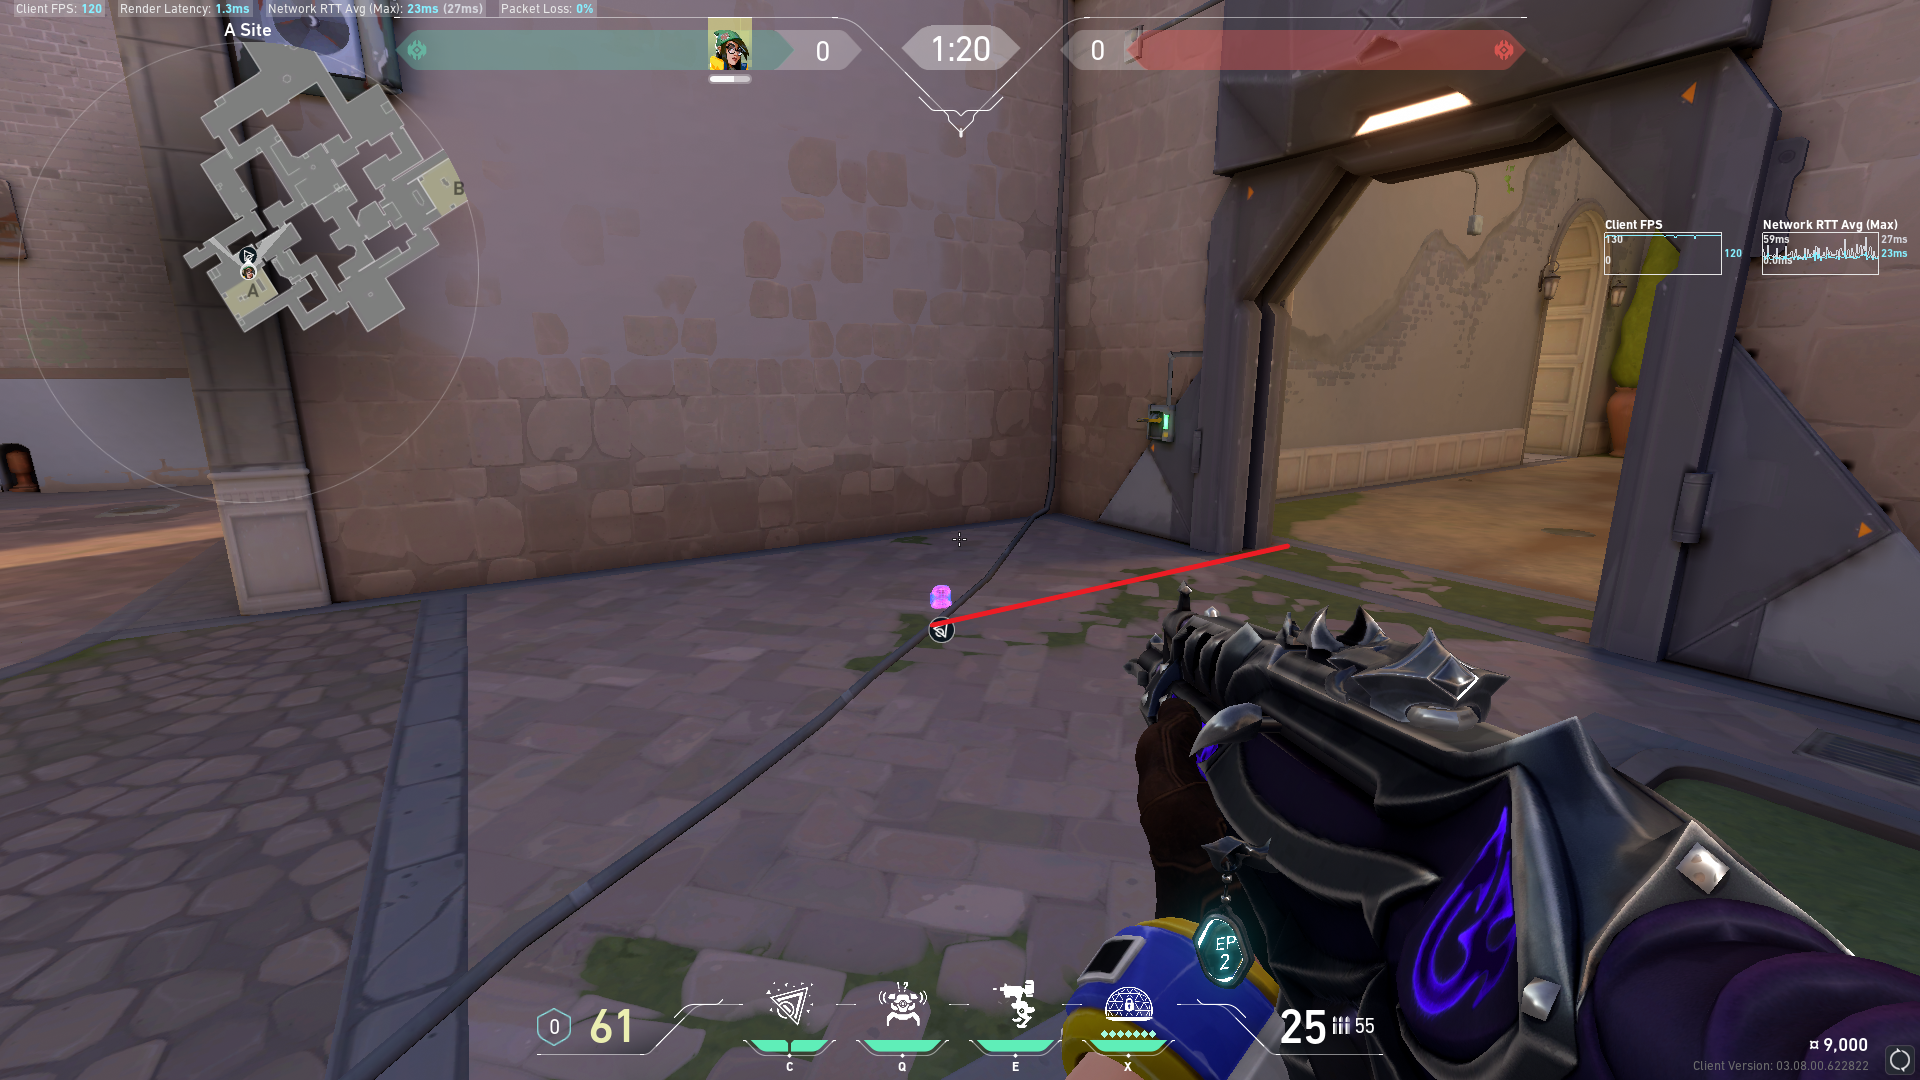
Then place your other Nanoswarm on the second crack in the ledge and your Alarm Bot in the middle so it activates if anyone goes toward the door or Generator.
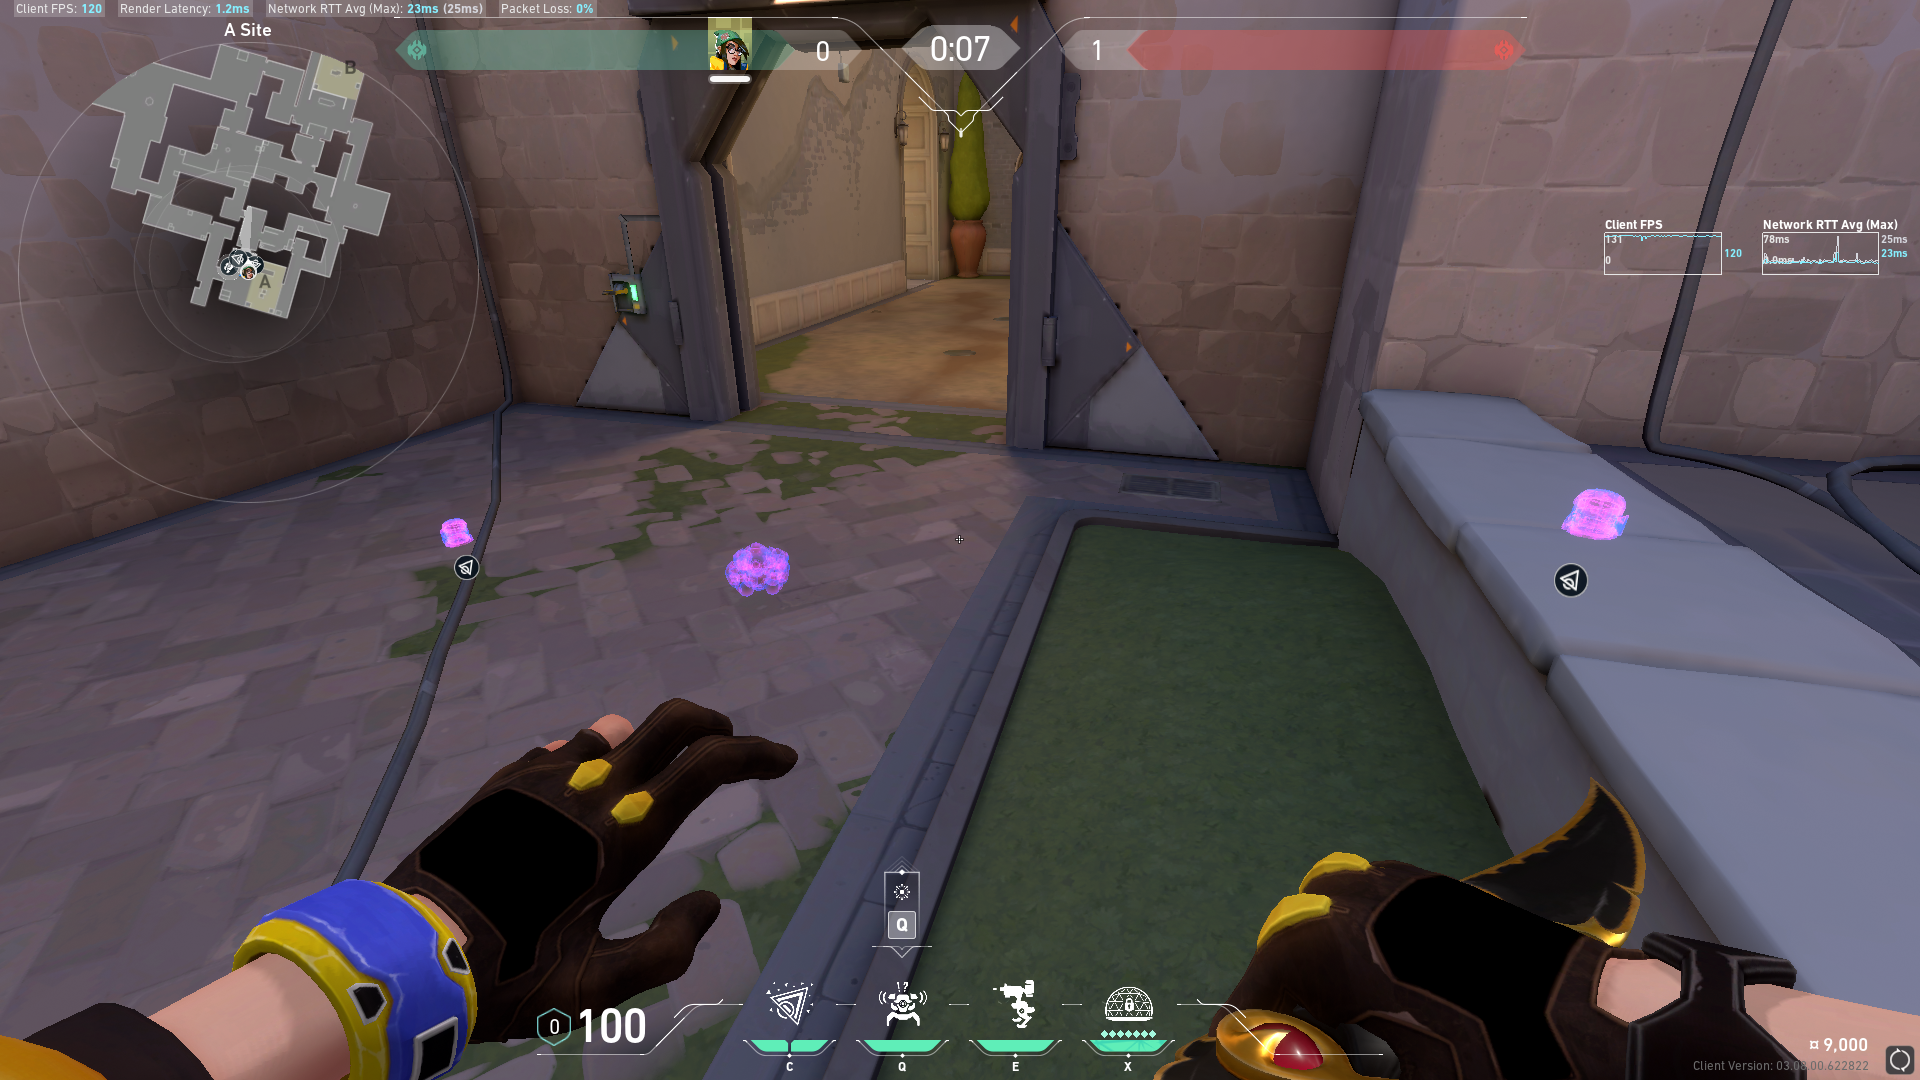
There are many turret spots for A. These two are very commonly used because they can both watch A Main and Tree Room. These turrets will be at an off-angle for attackers pushing out of A Main, so they’ll have to turn to the left or right to shoot them.
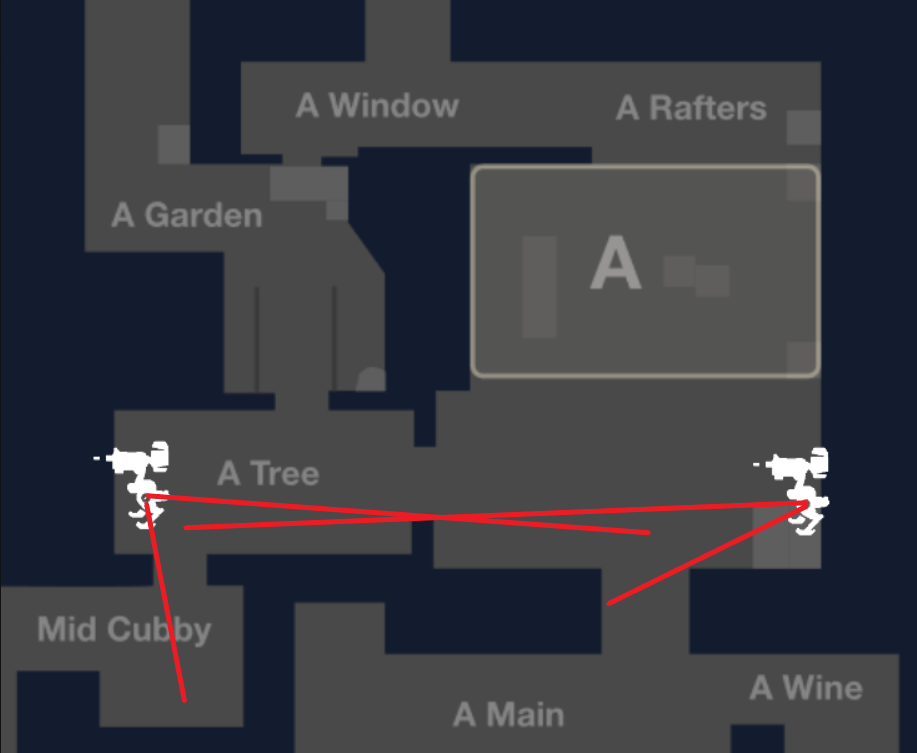
Placing your turret on the boxes on Rafters is acceptable for pistol rounds because it can deal chip damage from afar and you might even be able to pick it up before it gets destroyed. But for rifle rounds, it’s better to place it somewhere else because attackers will get used to isolating it and destroying it before they push site.
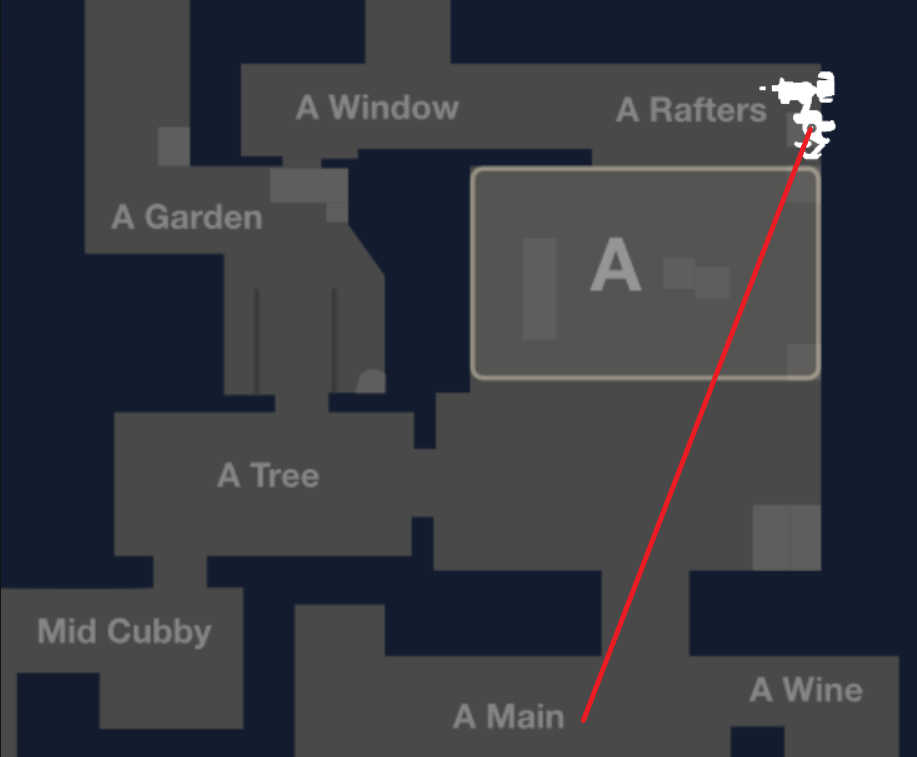
There are two more turrets that are specifically for defending the door switch. Both the turret behind Generator and the turret in Hell will only activate once an attacker gets close to the switch. So it’ll only slow attackers down once they’re in the other traps, making the Door Setup even more effective.
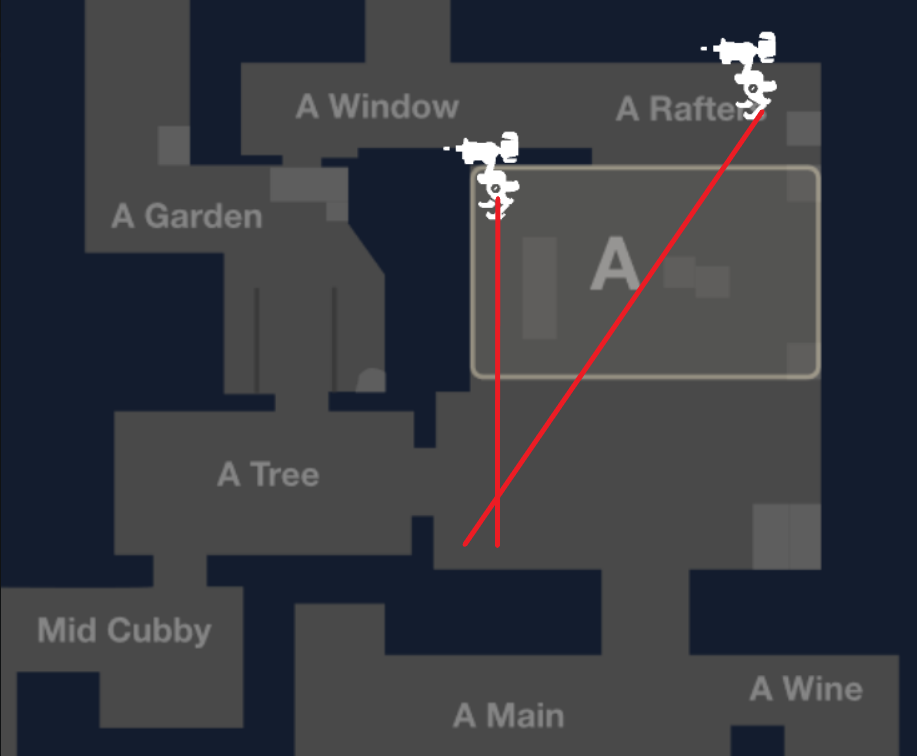
Killjoy’s ultimate, the Lockdown, detains all enemies within its 30-meter radius which disables their weapons and abilities. The Lockdown is great for retakes because it forces all attackers off the site, making a defuse much easier.
If you play B as Killjoy, you will often be retaking A. This Lockdown and Nanoswarm combo basically guarantees a defuse. First, place your Lockdown in this corner.
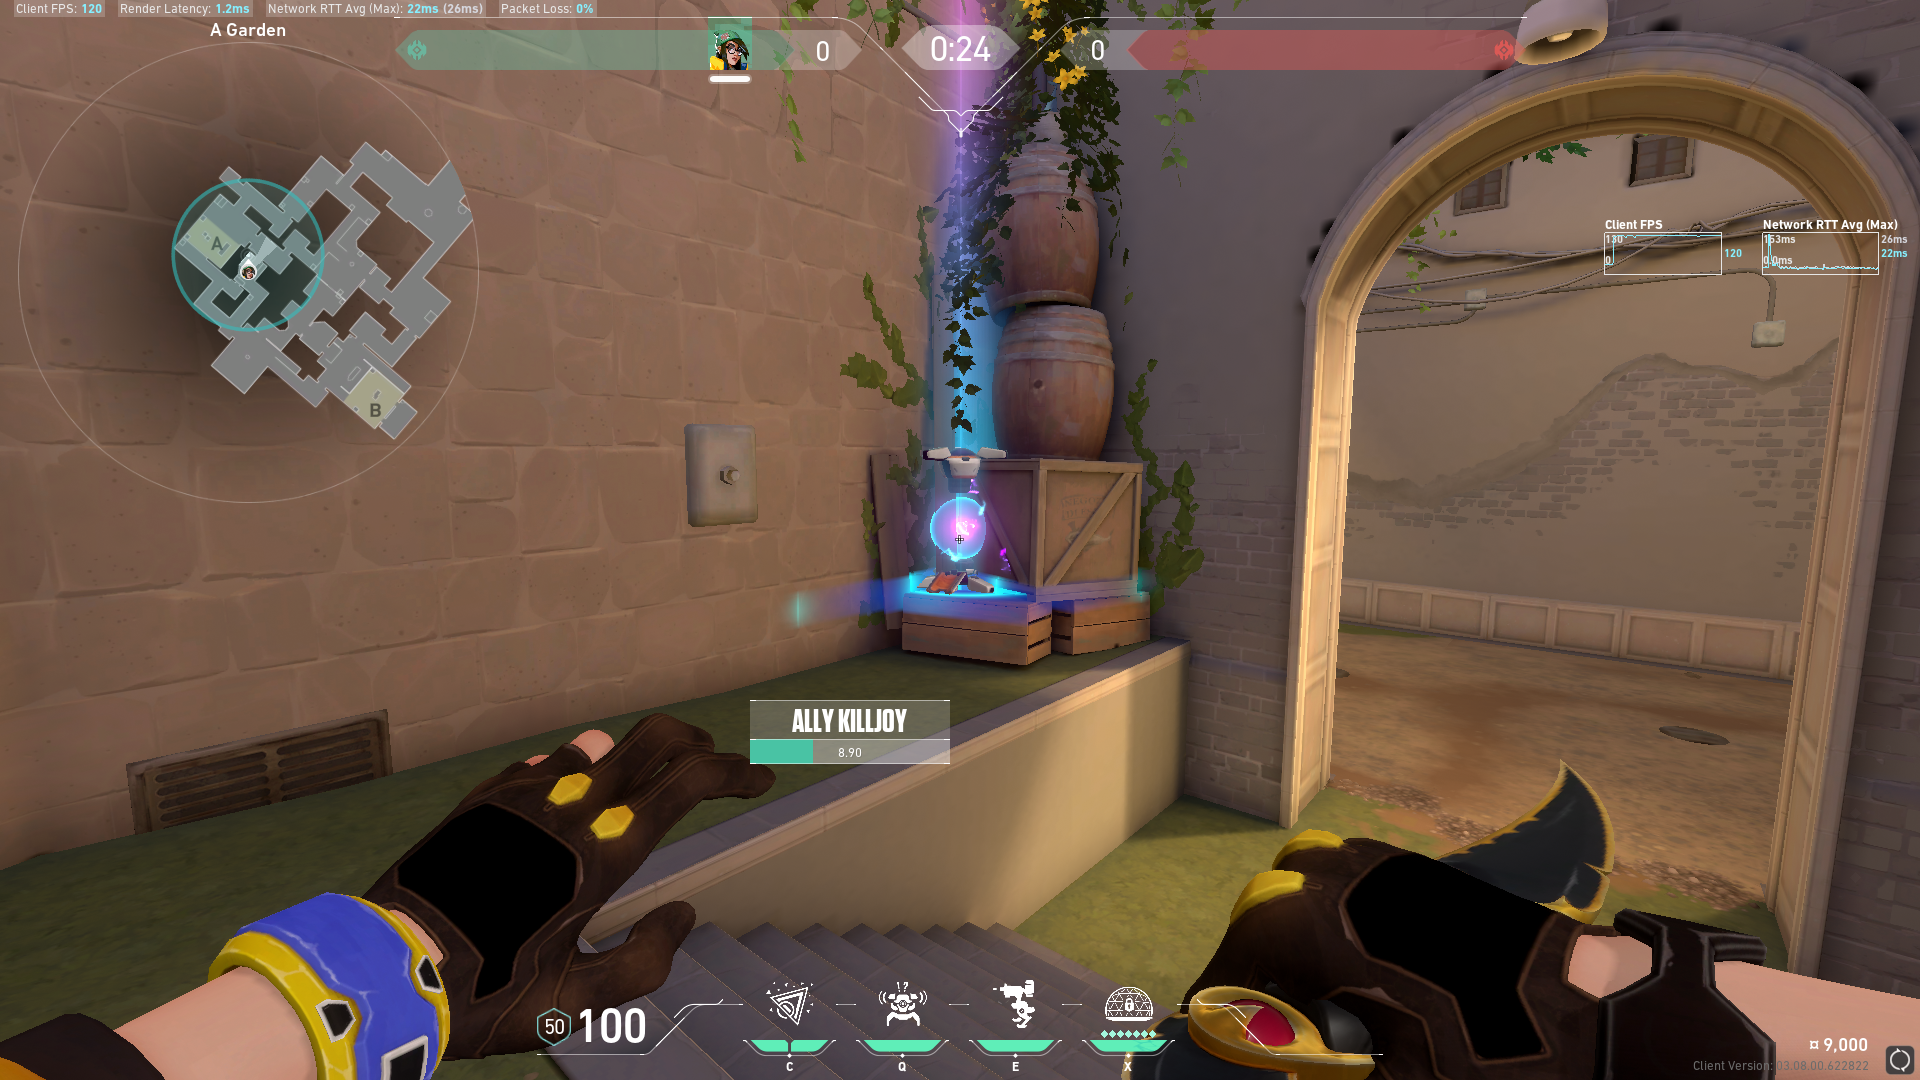
The Lockdown will completely cover the site and force attackers to back off to A Main or Wine. To make this Lockdown even more effective you can throw a Nanoswarm into Wine. To do this, you have to make sure Tree Room is safe and the door is closed. Then, go into this corner between the tree and the wall.
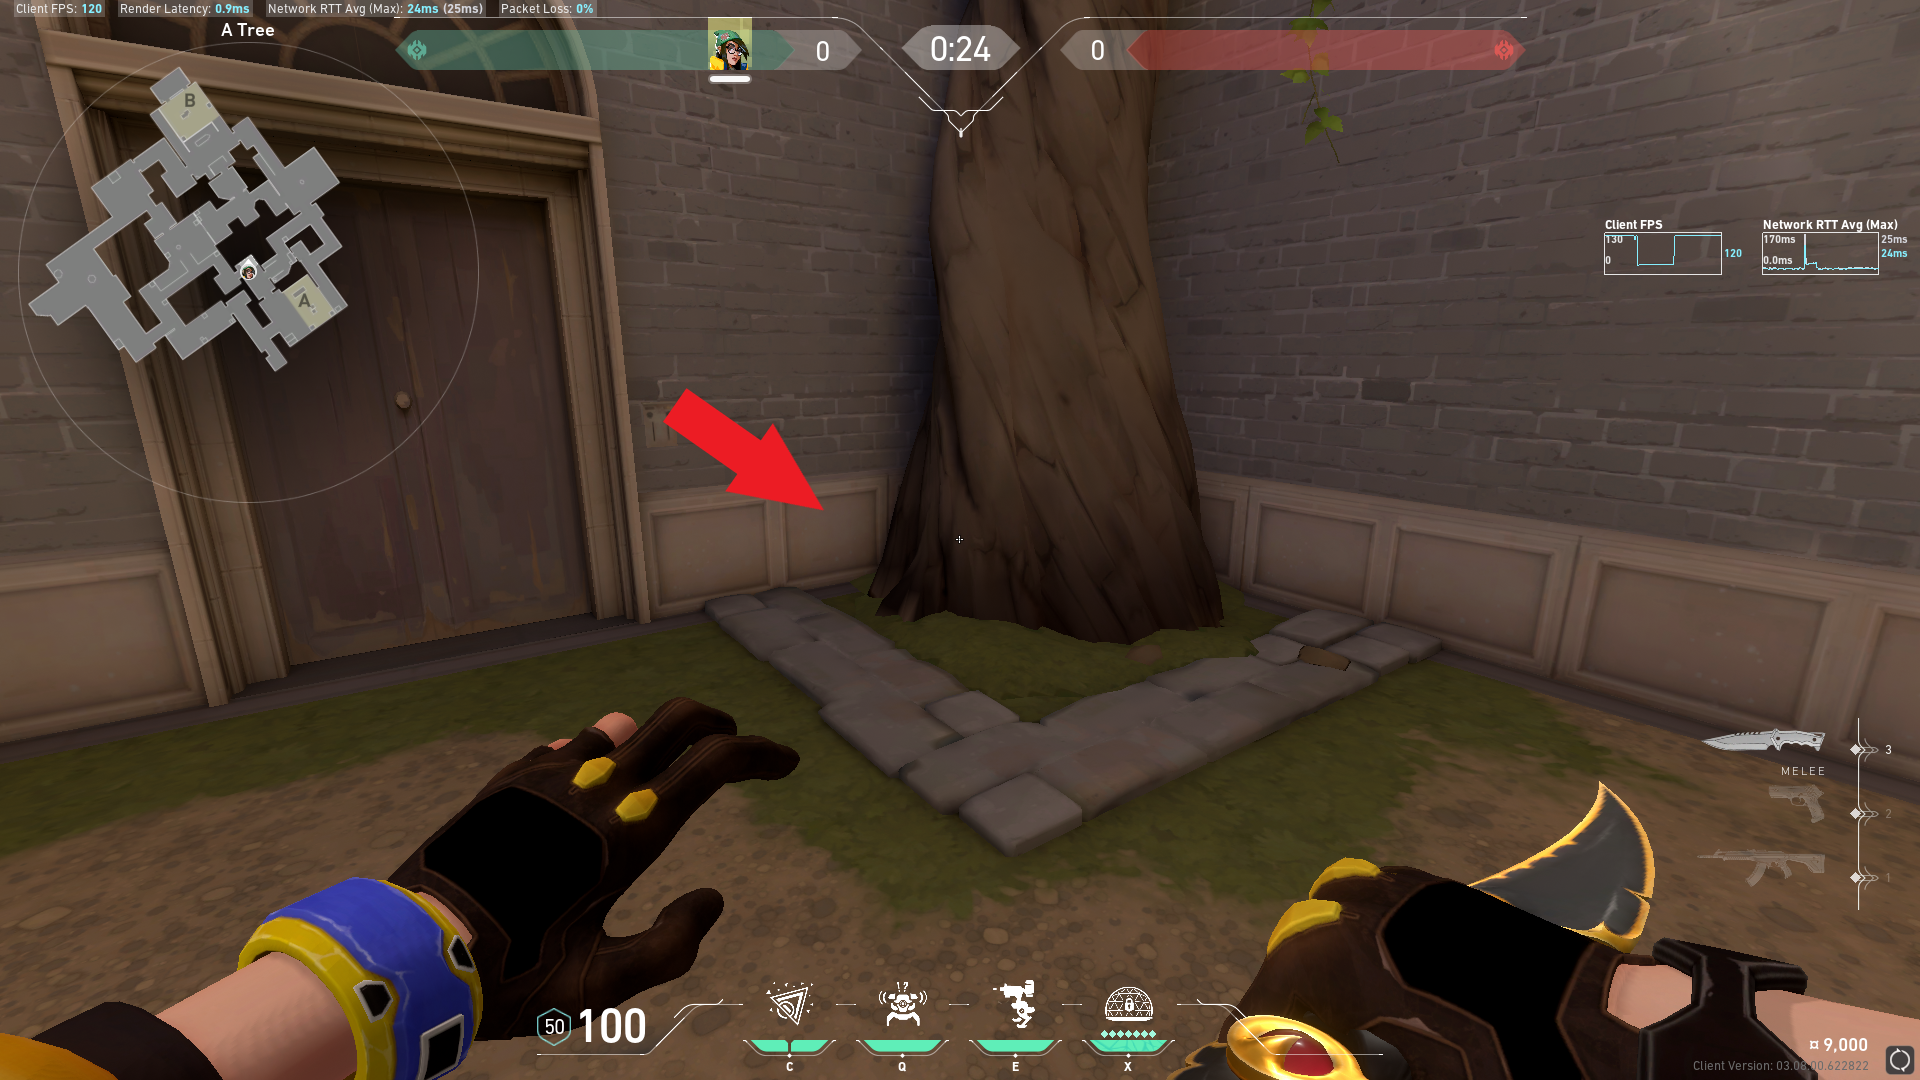
After that throw your Nanoswarm and the empty space above the tree branch.
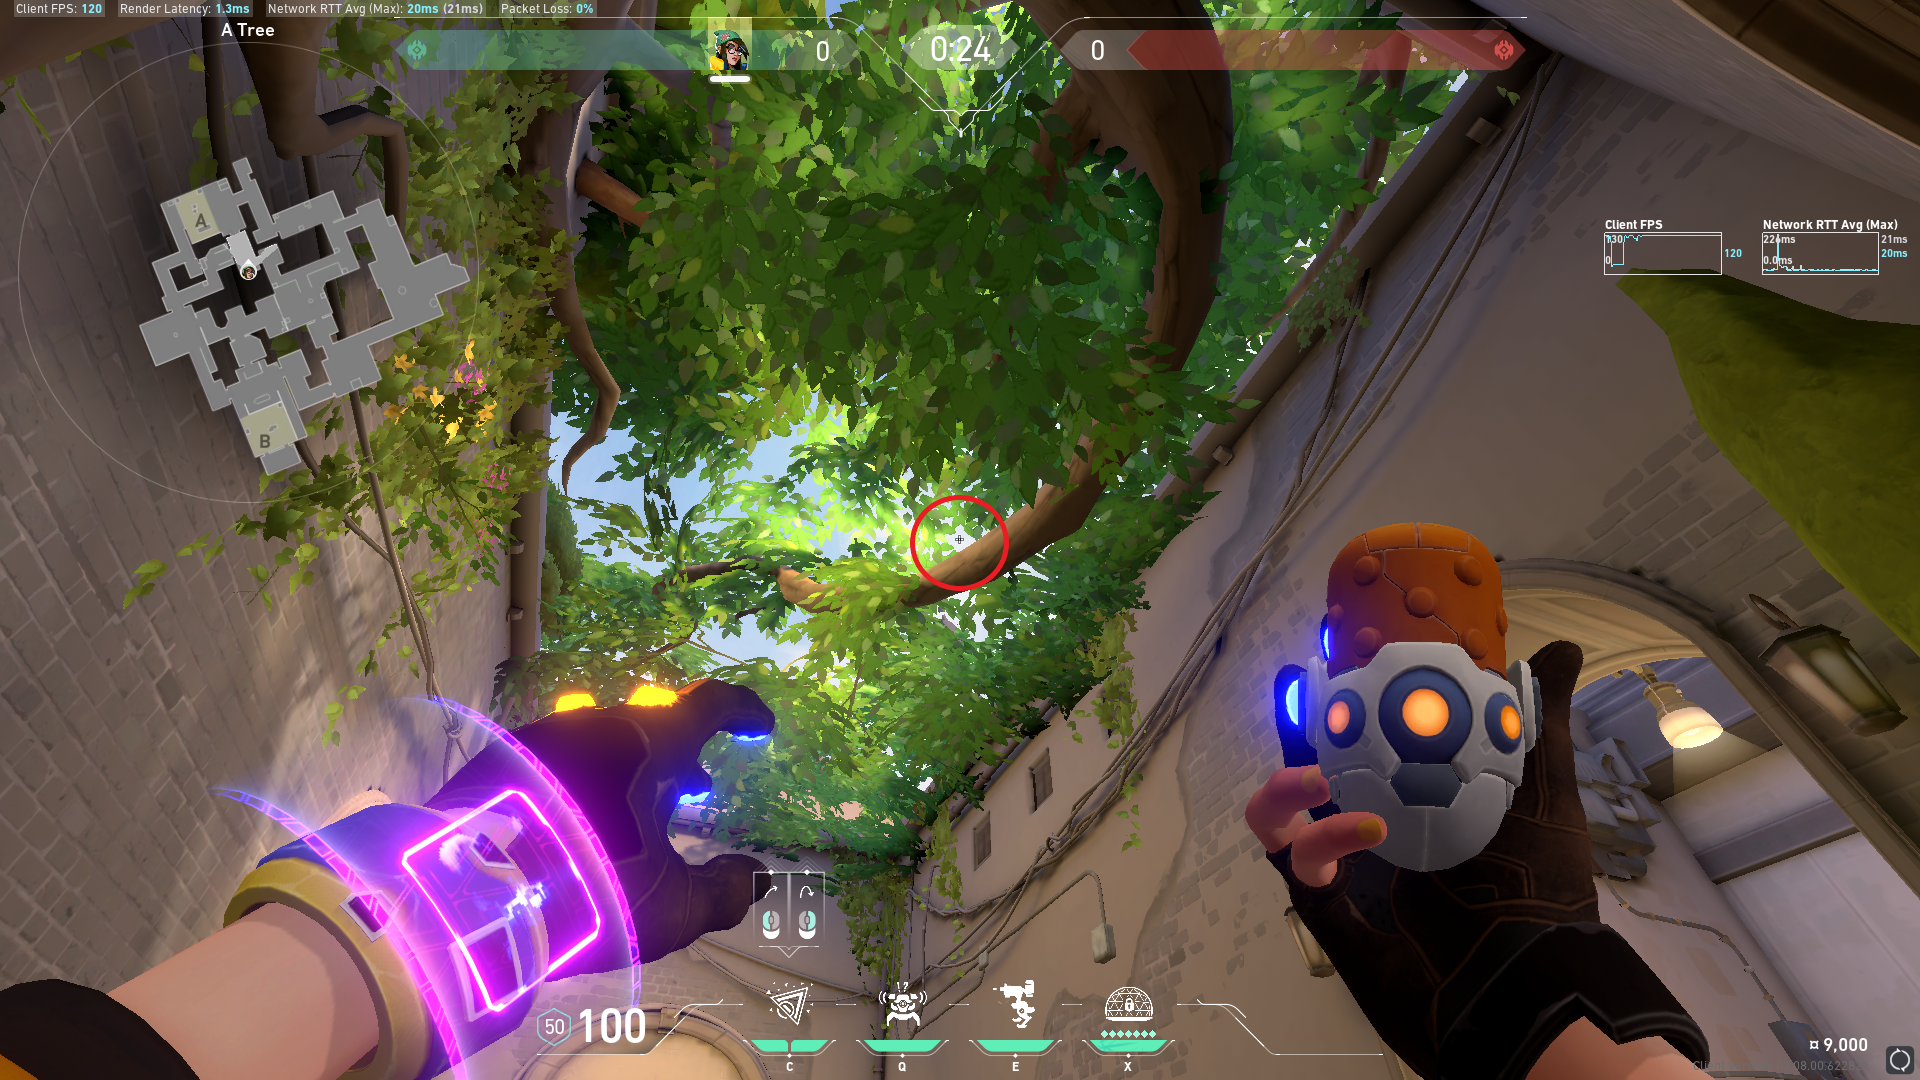
If you throw this Nanoswarm when the Lockdown has around 7 seconds left and activate it as soon as it lands, the attackers in Wine will have to choose between being detained or dying to a molly. The attackers that went to Wine will either be detained or die and the attackers in A Main will be far, so it’s a very easy defuse.
There is also a Lockdown spot for retaking the B site. This Lockdown will completely cover the whole site and force the attackers to run out towards you and your team. Before you use this Lockdown, you have to first make sure there are no attackers offsite that can break it. Also, it’s important to be looking down when placing it because otherwise you’ll place the Lockdown on the table, and the attackers can wall bang it there.
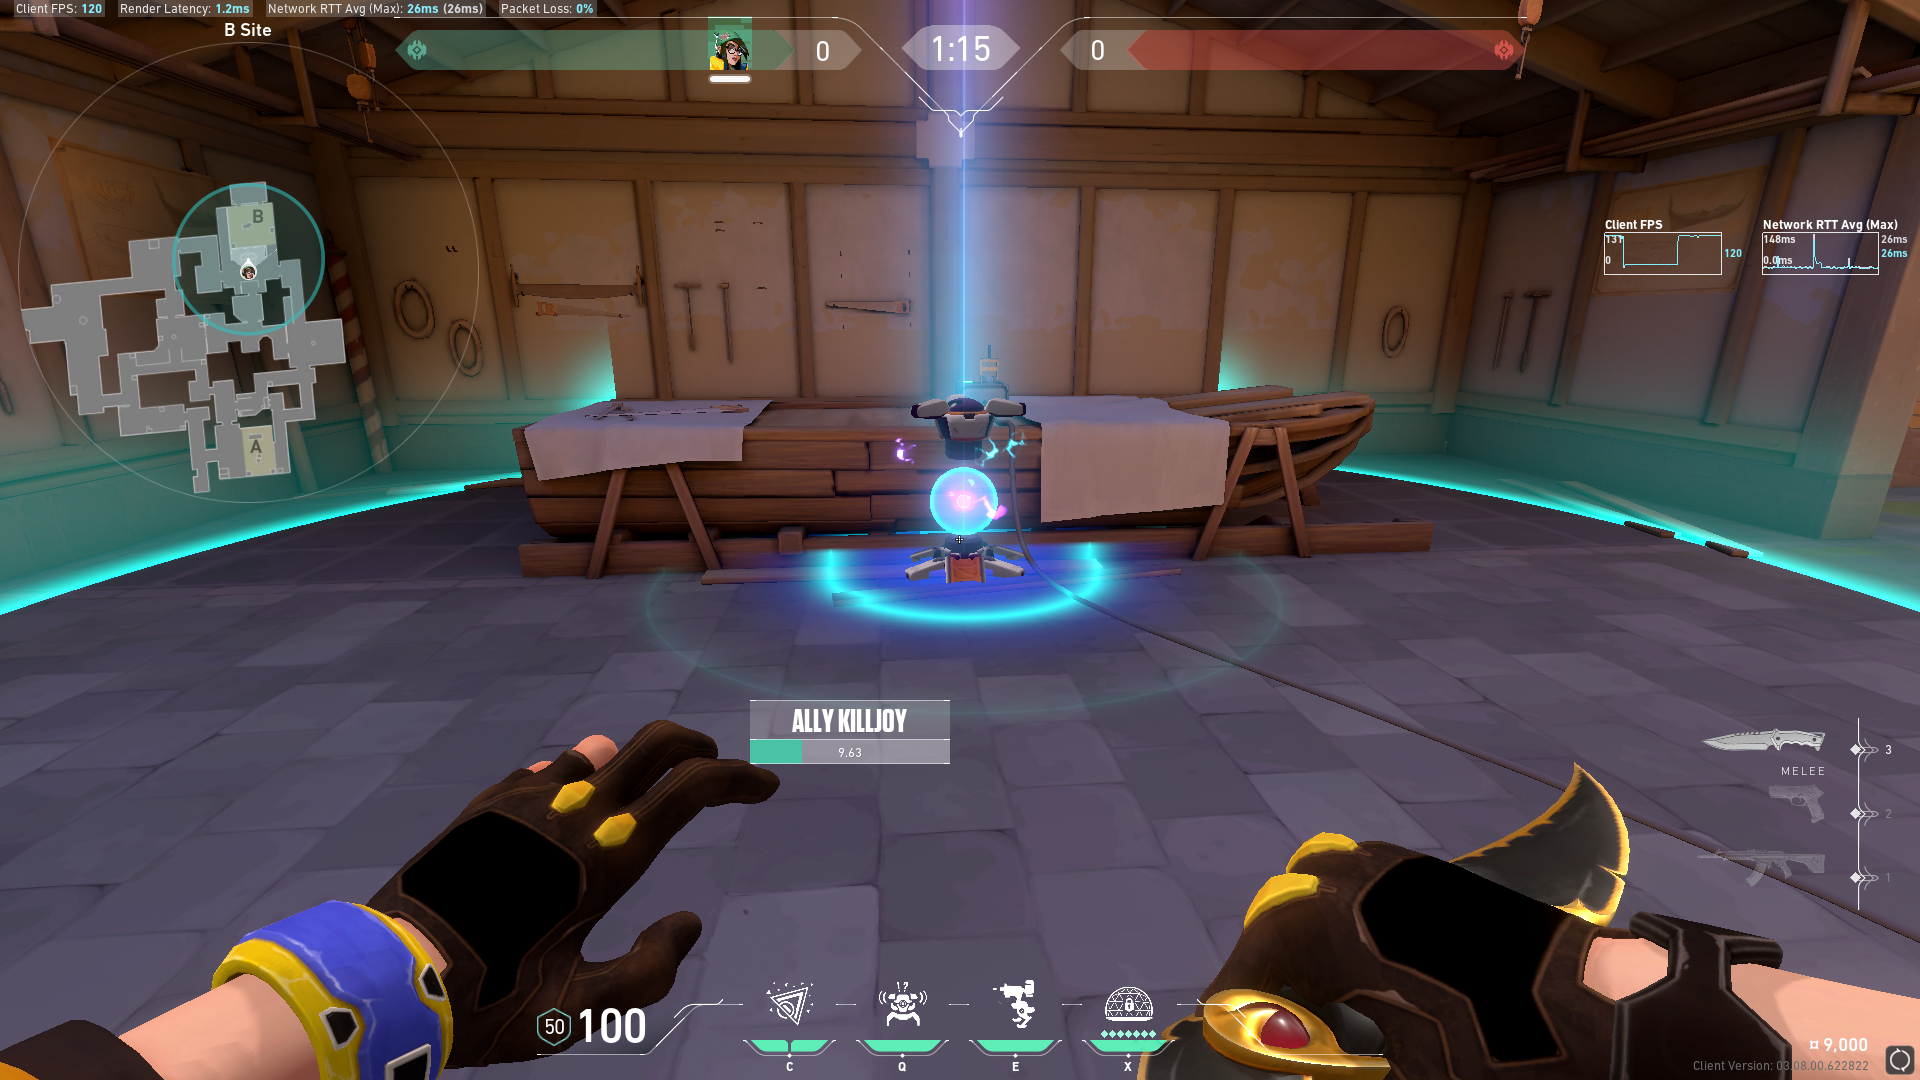
Killjoy’s strength as a Sentinel is on defense, but she can still provide high impact by using her Lockdown for site takes and denying defuses. Her turret can also provide support and watch flanks.
One of the best turret spots for Mid is on top of the wall in Tiles, or Mid Link. Place in the very right of the left wall.
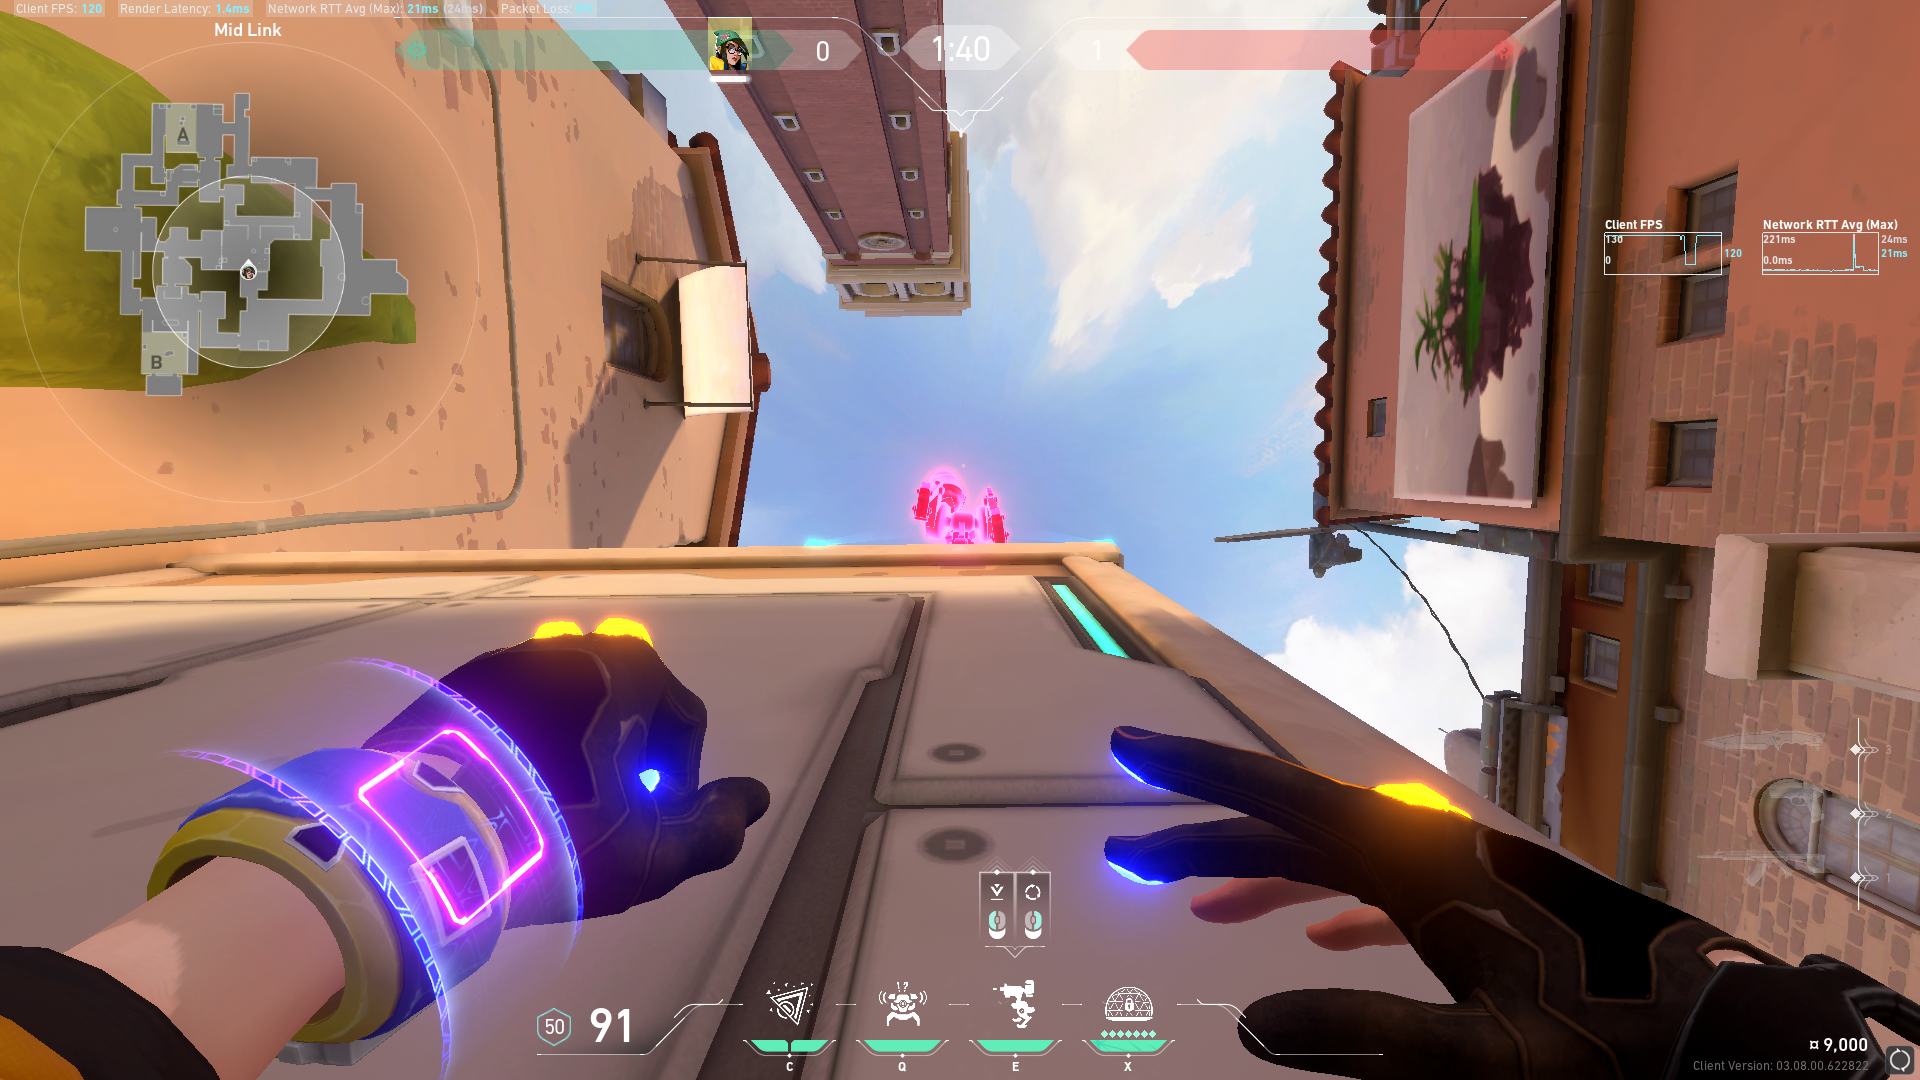
This turret can see into Cat Cubby, and it’s so high up it can see over the Bottom Mid arches all the way towards Defender Spawn. So this turret can cover you if you push Mid or watch your flank if you push B.
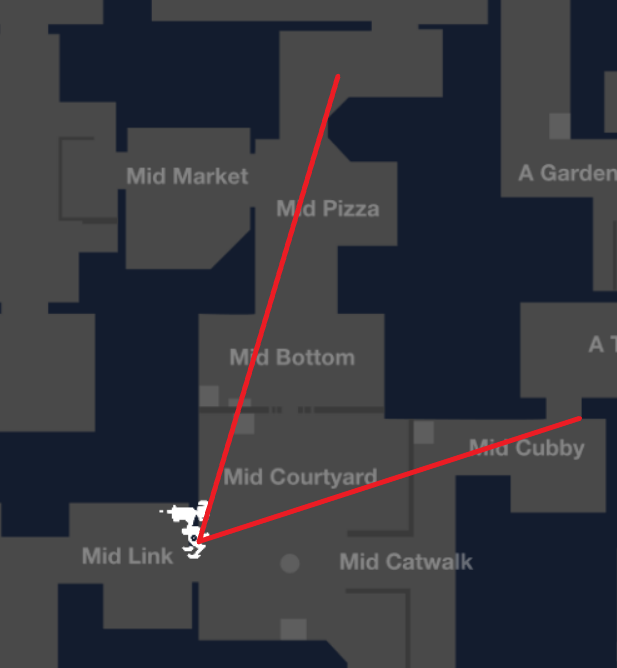
Placing your turret in A Main or B Main can watch flank and shoot any defenders that push it. And for post plants, placing your turret onsite will slow down retakes and you can peek off of it while the defenders are distracted by it.
Just like on Defense, Lockdowns can cover sites and force enemies off them. These two ultimates in B Main and A Main will let you walk on to sites with ease. Just be careful because the A Lockdown won’t cover the right side of Hell or Rafters, so enemies may hide there.
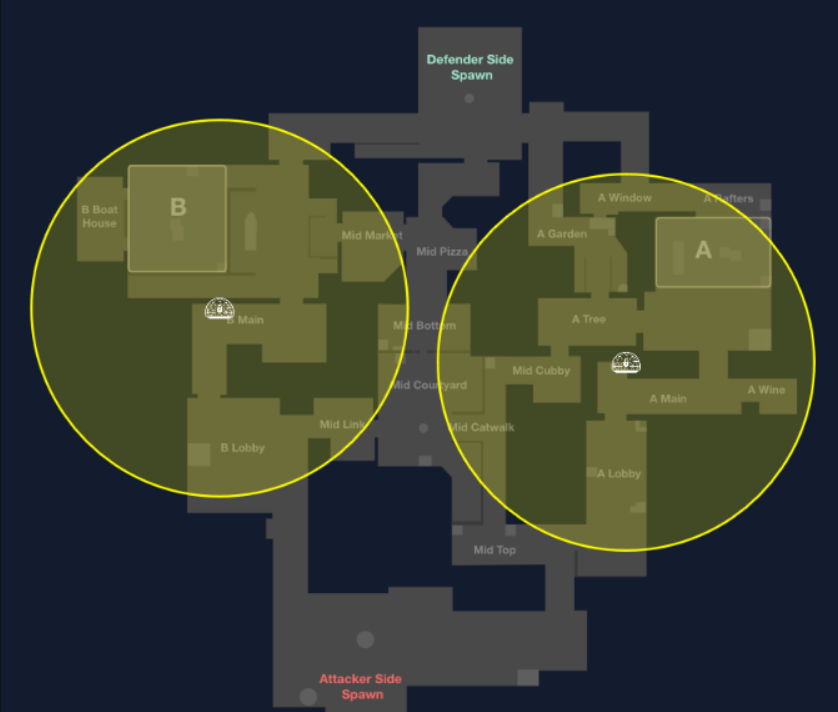
Once you take the site and get the spike down, your goal is to keep defenders from defusing the spike, which Killjoy’s abilities are great for. You can place your Nanoswarms directly on the spike, but many players know to break them, so it’s often better to use lineups from a safe distance away.
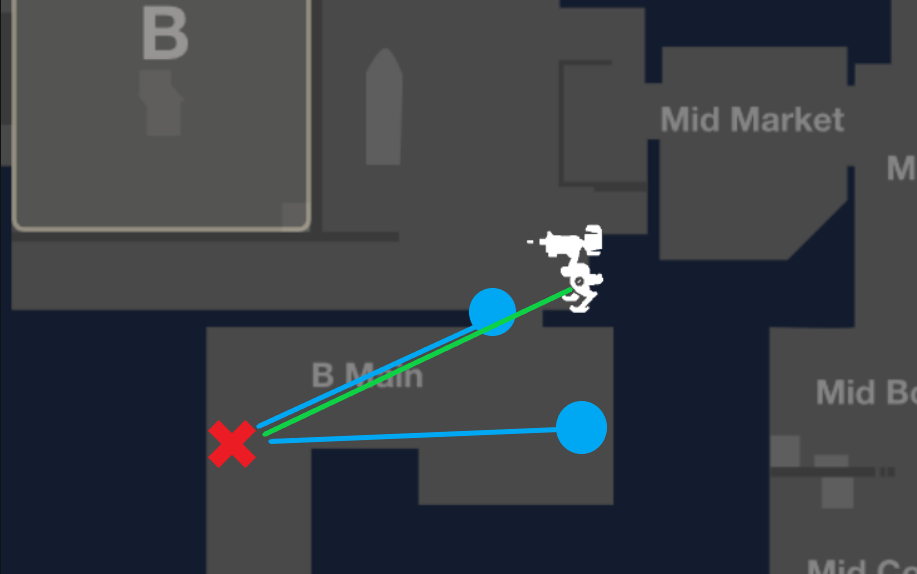
For the A Site, if the Spike is planted in front of the Green Boxes, first get in this corner between the Radiant Boxes and the wall, and then aim at the tip of this spike and throw your Nanoswarm.

If the Spike is planted in front of the Generator, start in the same corner and align the tip of your turret’s icon with this tiny spike.

Lastly, if the Spike is planted at the default Green Boxes on the B site, then go into this corner in B Lobby and aim at this spike.
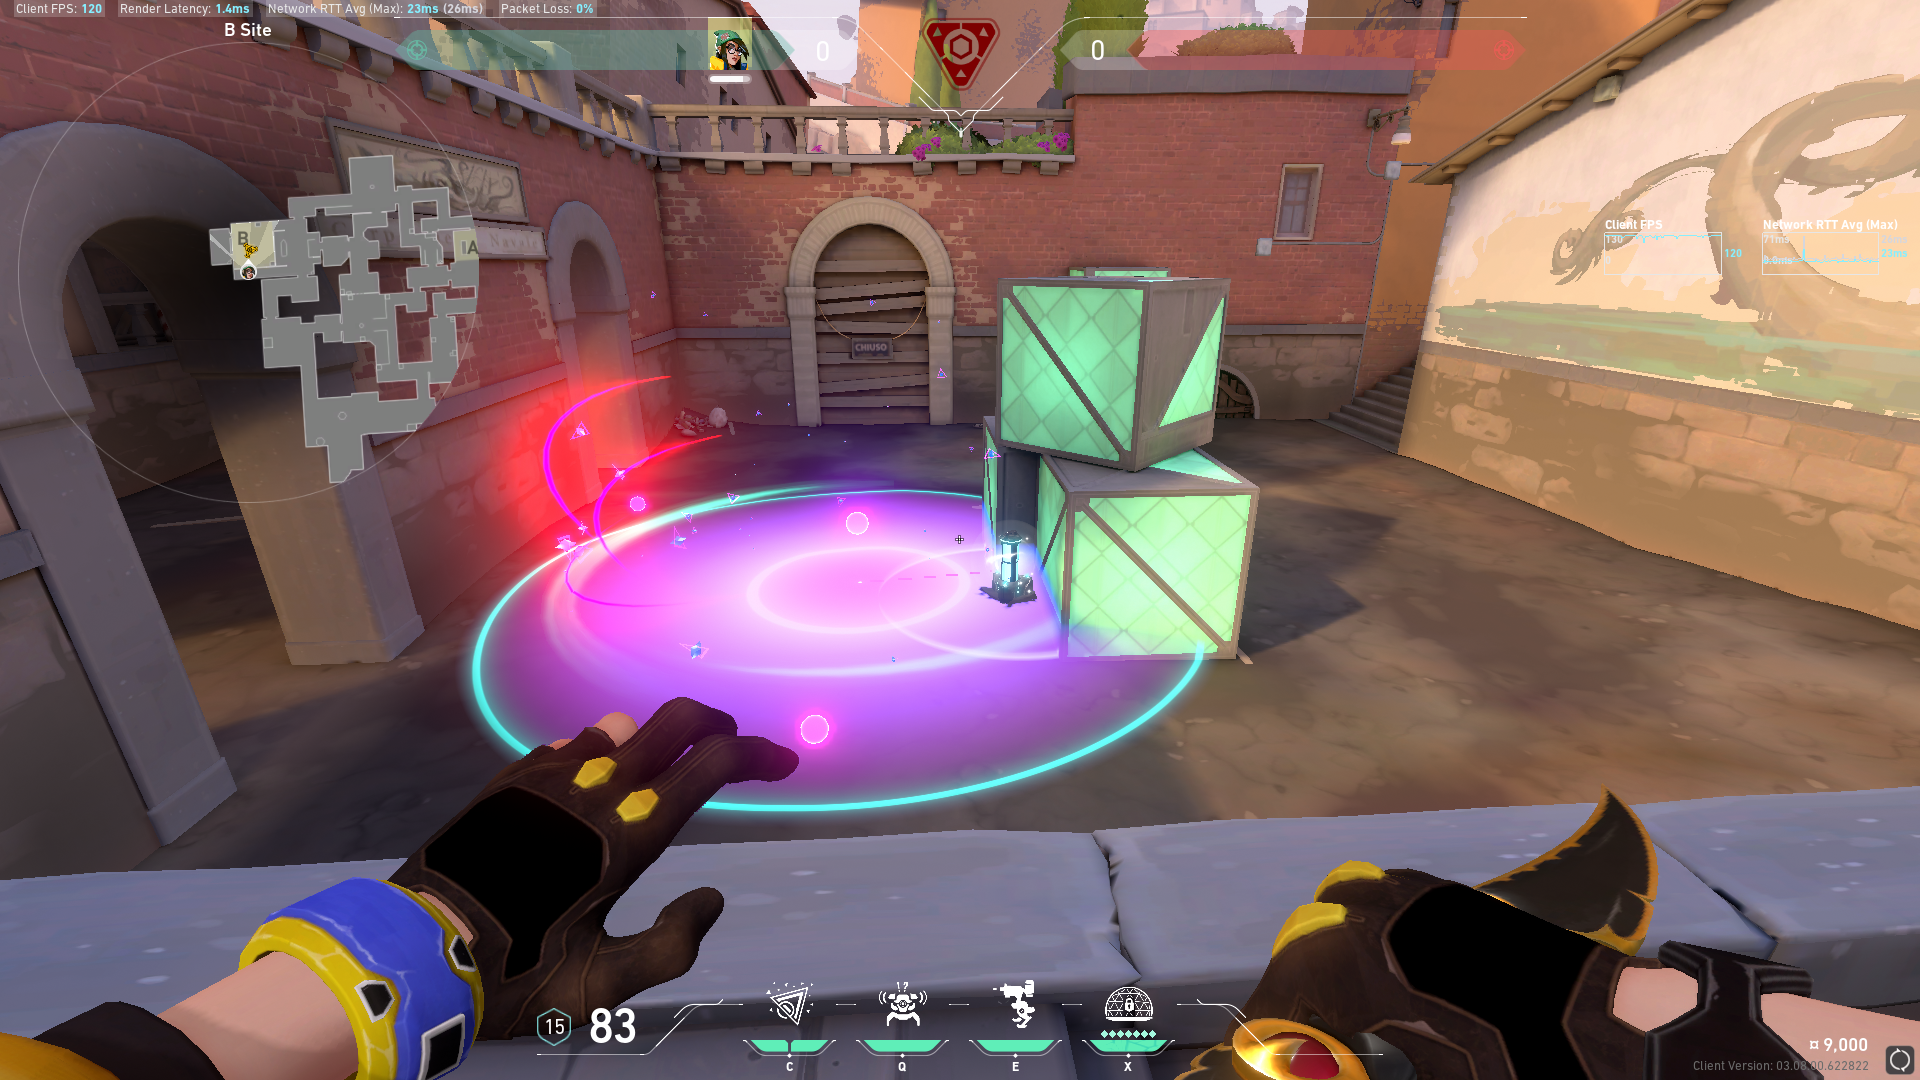
It will land in front of the Green Boxes and completely cover the Spike.
If you want to make your own Killjoy Nanoswarm lineups on the spot, take a look at this guide. I’d also like to credit Keeoh and Eevux for creating some of these setups and lineups.