Why Even Ward Anyway?
Warding is often one of the hardest concepts for newer players to grasp because it is a more abstract strategy in League of Legends. Unlike things like micro, which has very clear implications for whether you win a fight or not, proper warding is often hard to objectively measure or notice. It may seem like one of those things where people just put wards down because you have one, but you aren’t sure why. To help better understand why wards are so important, here are some of the main forms of information you are gaining with wards, and their implications in a match.
Gank and Flank Warning Systems
A good ward will warn you if an enemy jungler is coming to gank you to give you time to either back away to safety or prepare for a fight. If you wait until the enemy jungler is in your line of vision while laning, it is often too late to run away from a fight. However, keep in mind that wards are not just to tell you to back away when an enemy jungler is coming; they are simply giving you the information as to where the enemy jungler is.
Sometimes it is advantageous for you to bait the enemy jungler into a fight that you actually have the upper hand on, like your jungler also being ready to fight. Some champions, like Illaoi, do better in a straight-up 1v2, and as such, she may intentionally overextend, then prepare a vessel to ultimate when the jungler attempts to gank her.
The same concepts apply outside of the laning phase. If you and your teammates are pushing mid lane into three people, you want to know if there is an enemy with a prime flank position. You do not want to be pushing forward, then suddenly, a Kennen ults you from behind and your team gets deleted before they can react. Wards in this situation serve as information-gathering devices from which you can make educated decisions on when to take good fights and disengage from bad fights.
Jungle Tracking and Wave Management
This is especially important in the laning phase. The enemy jungler can only move so quickly, and based on their location on their first clear, you can pretty well estimate what lanes they will be near. Wards allow you to intelligently manage your wave around the enemy jungler to minimize the likelihood of you getting ganked. Say you are playing a lane bully top like Quinn, who likes to shove the wave quickly and roam. Naturally, you do not want to get caught by the enemy jungler after you shove a wave. However, if a ward spots the enemy on their bottom side jungle camps, then you can safely push the wave without worrying about a gank coming afterward.
This information first removes a lot of the guesswork and risk attached with wave management, and also gives you more options to play around than if you didn’t know where the enemy jungler was. If you see the enemy jungler is pathing both, for example, you could look to gank mid. If you did have this information from the ward, that exact same play would be a coinflip at best, as the jungler could have been hovering around mid.
This ward on the enemy red buff has identified that Shyvana is starting on her Red Buff. It is logical that she will therefore be clearing towards the bottom side of the map, allowing Malphite to play more aggressively while warning bot lane to play more passively.
Player Counting
This concept takes place most often in the midgame and the endgame. All else being equal, the best way to gain an advantage in a teamfight is to have more people fighting than the other team. Therefore, you want to force fights if you know you will have a player advantage in the coming teamfight. The most common way to use this leverage is to force a Baron Nashor fight.
Let’s say you have all five teammates hovering around the Baron pit, and you see four of the enemy team in the Mid lane, with their Corki mid hidden somewhere in the fog of war. If you have no wards on the map, you do not want to start Baron, because if Corki is around, you’re taking a losing 5v5 due to the resistance shred and damage from Baron. However, if you see Corki on a ward in his bottom side jungle, and he does not have TP or his passive, then all else equal you can probably start Baron Nashor. At worst, you take a teamfight which is uneven in your favor which you likely have a good chance of winning. At best, you take an uncontested Baron. Keep in mind that this can apply to things like sieging turrets or hard engaging as well.
Types of Ward Trinkets
Stealth Ward: Your bread-and-butter trinket that every player has access to. Will last for 1:30 – 2:00 depending on the average level of the players. Most champions should start this trinket for the lane.
Farsight Alteration (aka Blue Wards): A ward that can be placed at a much further distance, with the downside of requiring only one hit to destroy and being visible to the enemy team. While useful for top laners, it should almost never be taken as a support.
Oracle Lens: The vision denial tool. Use this to reveal hidden wards to enable you to destroy them. Also shows the outlines of control wards, farsight wards, and enemy champions. Take this once you complete your support item quest.
Control Wards and their Usefulness
Control wards, (often referred to as “Pink Wards,” due to their former icon) are invaluable tools if used correctly. When placed, they will block all other wards that are not control wards within their radius, and they take four hits to destroy instead of three. However, they come at the cost of 75g to you, and the enemy gets 30g for destroying one. Therefore, the net cost of a pink ward to your team is 105g. Therefore, you need to gain something useful out of placing the pink ward, ideally worth at least 105g. Either a kill, avoiding an ambush, securing extra farm, getting priority on dragons, or defending camps.
You will most commonly be placing these wards on either Baron Nashor or the Dragon. By doing so, you are denying the enemy crucial information as to whether you are doing that objective. This forces them to either use one of their wards to gain temporary vision (mentioned in a later section) or face check the objective, which you can often punish.
The worst thing you can do is place down a Pink Ward that gains you no information and will immediately be destroyed. Consider the following placement:
This is a rather extreme example, but one that happens all too often. Placing a pink ward in this bush while a large wave is pushing towards you is an easy waste of money. Not only could the jungler simply walk through the lane to gank you or walk through your jungle, the enemy support can simply walk up and destroy that ward once the wave crashes to your turret, as you cannot stop him without dying yourself or losing a massive amount of gold and exp. Be sure, especially in the laning phase, that your Pink Wards are actually accomplishing something.
Deep Vision
The act of placing wards in the enemy jungle is referred to as “Deep Vision.” The purpose of these wards is to both track the enemy jungle and give you a chance to invade the enemy jungler, in specific scenarios. It also allows your jungler to steal away camps and buffs if the enemy jungler is spending too much time on one half of the map.
Naturally, these wards are the most dangerous to place because you are venturing into the enemy’s side of the map. The best times to ward these positions is when you know the enemy jungler is on the opposite side of the map, or you have pushed a wave of minions into the enemy turret.
Objective Control
When a major objective is on the map, one of your jobs as a support is to keep vision on that objective, as well as deny enemy vision on that objective. The reason you want to keep vision on the objective, like Baron, is to be sure both that the enemy team is not trying to sneak it off of vision, but also so you know about how many people are around that side of the map. You want to deny enemy vision for the obvious reason, in case you want to take the baron, but doing so offers more benefits as well. By the enemy not having vision on Baron, you do not even have to take the objective to gain advantages. If the enemy does not have vision on Baron and does not see you, one player may give up a wave crashing into the bottom turret to rotate to Baron because they suspect your team might be on it. But, surprise, you weren’t doing it and your split pushing Yorick appears in the bot lane again and takes a free turret. It is this uncertainty that makes vision control so powerful. It forces your opponents to expend resources and gives them opportunities to make mistakes.
You typically want to be recalling a little more than a minute before the major objective respawns. You then stock up on wards and control wards and begin heading towards the objective to sweep out vision and place your own wards. The minute rule of thumb is because that’s usually the time that you are safest to go to the river around objectives and place wards before the enemy team gets there, as they will usually have to be catching waves somewhere. Once you place those wards, your team can set up for the dragon and the enemy will be forced to use a lot of utility to flush you out, creating advantageous situations for you and your team.
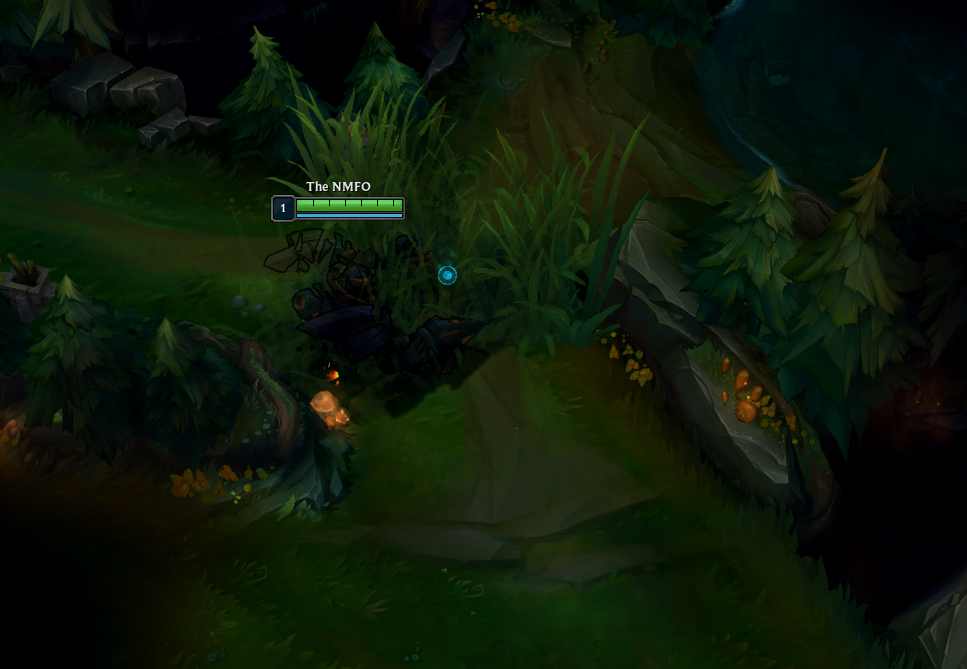
Vision Lingering and Debris
When a ward is destroyed, either from a player destroying it or timing out naturally, the vision will linger for a few extra seconds as the ward leaves some debris. This debris takes the form of a small circle that is either blue or red, depending on whether it was an ally or an enemy ward, see the following picture. This can be used to determine if a bush is warded or not, as if you see debris from a ward that has just decayed, and you know the enemy would not be able to put a ward in that bush, you can be fairly certain that bush is no longer warded.
When you hit a ward that is being blocked by a Pink Ward, it will grant vision for a small amount of time. This applies to when a ward is first put down in a Pink Ward’s radius as well. For this reason, do not hit wards while taking objectives. This is a beginner’s mistake. If your team is killing a dragon and the enemy has a ward in the pit, but you have correctly placed a control ward to block their vision of the objective, do not start destroying the ward as you’re taking the dragon. This defeats the purpose of the Pink Ward, as because you are hitting it, the enemy team is getting vision of the objective. It is perfectly fine to destroy the ward before or after you take the dragon. But when you hit the ward while you are taking an objective, you are just giving the enemy free information.
Miscellaneous Tips and Tricks
The most common ward to place in lane to protect yourself from ganks is in the bush in the river just north of the bot lane. However, with some junglers like Rammus or Nunu & Willump, this ward does not work. These junglers are too fast that by the time they are on the ward, you cannot escape. This can be true for junglers who can ignore walls as well, like Kayn, Talon, or Post-6 Fiddlesticks. For these junglers, make sure you are adjusting your wards accordingly, either placing them further back in the river or next to the walls the junglers like to jump.
Scryer’s Bloom is a plant that spawns periodically throughout the game, and more frequently on Cloud Dragon rifts. Breaking this plant temporarily reveals all wards in the area, allowing you to quickly deny the enemy’s vision.
Zombie Ward is a very good rune for supports if you are going into the domination tree anyway. Not only does it give you free adaptive force, the wards it leaves behind means you are not just denying enemy vision but getting your own as well! If you can build Umbral Glaive with this rune as well, you can one shot enemy wards and turn them into your own!
With these tips in mind, you can go out and impact your games in a new way! Remember, vision and information control is one of the best ways to enable your team to make good plays!


