The Ultimate Settings for CS:GO
In this guide, we take a look at the best settings to give you a competitive edge in CS:GO.
In this guide, we take a look at the best settings to give you a competitive edge in CS:GO.
It can be quite overwhelming to try and figure out which settings are the best to give you the competitive edge. Libraries worth of content have been written on the subject of the most optimal settings for CS:GO. From absurd theories to lists of numerical values, you quickly end up seeing the forest for the trees. In this guide, let’s condense all of this information and filter the nonsense from the applicable.
If you have, at any time, looked up mouse settings for CS:GO, you might have been bombarded with a barrage of numbers that became more meaningless the more you looked at them. Instead of trying to explain all of the scientific theory that underlies these settings, I will just explain the possibilities you have, so you can adapt your settings to your preference. Note that each mouse will offer different possibilities to change these settings: some come with physical buttons on the mouse, while others require software.
Your polling rate means the frequency at which your mouse reports data to your PC per second. Not all mice offer the setting to change this. There is a good reason for this, as the industry standard is set at 1000hz (once every millisecond) and there is very little reason to change it. This frequency is also the one that most of the pros use. A small minority opt for 500hz, but there is no reason to switch to this if you’re not used to one or the other yet.
Recommended Setting: 1000hz
Next up, DPI. Basically, this means how many dots on your screen your cursor will move if you physically move your mouse one inch. Consequently, the higher your DPI, the faster your crosshair will move with less movement of your mouse. The most optimal choice is less clear cut here. While the majority of players use the lowest possible DPI of 400, a good number of players also up this to 800 and some even go as far as 1600. The main reason for this is that a higher DPI setting will make your mouse very sensitive to very small and accidental movements, which may lead to inconsistent shots. Moreover, it will make small adjustments a lot harder as even a slight physical mouse movement leads to a large in-game cursor movement.
Recommended Setting: 400 DPI
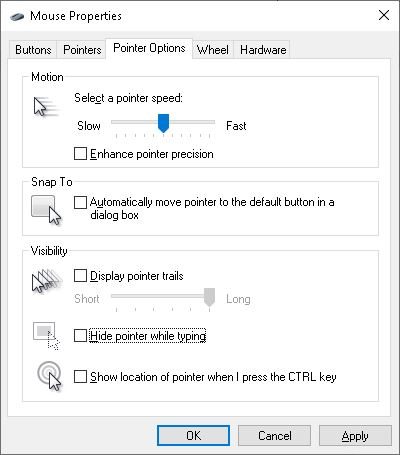
Next, let’s change your Windows settings. Open this window by going to ‘Mouse settings’ in the search bar and then clicking ‘Additional mouse options’ in the top right corner of the window that just opened. Set the pointer speed to the 6th out of the 11th bar and make sure that the box to ‘Enhance pointer precision’ is unchecked. Enhanced pointer precision will merely distort your natural movements.
Some mice also come with their own software to change things like DPI, RBG lighting, and other things. If you have this software installed, make sure to check its settings too for any things like pointer precision or mouse enhancements. Disable these, as they will also change your movements virtually which is often not beneficial in-game.
Let’s dive into the game settings. Before we look at sensitivity, we need to make sure that our preliminary settings are in order first.
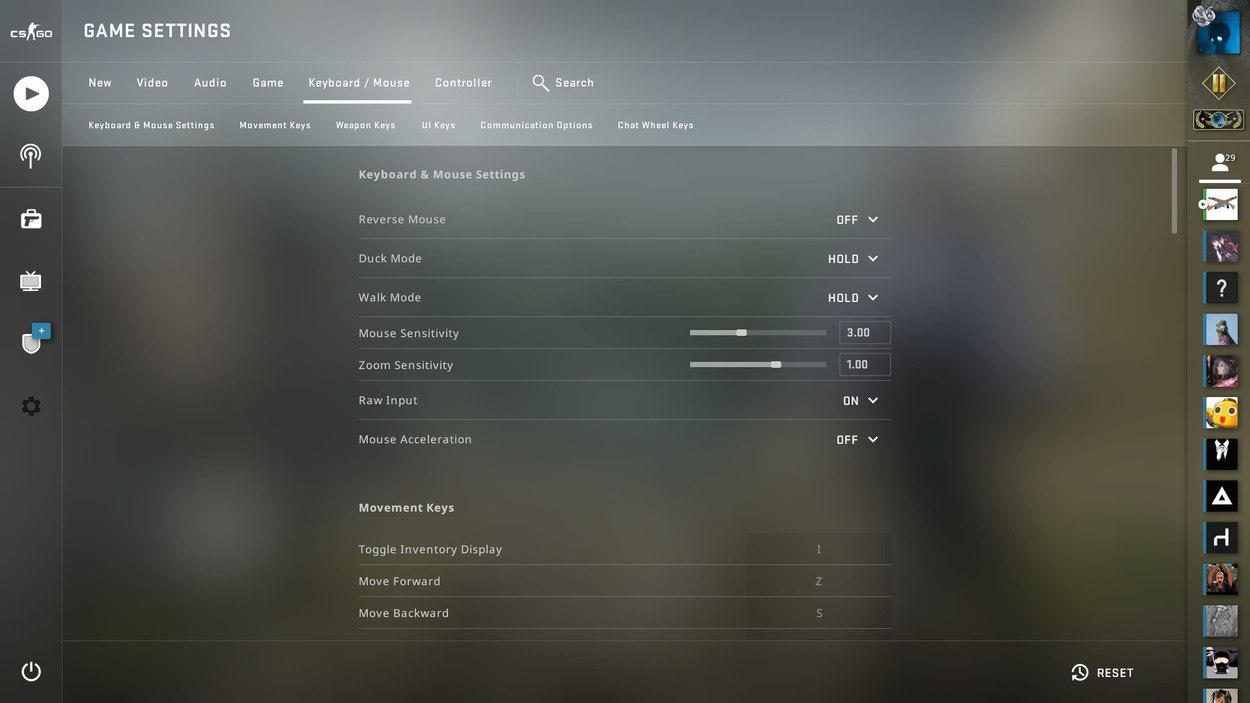
First of all, you want to enable raw input. This means that CS:GO will ignore the Windows settings and take the input straight from your mouse. You might wonder why we changed the Windows settings earlier then. Mainly this is done as a fail-safe: even if this setting gets reset in an update or by accident, your effective in-game settings will remain the same.
Recommended Setting: Raw Input Enabled
More important is to disable mouse acceleration. This is identical to the ‘Enhance pointer precision’ setting in Windows and, consequently, would mess with your crosshair movement even if raw input was enabled.
Recommended Setting: mouse acceleration disabled
This is a big one and highly personal. Your DPI will be multiplied by your sensitivity, which gives you your eDPI and will ultimately determine how fast your crosshair moves in-game. A player who uses 400 DPI with a sensitivity of 2 will have the exact same feeling as a player using 800 DPI with a sensitivity of 1. Sensitivity choices range anywhere from 1 to 4, with many pro players landing somewhere in between. For example, if we look at some of our players, Patrik ‘f0rest’ Lindberg uses a sensitivity of 3.20 while Håkon ‘hallzerk’ Fjærli uses a sensitivity of 1.90.
Ultimately, it will come down to what you feel comfortable with. Do not believe the theories saying that you should measure sensitivity by figuring out at what setting you can do a full 180 with one stroke from the left to the right of your mousepad. This would mean that you let the size of your mousepad decide, which is a tad ridiculous, especially now that we have extra-large mousepads. The best way to figure out your optimal sensitivity is by going into a custom game and spawning a bot. Put your crosshair on the bot’s head and start strafing in a circle, while keeping your crosshair on its head. Increase your sensitivity if your crosshair is lagging and decrease it if it is skipping ahead. Continuously finetune it until you are comfortably strafing around with your crosshair on its head. It’s also not a bad idea to recalibrate this every once in a while to see if you are still as comfortable with this setting a couple of days later and that your results were not affected by, for example, exhaustion.
Recommended Setting: Any number you feel comfortable at between 1 and 4. The average sensitivity used by the pros is 2.20
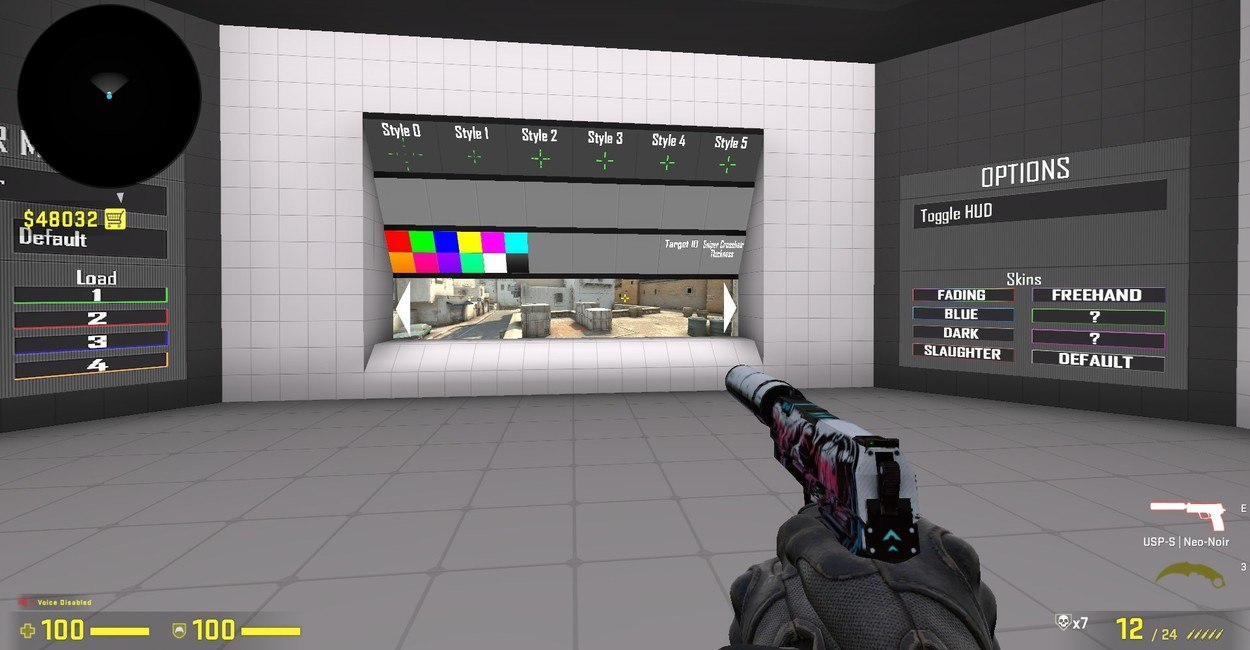
When it comes to crosshairs, much of the same is to be as for the prior considerations. All of this will depend on personal preference and pros use a wide variety of different crosshairs. From wide crosses to small little dots, crosshairs come in all shapes and sizes. Generally, you want a crosshair in a color that gives you high visibility and doesn’t blend into the environment. That generally excludes brown and dark green colors. To modify your crosshair, you can use crashz’ Crosshair Generator. Not only does this map offer you many pro’s crosshairs as a possible starting point, but you can also easily change your settings by shooting the respective option on the map, which will immediately effect the change. Most professional players stick to the standard cross-shaped crosshair with a gap in the middle, while some others prefer a dot or small gapless cross.
Recommended Setting: A neon green, yellow, or blue crosshair, cross-shaped with a gap in the middle
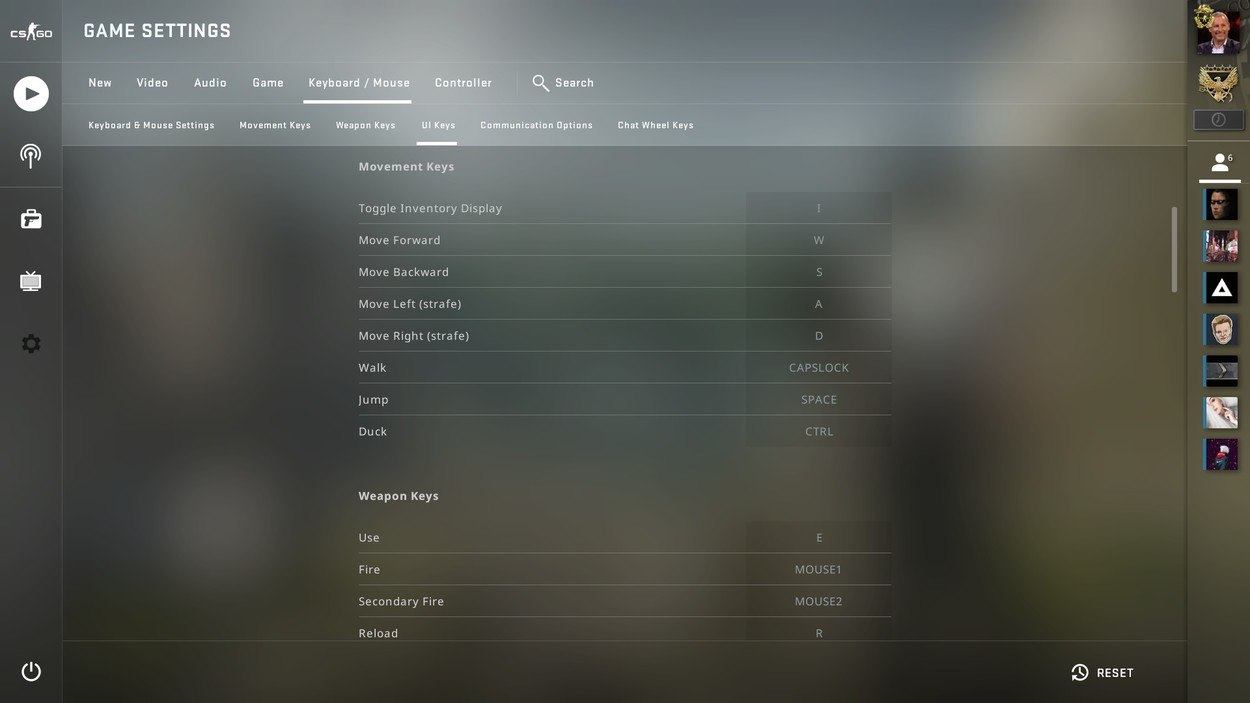
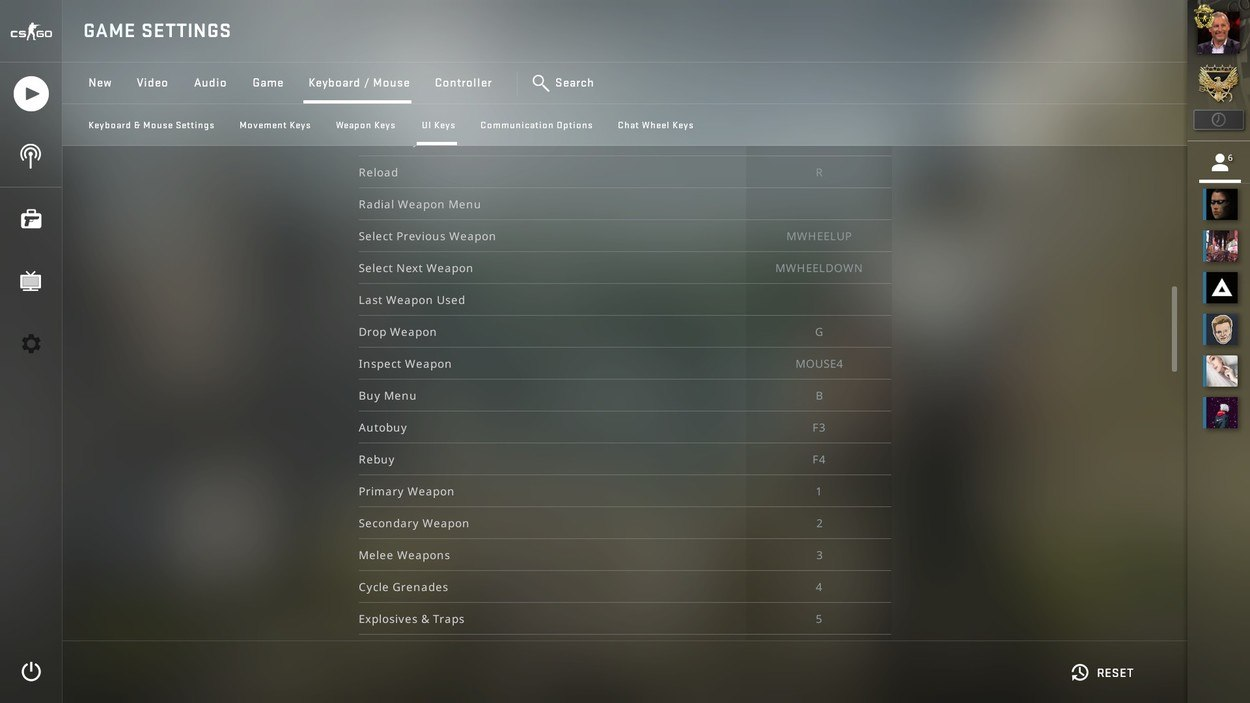
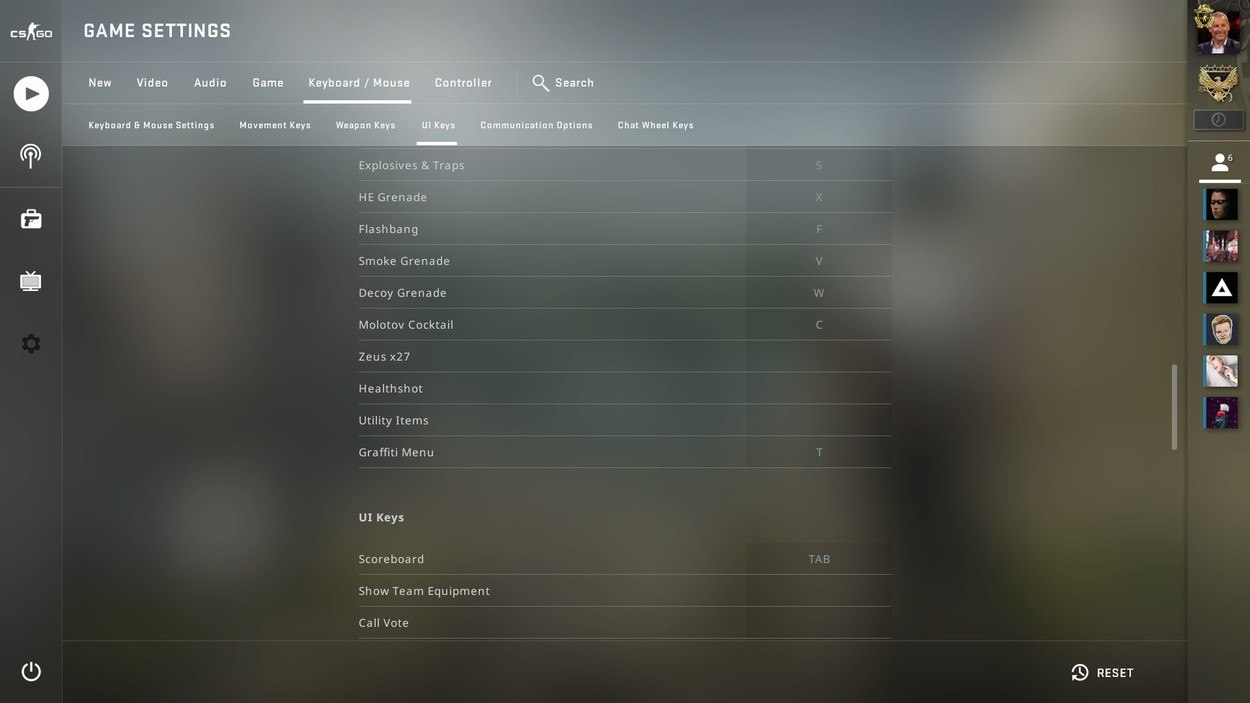
When you’re playing CS:GO, you find yourself in an environment in which every second counts. Having to frantically scroll up to select the right grenade often won’t cut it and sets you up for disaster. That’s why it is important to bind a key to all of your important actions in-game so that you can instantaneously do what is required of you in the heat of the moment. Across all players, there are some generally accepted binds. For example, players will generally use the ‘WASD’ keys to walk around in-game and the ‘R’-key to reload. Spacebar is used to jump (often in combination with the mouse wheel down or up) while ‘B’ opens the buy menu. A useful trick that can tremendously improve your gameplay is to bind each grenade to a specific key. Below you can find an overview of the most commonly used binds by professional players. (Tip: click the images to open a larger version of the image in a new tab!)
Recommended Settings:
Finally, there are other keybinds such as those to buy items that you can’t easily change from the menu. These must be changed by editing the 'autoexec' file of CS:GO. If you are the only CS:GO player on your computer, you can just go into your CS:GO folder (C:\Program Files\Steam\steamapps\common\Counter-Strike Global Offensive\csgo\cfg) and open the ‘autoexec’ file. If multiple people play CS:GO on the computer you’re using, you should create an autoexec that is exclusive to your account by finding the same file in a different folder: (C:\Program Files\Steam\userdata\\730\local\cfg). You can find your Steam ID by going to the Steamfinder website, entering your name, and checking the number behind ‘steamID64 (Dec)’. Should you be unable to locate the file in these folders, you can simply create it yourself by right-clicking in the folder and generating a new text-file, naming it ‘autoexec.cfg’.
To generate keybinds for your Numpad keys to buy items, you can use the site CS:GO Buy Binds Generator. Simply press the corresponding key on the screen and select what you want it to do. Once you are finished, press ‘generate binds’ and copy the generated text into your autoexec file.
If you want to jump when you scroll down on your mouse, simply paste this command right under the other binds:
bind "MWHEELDOWN" "+jump"
In case you want to use a jump-throw command, you will have to do the same for this slightly more complicated command:
alias "+jumpthrow" "+forward;+jump;-attack"
alias "-jumpthrow" "-jump;-forward"
bind "alt" "+jumpthrow"
host_writeconfig
However, remember that jump-throw commands might not be allowed in every tournament, so make sure to check the rulebook on this.
At the end of the document, paste the following command:
host_writeconfig
Finally, we’ll have to make sure that this file gets read by CS:GO. Go to Steam and right-click on Counter-Strike: Global Offensive. Press properties and find the ‘launch options’ tab in the window that just opened. There, write the following command and save.
+exec autoexec
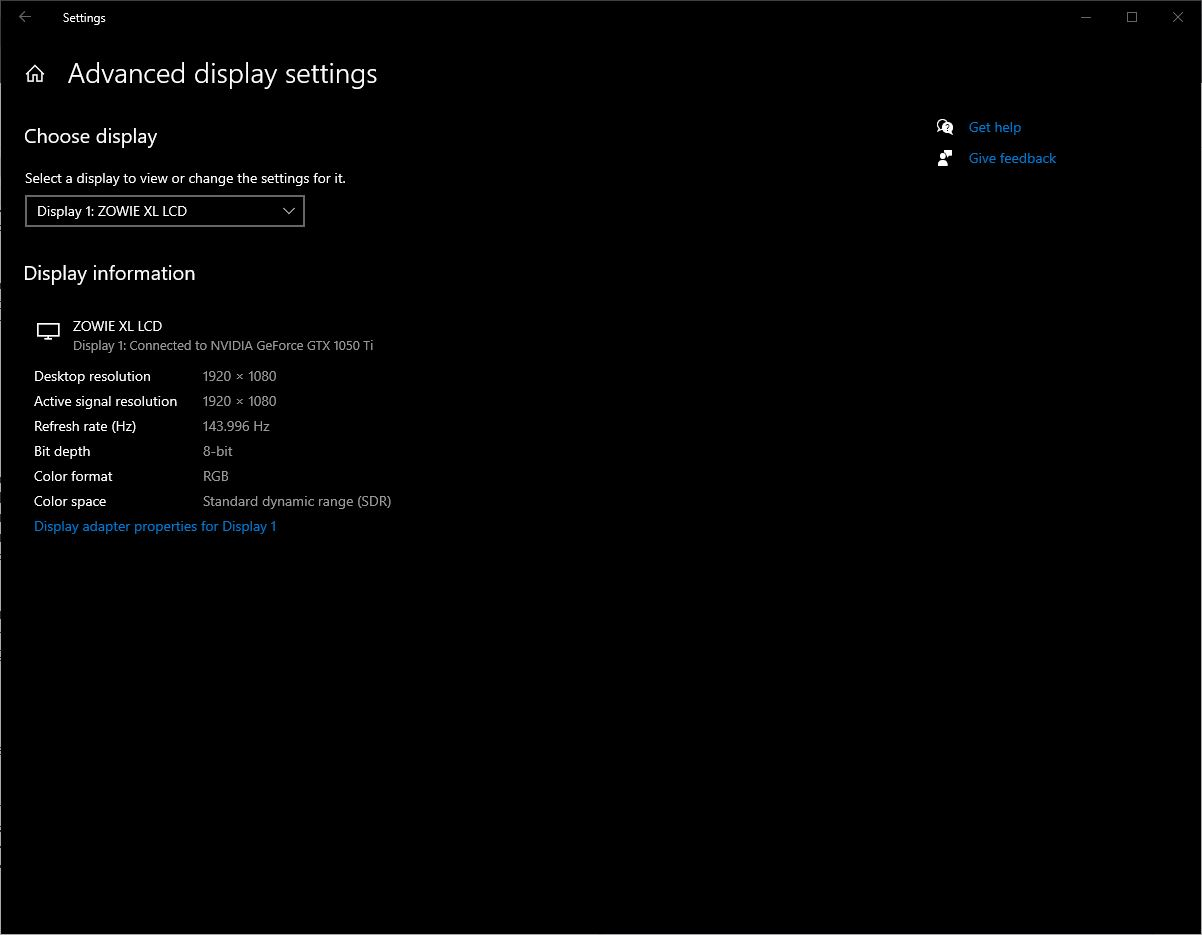
A common mistake people make when they buy a new monitor that supports higher refresh rates is that they forget to check whether Windows is actually set to output said higher refresh rate. The first order of business after connecting a new monitor should thus be to check your Windows settings.
To change this setting, click the Windows key and type “Display” into the search bar. Then, select the option to change the resolution of your display. Scroll down until you find “Advanced display settings”. You should see a screen where you can choose between your monitors (in case you have multiple). Select the monitor you want to use a high refresh rate on, and then click “Display adapter properties for Display X”. In the new window that opens, select “Monitor” and choose your refresh rate. Then click “Apply” and “OK”.
Recommended Setting: Highest possible refresh rate on your monitor

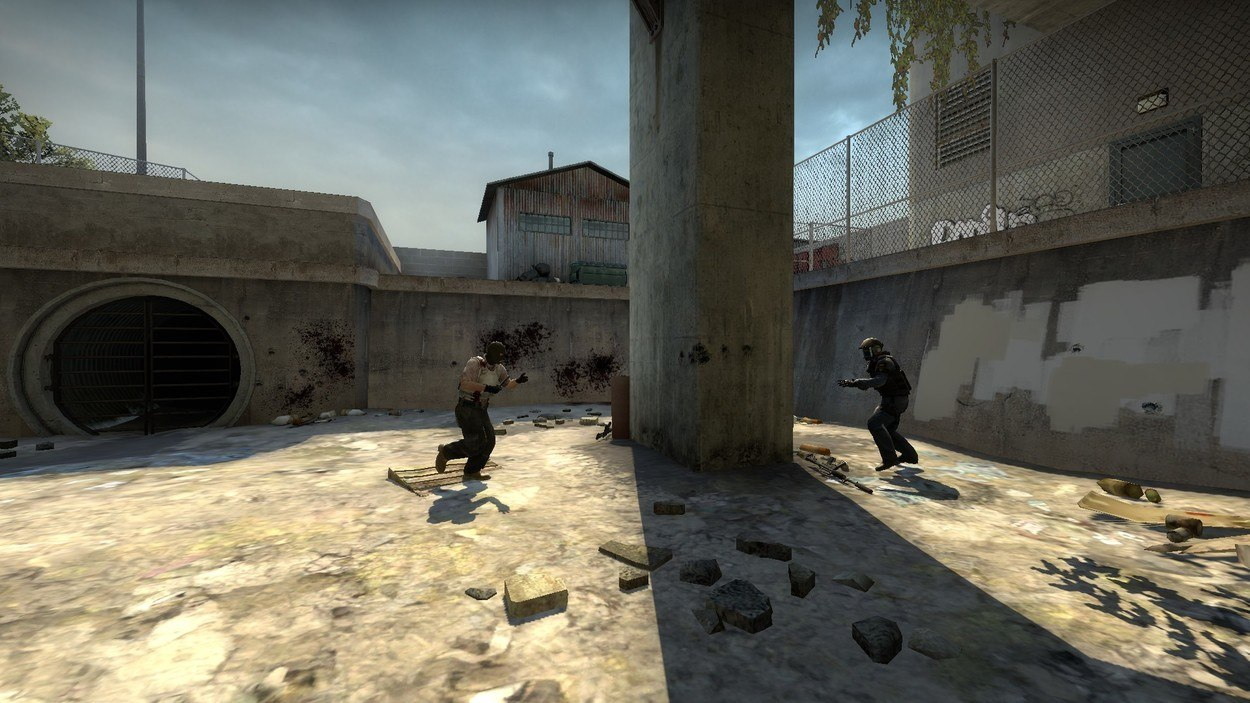
As was said before, every split-second decision in CS:GO can make or break a round. Consequently, it’s very important to see enemies as fast as you can. One thing that can help with this is digital vibrance. Basically, this setting increases the saturation of your screen, which makes everything more colorful. It also means that you can much more easily distinguish between different objects, including players. Unsurprisingly, this is a standard setting used by many professional players.
Some monitors come with built-in settings that allow you to change the digital vibrance on the hardware itself. If your monitor has this feature, check your manual on how to change this setting on your specific monitor. In case it doesn’t, there is some neat software to change this. You can simply go into your AMD or Nvidia settings, but that can be quite cumbersome, especially when you want to switch between high vibrance for competitive games and low vibrance for other content such as movies. Luckily, there is a simple tool you can download called VibranceGUI that works for both AMD and Nvidia cards. This neat little tool allows you to easily change the vibrance on the fly. It even lets you choose whether you want it to run for all software or only activate when you launch certain games like CS:GO. Once installed, just hop in-game and see how much vibrance is optimal for your monitor and taste. Most pros set their digital vibrance to at least 80%, with many of them cranking it up to the full 100%.
Recommended Setting: Digital Vibrance between 80-100%
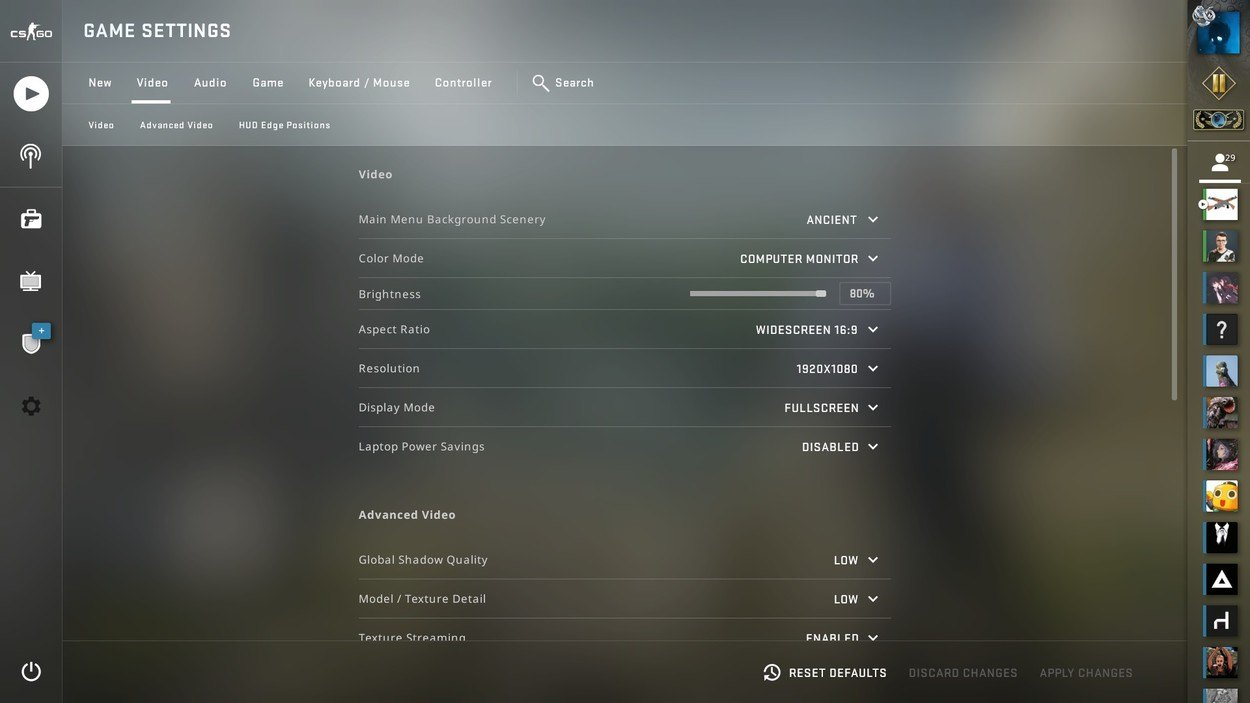
When you look at the resolutions used by professional players, you will see that most of them choose to play on lower resolutions with an aspect ratio (width to height) of 4:3. Historically, this can be explained by a lack of availability of higher resolutions when most pro players began to play and, in addition, weaker hardware that could not sufficiently drive the higher resolutions even when they became available. Many people like to copy the settings used by the pros, and, consequently, these lower resolutions have been accepted as the generally recommended standard.
However, if your hardware is powerful enough to drive CS:GO and gives you at least more FPS than your refresh rate, there is no reason to choose these lower resolutions over your standard settings. In fact, the best player in the world of this year, Mathieu “ZywOo” Herbaut, has been using a 16:9 aspect ratio with a resolution of 1920x1080. It might even be better to lower your graphic settings to have a higher resolution than the other way around. The most important thing, however, is to find the resolution that is right for you and stick to it.
Recommended Setting: 1920x1080, unless your framerate is too low for comfort on this setting
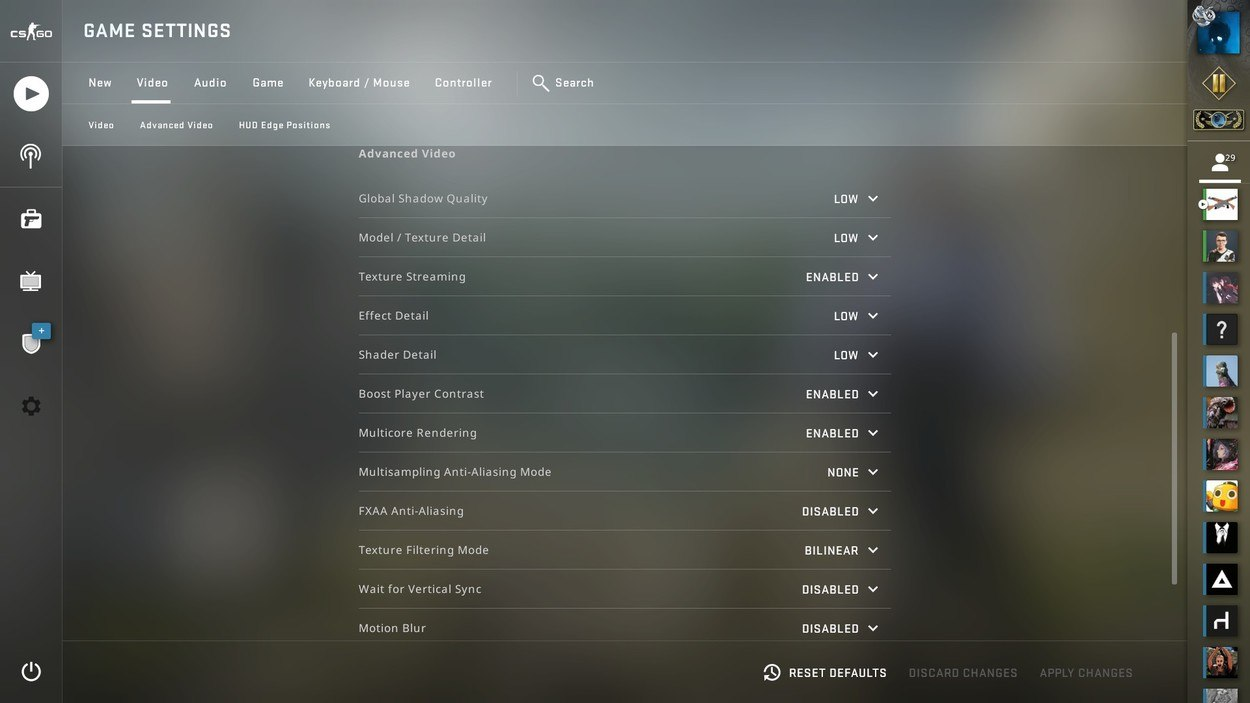
These settings will mainly come down to the power of your hardware is and what it can drive. The most important thing in CS:GO is FPS, and usually lower settings will give higher FPS. You can check my settings below, but these are not golden rules and are mainly tailored to my hardware and preferences. You can choose to copy them and see if you have any FPS to spare. In that case, you can increase the quality and see how far you can push it. There are a few important settings that must be considered though.
Recommended Settings:
For audio settings, I refer to my guide "The Optimal Audio Setup For CS:GO", as there is a lot to be said about audio itself and I believe it warrants its own guide.
And if you've adjusted all of this, you've gotten yourself the best possible settings for CS:GO!
Visit our partner VIE for the safest market and best customer care in esports betting.
Must be age 18+ and reside in a country where online gambling is legal. Gamble responsibly