Common Rotation Mistakes to Avoid in Rocket League
You're probably commiting these common rotational mistakes.
You're probably commiting these common rotational mistakes.
Rotations in Rocket League are pretty well-defined at this point of the game’s lifespan, but the actual execution of those rotations is never perfect - even at the pro level. Because the game is so fast and so many variables can come into play at any time as well as six players on the field who may measure those differently, it's simply not possible that the snap decisions each player makes to address those variables will fit cohesively as a team every time. In fact, due to the simple volume of circumstances and variables in a Rocket League game, breaking a rotation is often necessary.
However, some rotational breaks should only be utilized as a last resort and, though they may feel natural even in normal play, they have the most significant likelihood in resulting in a poor outcome.
Before outlining those common rotational breaks, we're going to define common rotation situations that your team should be following first. In an actual game, these roles are of course constantly switching and sometimes that is happening so fast that it can appear that players or teams are skipping entire steps.
Offense - Traditional Rocket League rotations in 3v3 generally map out as outlined below and depicted in the accompanying image.
1. This player is on the ball and moving it forward. Rotates to 2 upon failure.
2. This player is forward and center(ish) waiting for a pass from position one. If 1's pass fails, move back to position 3.
3. This position plays behind the first two players with the primarily goal of cleaning up if position 1 loses a challenge.
Defense – Normal defensive rotations in 3v3 Rocket League are mapped as depicted in the below image.
1. Attack the ball. Rotate to 3 if you fail to clear.
2. Stay front post to defend if it gets past 1
3. Stay back post to cover if it goes over 2 and move into 2 position following a failed clear from one.
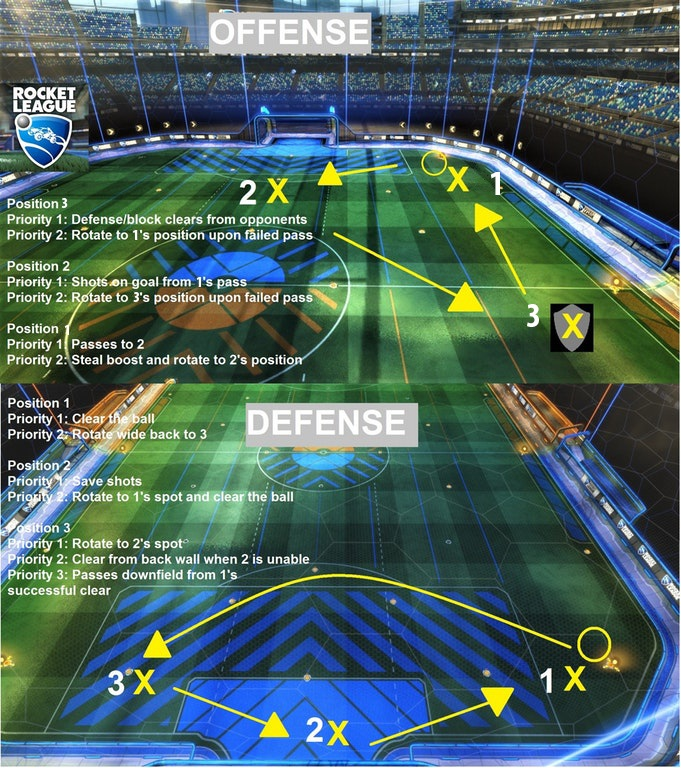
Image created by reddit user lmfao_schwarz.
Again, it is inevitable that a player's or team's rotations will falter due to poor decision making or pressure from their opponents at some point, but recognizing and avoiding those with the lowest percentage of success can mean the difference between a win and a loss. A majority of players are aware of general rotation concepts and the roles of each position. Even so, most players that commit these mistakes do so with a fundamental awareness of how to rotate and don't even realize that they're commiting these errors.
One of the hallmark failures of an offensive rotation is position 2 going for a failed center. If the player in position 1 loses a challenge, position 3 should move up to support, and 2 should move back in to position 3. When position 2 transitions into 1 after a failed center, it almost always leads to a challenge with your car not directly behind the ball and therefore results in a lower win percentage. This most often happens just because the player in position 2 gets antsy and cuts in front of position 3 as they move into 1. In addition, this can often lead a double commit on the ball, or at least improper spacing, and increase the likelihood of a counter goal.
Exception: If position 3 is too far back from a boost run to support in time and not challenging will lead to a transition in pressure, it is acceptable for the player in position 2 to challenge. However, this should be communicated clearly.
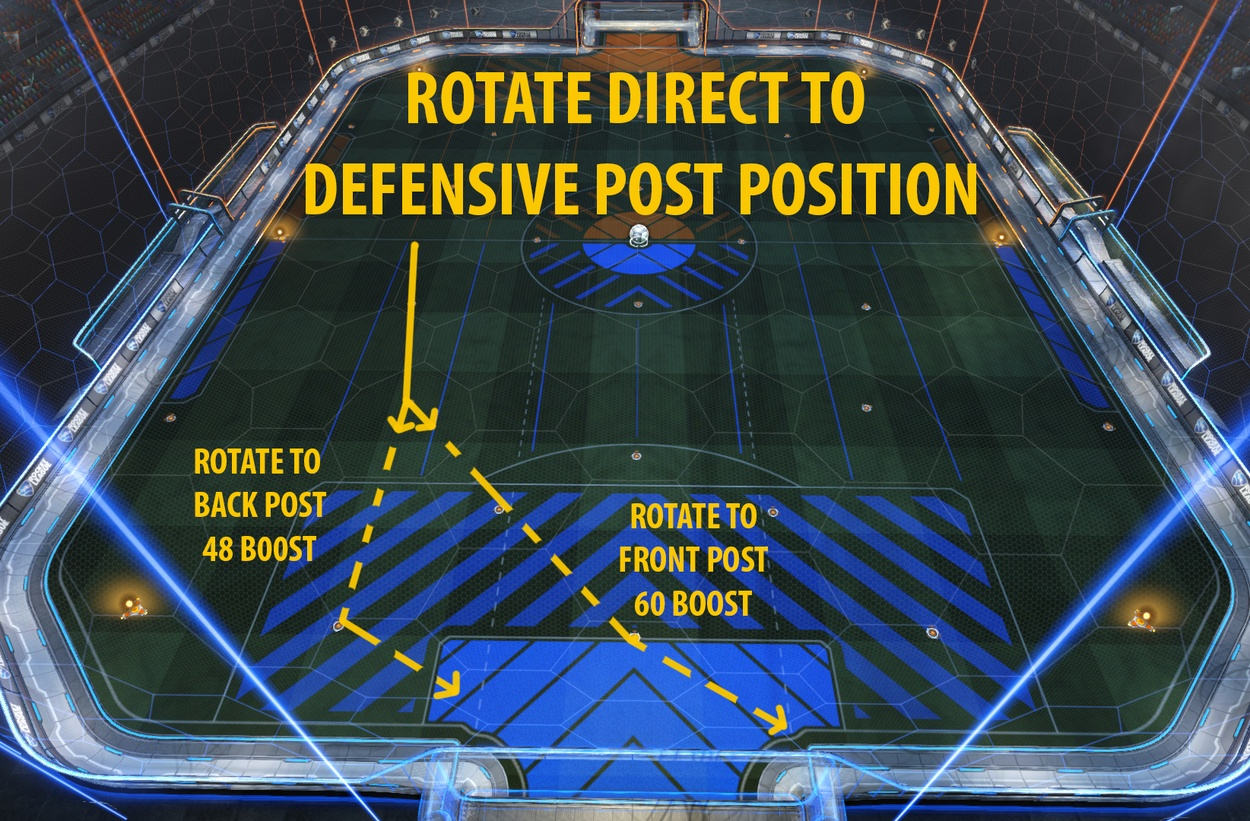
Rotating to front post in a defensive rotation is equally egregious. If your team is defending against corner pressure and you're rotating back to net after challenging a ball or transitioning to offense and you have someone in net at back post, you need to rotate behind them. As you do, your teammate should move up to front post when they see you coming.
If you rotate to front post and your opponents levy a shot while you're still power-sliding into position, you could concede a goal that your teammate would have easily saved. Additionally, even if your teammate is cognizant to the fact that you're not settled and knows to go for the save, you're now literally in his way. Even if you do get the save, it's likely that your settled teammate would have had a better line to clear the ball farther to better relieve your opponents' offensive pressure.
The big boosts are so beautiful. It's never a problem that goes away. There are tons of examples of pros getting greedy and conceding a goal due to this fundamental need of every Rocket League player. That doesn't mean you shouldn't fight it. You should learn the placements of the small pads so that you're hitting them without even thinking about it. Until then, we have some pathing suggestions that require only minor deviations from general rotation patterns for both offense and defense. The below options are especially helpful if you already have any amount of boost and can simply add to what you already possess. Obviously you should continue to pick up big boosts, not only to maintain your own levels, but to manage the boost of your opponents as well. These recommendations are for situations where speed is paramount and the time for a trip to a big boost can't be afforded, or for when all the nearby big boosts are already taken and traveling across the pitch for another is unreasonable.
These paths will transition you straight from a defensive position to a support position or breakaway offensive chance without taking the time for a big boost pit stop. Either way, you'll have enough boost to support a play on the ball and you can worry about more boost after that.
These paths is great if the two boosts on the side that you're rotating back on are already taken or if the pressure being applied by your opponents is too strong to allow time to detour to your corner boost. These pathing options takes you directly into a defensive position from offense and get you enough boost to deal with immediate pressure.
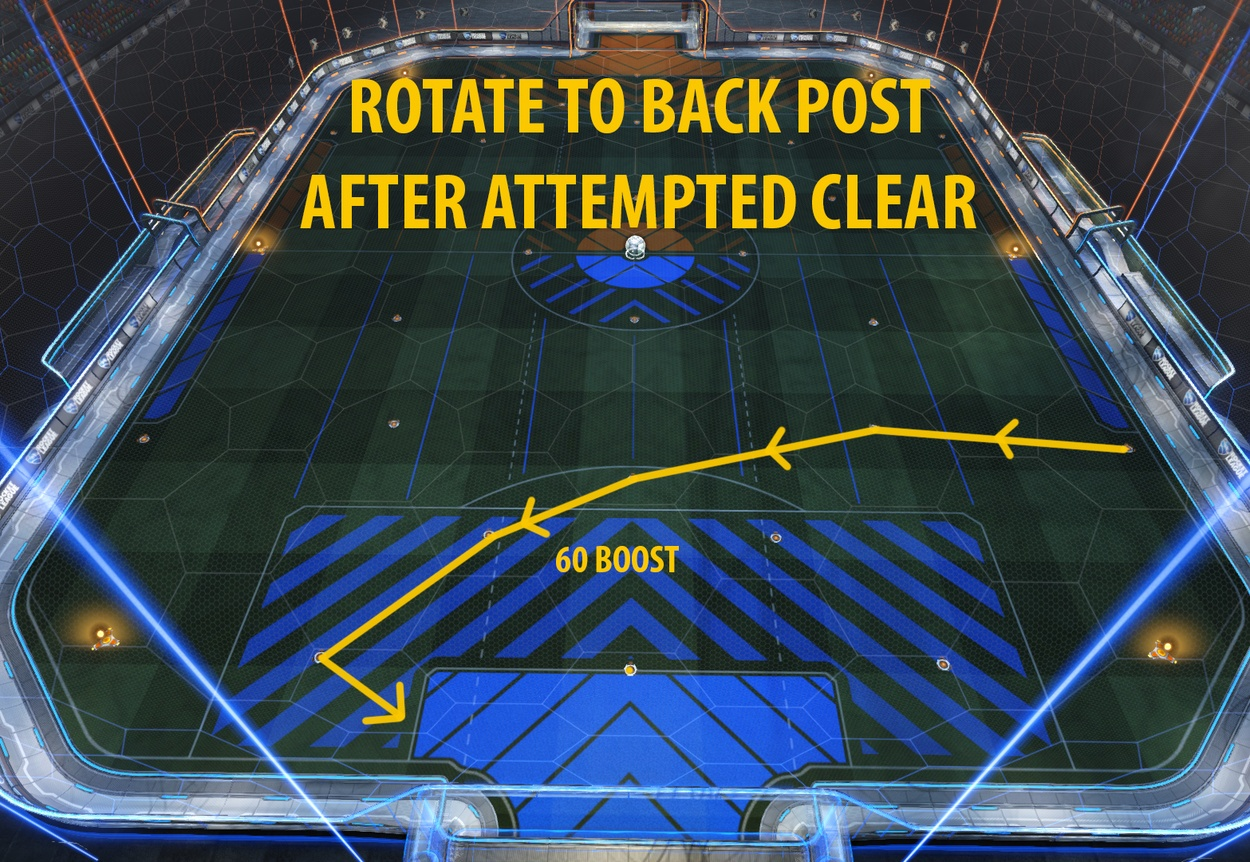
This example is great if your attempted clear as position 1 failed and you now need to rotate to position 3 with immediate pressure from your opponent. You'll recover enough boost to not only support the defense but also transition to offense quickly if the option presents itself.
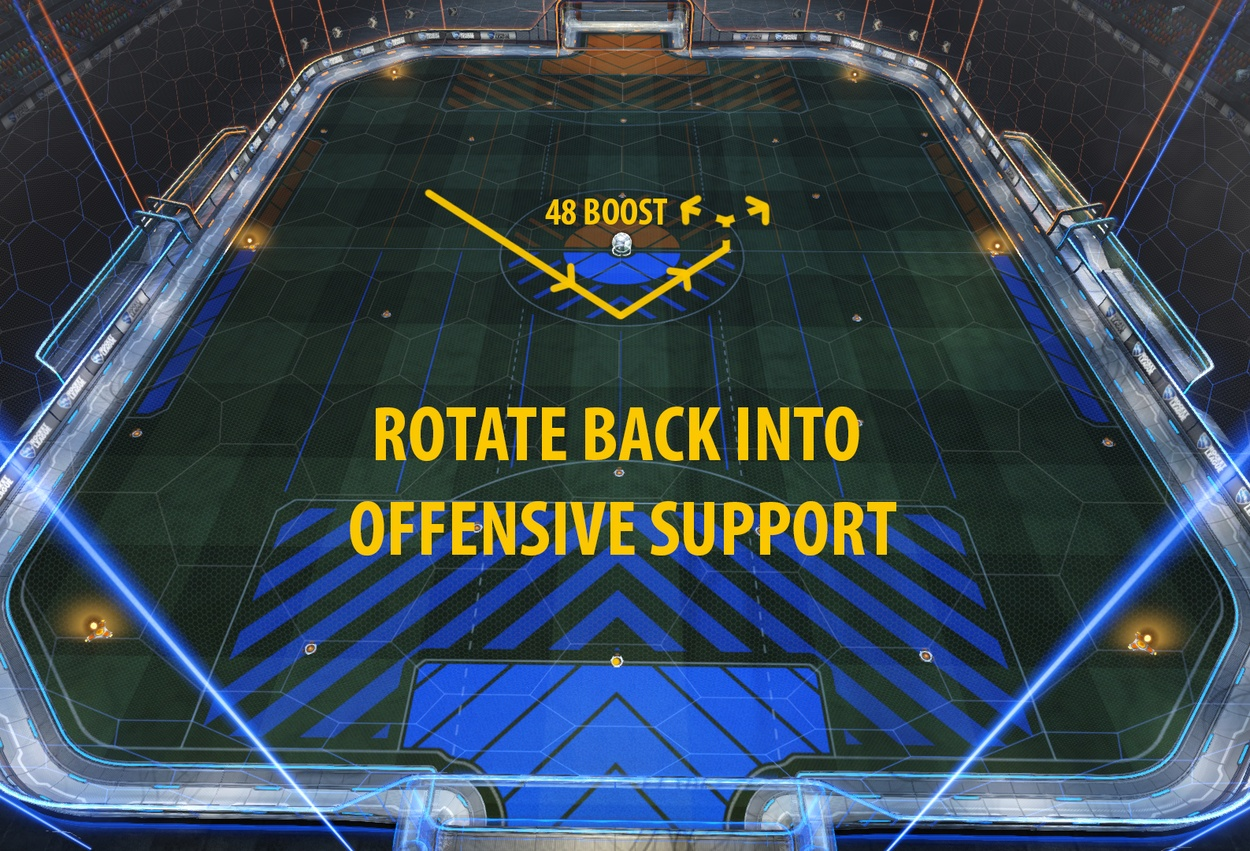
Rotating back in to support ongoing offensive pressure leaves you with perhaps the most amount of options. This is one option that allows you to reengage very quickly. However, depending on the situation, you'll have many paths to pick up small pads without having to travel all the way back for a corner boost.
Now that you know of these common mistakes, pull up a recent replay and see if you find yourself committing them yourself. Do so with an eye more critical than forgiving and you'll be a better player for it.
Like our content? Support us by getting our merchandise in our shop