


CS2: How to Set Up A Nade Practice Map
Here is your definitive guide on how to set up a nade practice map in CS2.
Here is your definitive guide on how to set up a nade practice map in CS2.
If you are practicing to improve as a player in CS2, you will start practicing lineups at some point. Utility usage is a vital part of CS2, and all good players practice and memorize lineups as part of their training.
So, you must learn how to throw lineups if you want to be a good CS2 player. The first step to that is to know how to set up a nade practice map in CS2. You can’t just queue into a match with bots and start throwing nades—it’s an inefficient way to practice.
CS2 gives you a lot of control and options to help you practice nade lineups. Things like a nade camera and a nade tracking line can really speed up your lineup learning process.
So, in this article, we will guide you on how to set up a nade practice map for yourself so you can start learning some fun and useful lineups.
When setting up a nade practice map, you must enter a lot of commands to get things started. It’s not really a problem if you have to do it once, but with lineup practice, you are often playing on different maps multiple times, so entering commands every time gets frustrating.
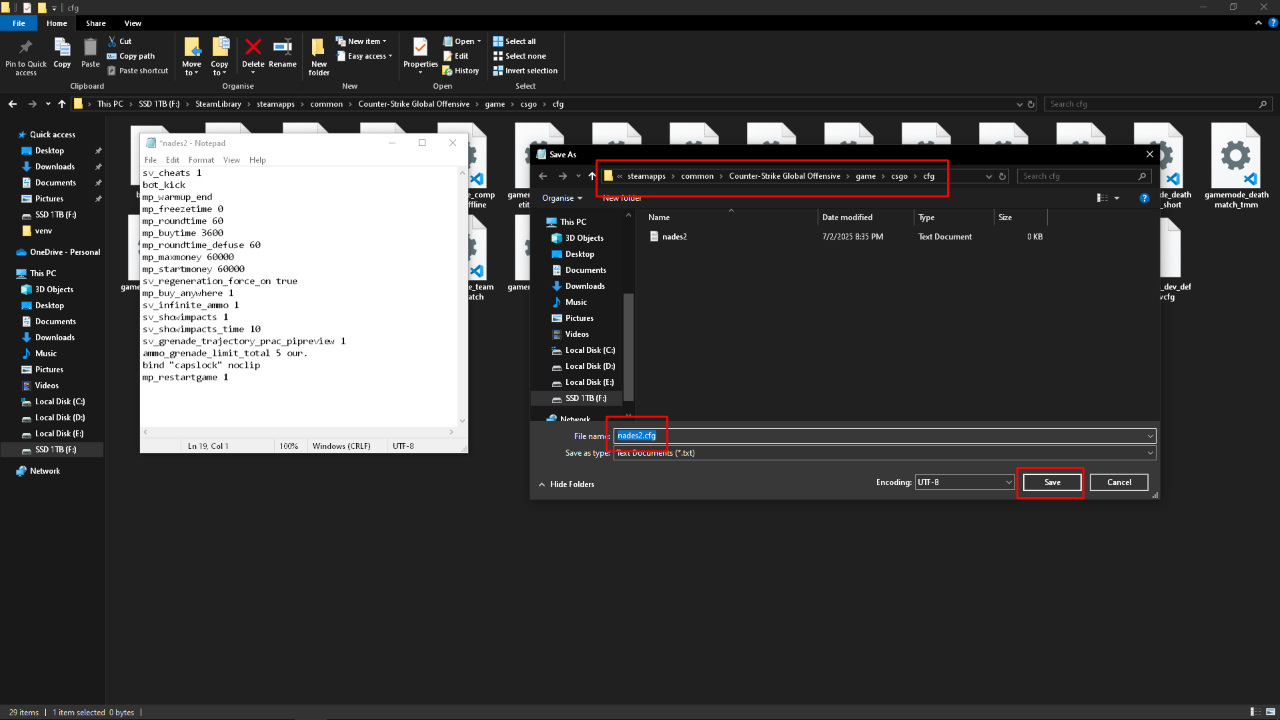
It’s much better to create a config file with all your commands and then just execute them when you are practicing nades. If you have never created a .cfg file, here is how you do it.
However, creating your own config requires knowledge of CS2’s commands. If you are not familiar with that, you can use this basic config.
sv_cheats 1
bot_kick
mp_warmup_end
mp_freezetime 0
mp_roundtime 60
mp_buytime 3600
mp_roundtime_defuse 60
mp_maxmoney 60000
mp_startmoney 60000
sv_regeneration_force_on true
mp_buy_anywhere 1
sv_infinite_ammo 1
sv_showimpacts 1
sv_showimpacts_time 10
sv_grenade_trajectory_prac_pipreview 1
ammo_grenade_limit_total 5 our.
bind "capslock" noclip
mp_restartgame 1
The hard part is now down; the rest is just starting up the map. Now, you can’t just start up a bot match and hope for the config to work.
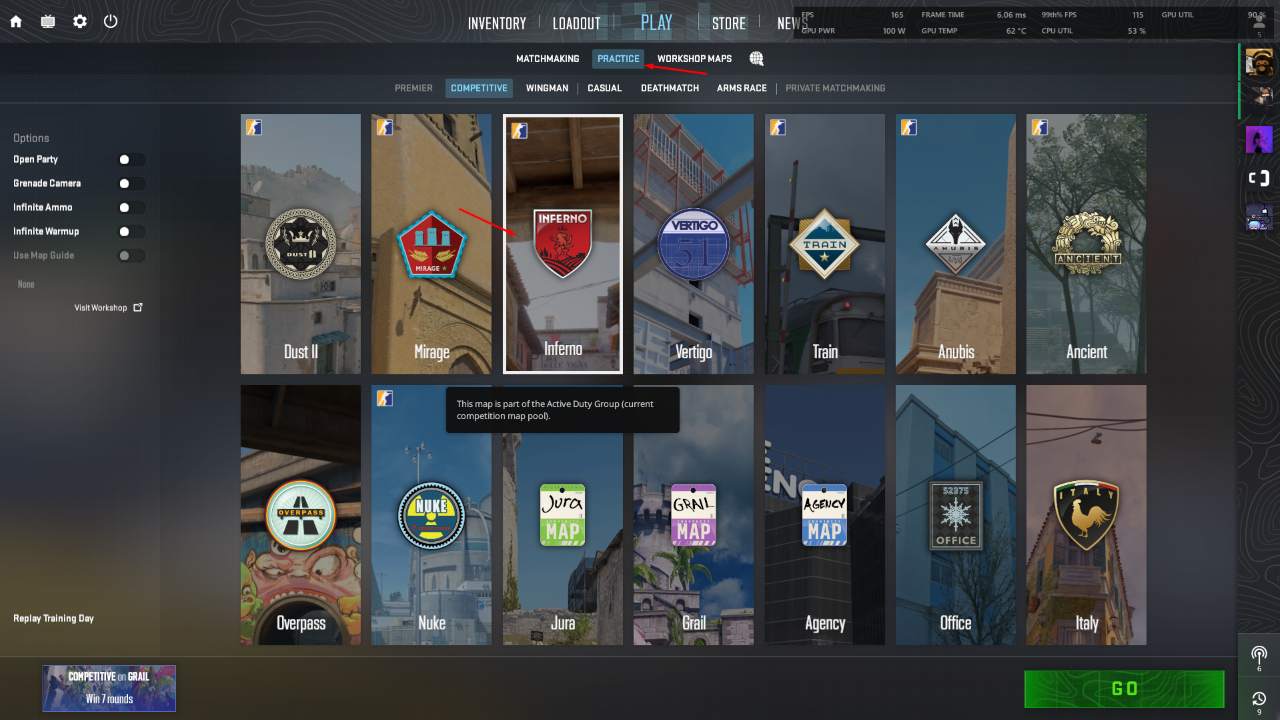
There is a specific game mode that you need to open the map with. Secondly, it works differently for maps that are in the Active Duty Pool maps like Dust 2 and Mirage, versus maps off of the workshop, like Cache.
For Active Duty maps, first click on Play, then select Practice from the three options, and finally choose the map of your liking.
For non-active duty Maps or maps from the Workshop, you can simply launch the map in any game mode.
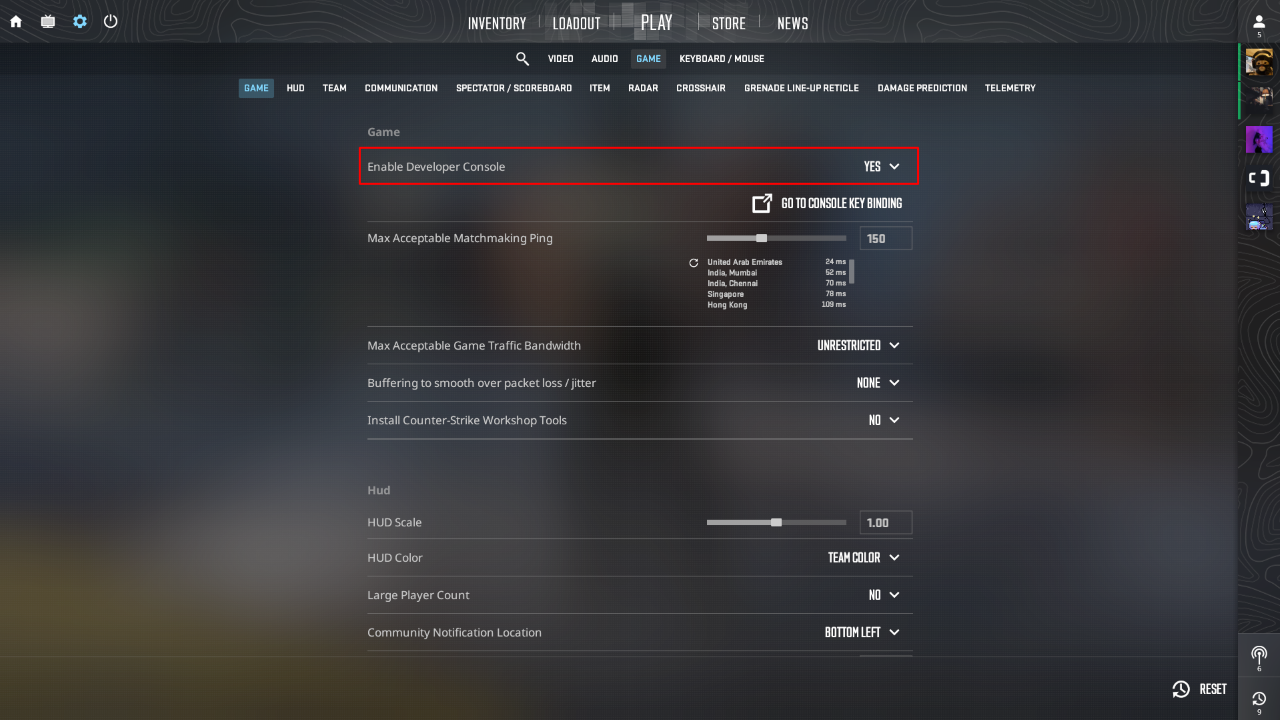
Once you are on the map, simply press “~” to open the Command Console. If the button did not work, you probably have the console turned off in the settings. It is disabled by default, so you have to enable it first. Go to Settings > Game > Enable Developer Console
Now that you have the console open, just type exec filename.cfg (replace filename with the name of the file you saved in step 1).
Everything is set up now, you can start learning lineups easily. We have a Mirage Utility guide for you to get started, along with guides for other maps as well.
Of course, you can also make your own lineups, which is hectic but extremely fun if you can get them right.
Just remember to focus on the essential lineups; you can only remember so much, so focus on the lineups that you will need in actual games and practice them over and over until you get consistent.
Learning lineups is an essential part of your training in CS2, but it’s important that you set up everything correctly for a smooth experience. This short guide is supposed to help you quickly set up a nade practice map, so you can start throwing lineups as soon as possible.


