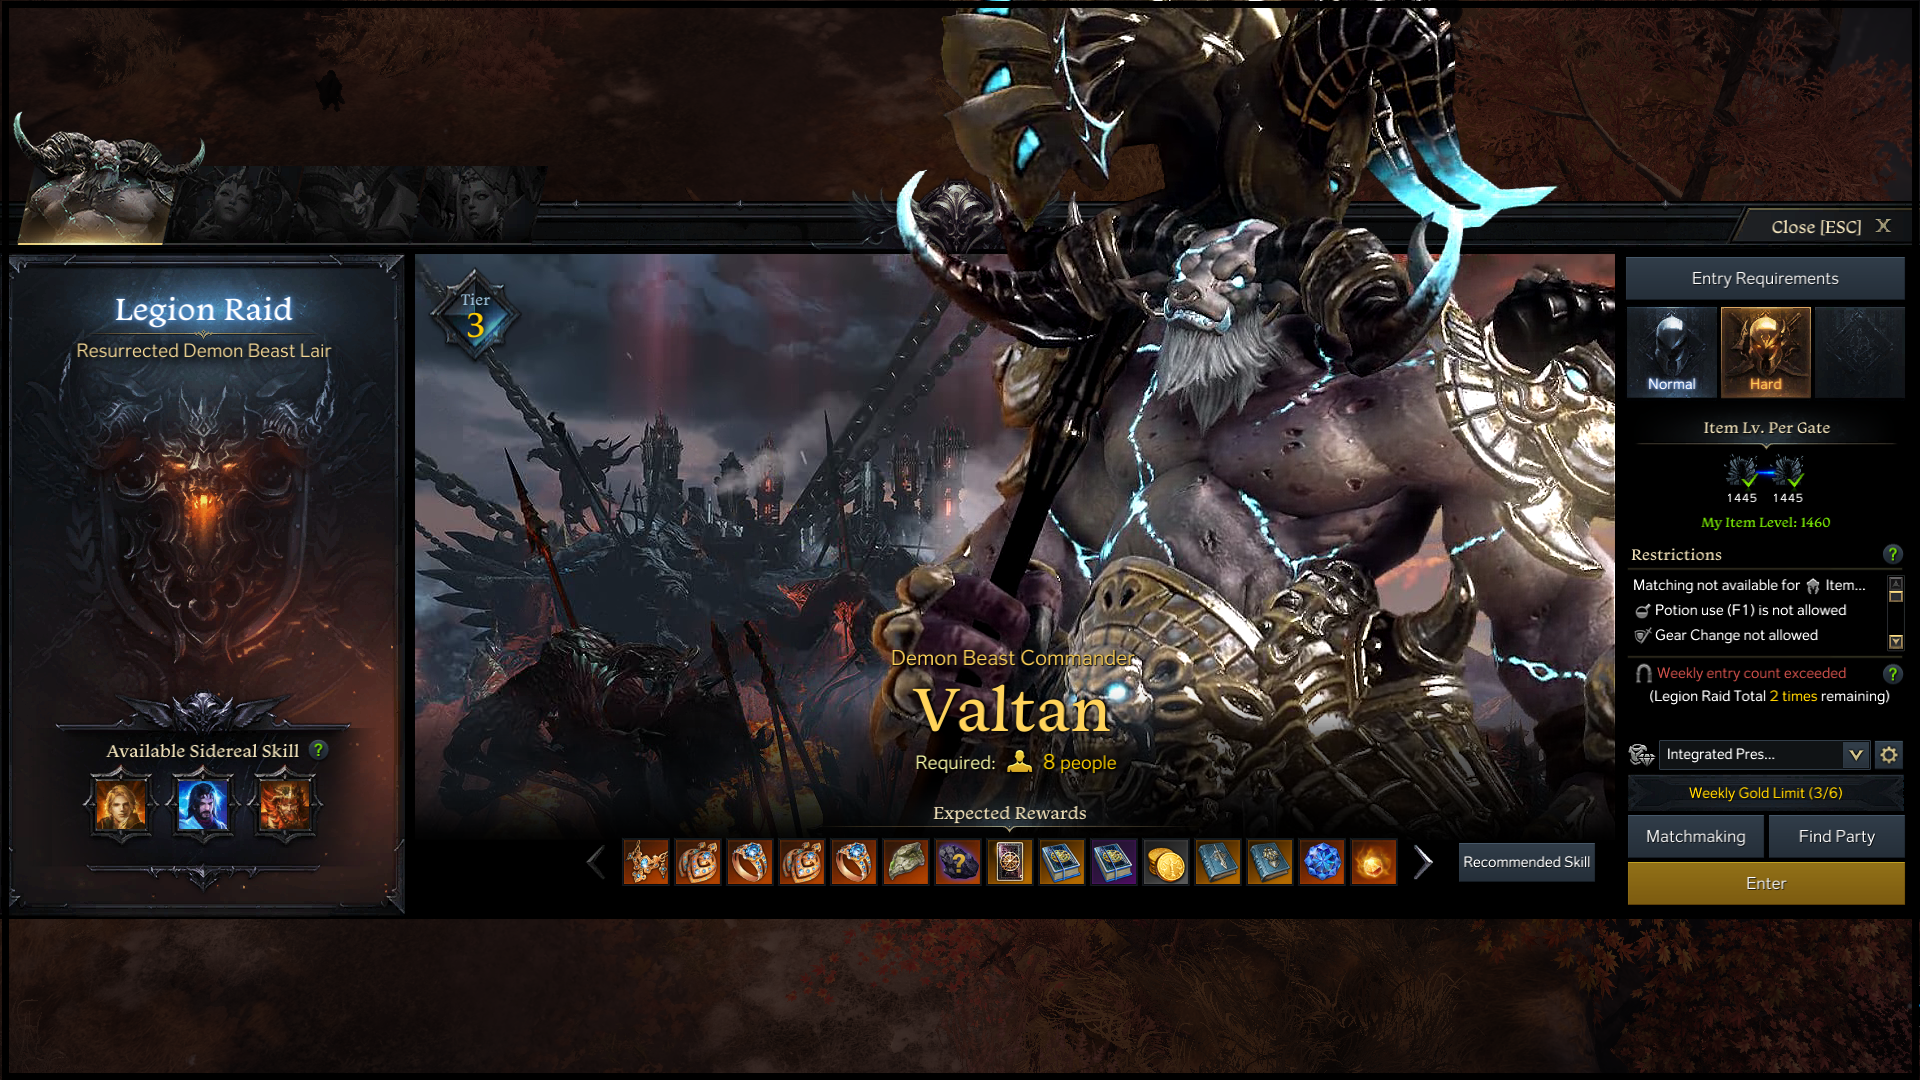
Legion Raids are challenging eight-player encounters that require a huge amount of teamwork and effort to overcome. Considered the ultimate PVE endgame of Lost Ark, Legion Raids have a much higher learning curve than other Raids and Dungeons. Valtan is the first Legion Raid to come to the Western regions and players will need to be Item Level 1415 and 1445 for Normal and Hard mode respectively. Valtan can be accessed through the Legion Raid structure in every major city, the Party Finder tool, or the Integrated Dungeon (Alt + Q) menu.

Valtan has two Gates, each with a different fight encounter and a variety of mechanics to learn. Unlike Argos, Gates in Legions Raids will act as checkpoints, saving players’ progress until the weekly reset. Rewards are distributed after completing each Gate and players can choose to proceed to the next Gate or resume at a later time; with either the same party or a different one. Normal and Hard mode will share the same weekly lockout, so players will only be able to attempt one difficulty per character for each Gate. Players, however, can choose to do each Gate on different difficulties, for example Gate 1 on Hard and Gate 2 on Normal should players find it too challenging.
This guide will go over the main mechanics and general patterns for Gate 1, as well as the common strategies used to beat this encounter. Normal and Hard mode share the same mechanics and patterns, with the only differences being boss health and damage. In Hard mode, certain boss skills can be incredibly deadly for squishier classes and less geared players.
Notable Rewards
- Relic Accessories & Ability Stones
- Demon Beast’s Bones (Material for Relic Gear)
- Demon Beast Veins (Normal Only. Material for Legendary Gear)
- Great Honor Leapstones
- Guardian/Destruction Stone Crystals
- Gold
The release of Valtan introduces Relic Gear sets that can be crafted at ‘Legion Commander Gear Crafting’ NPCs in any major city. There are multiple sets to choose from and each provides several powerful effects. The Relic Gear sets will require players to be Item Level 1445 in order to craft, regardless of if they have enough materials. Aside from Demon Beast Vein, the only difference between Gate 1 Normal and Hard mode rewards is the quantity, with Hard mode giving more.
Sidereal Skills
Sidereal Skills is a new mechanic introduced with Legion Raids, which allow players to utilize the power of the Sidereals during the encounters. The Sidereal Skills available in each Legion Raid will appear on the top left-hand corner of the players’ UI. To activate one of these skills, the Sidereal Skill meter must be completely filled. The meter will slowly fill up throughout the fight and certain mechanics, such as counters, can also help further increase this meter. Only the raid leader can activate Sidereal Skills, so if the leader dies, it is important that they immediately pass the position of leader to someone else. For Valtan, the Sideral Skills are provided by Thirain, Wei, and Balthorr.
Thirain - Completed Vanquisher (Control + Z)
Thirain strikes with his sword in a straight line, dealing a massive amount of damage. This skill deals the most damage amongst the three, as well as significant amounts of Weak Point damage.
Wei - Awakened Dochul (Control + X)
Wei summons Dochul to deal massive Stagger damage in three hits at the targeted location.
Balthorr - Arcturus’s Breath (Control + C)
After a short delay, Balthorr will strike his anvil at the targeted area and provide players with Push Immunity, reduced damage taken, and protection from certain wipe mechanics. Players must be within 14 meters of the anvil when it is struck in order to gain the benefits.
Sidereal Skills are incredibly important and timing their usage properly can help tremendously with the fights. When activated, the Sidereal Skills will land in the direction that the raid leaders’ character is facing, not where the cursor location is. For Valtan Gate 1, players will mainly be using Thirain or Wei for the most common strategies.
Valtan Gate 1
In Gate 1, players will be facing off against Valtan’s underlings, Dark Mountain Predator (Purple Wolf), Leader Lugaru (Red Wolf), and Destroyer Lucas (Blue Wolf). For clarity and simplicity, this guide will refer to them by their respective colors. In Legion Raids, the boss health bar is an important indicator for when major mechanics, usually party wipe skills, are going to happen. Let’s first go through all the main mechanics before we tackle the general attack patterns of the Wolves.
Main Mechanics
At the start of the encounter players will briefly fight the Purple Wolf before he begins his transformation at around x45 HP. The Purple Wolf will teleport to the middle of the map and cast a giant purple AoE before splitting into Red and Blue Wolf. During this transformation, players should gather away from the center to avoid taking damage. After the transformation, the Blue Wolf will teleport away, leaving players to fight against the Red Wolf.
[Invader] (x40 HP & x25 HP)
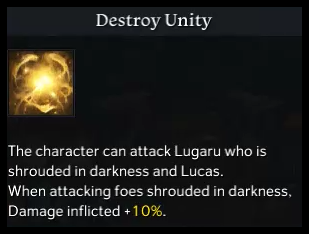
The Invader mechanic will happen twice during this fight, with the first one happening around x40 HP and the second around x25 HP. At around x40 HP, the Blue Wolf will invade the battlefield to fight alongside the Red Wolf for a brief period. When this happens, four random players will gain the ‘Destroy Unity’ buff, appearing as a golden orb buff icon. The invader (Blue Wolf) will be shrouded in darkness, preventing attacks from players without the ‘Destroy Unity’ buff. The Red Wolf will target a random player without Destroy Unity and the Blue Wolf will target a random player with Destroy Unity; this is indicated by a red or blue crosshair above the targeted players’ heads.

If the Wolves are too close to each other, they will gain a defensive buff, reducing the amount of damage they take. This buff is indicated by the orb above each wolf. When the orb glows yellow, it means the buff is activated, while a smokey, white orb indicates the buff is deactivated. Players targeted by each wolf should head to opposite ends of the area to ensure the defensive buff is not activated. The raid group should decide in advance where players should go. For example, the raid group can decide to have the invader always near the south and the non-invader near the north. The invader will flee after a short period of time.
At around x25 HP, the Red Wolf becomes the invader instead, as the Blue Wolf would have swapped in after the first ‘Orb Stagger’. Players need to pay attention to their buffs so they know where to be and which wolf they should be targeting.
[Dark Mist]
After each Invader mechanic, Dark Mist has a chance of happening when the group’s damage is too low. If the group is not able to push to the next major mechanic fast enough, the area becomes shrouded in mist. During this, players are vulnerable to a stacking Dark debuff that imprisons them at five stacks. The imprisoned should quickly ping their locations so their teammates can free them. Dark Mist will end when the ‘Orb Stagger’ mechanic is triggered.
[Orb Stagger] (x30 HP & x15 HP)
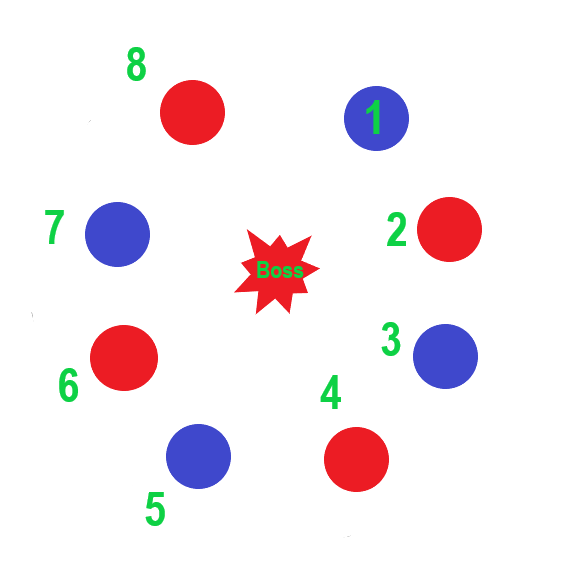
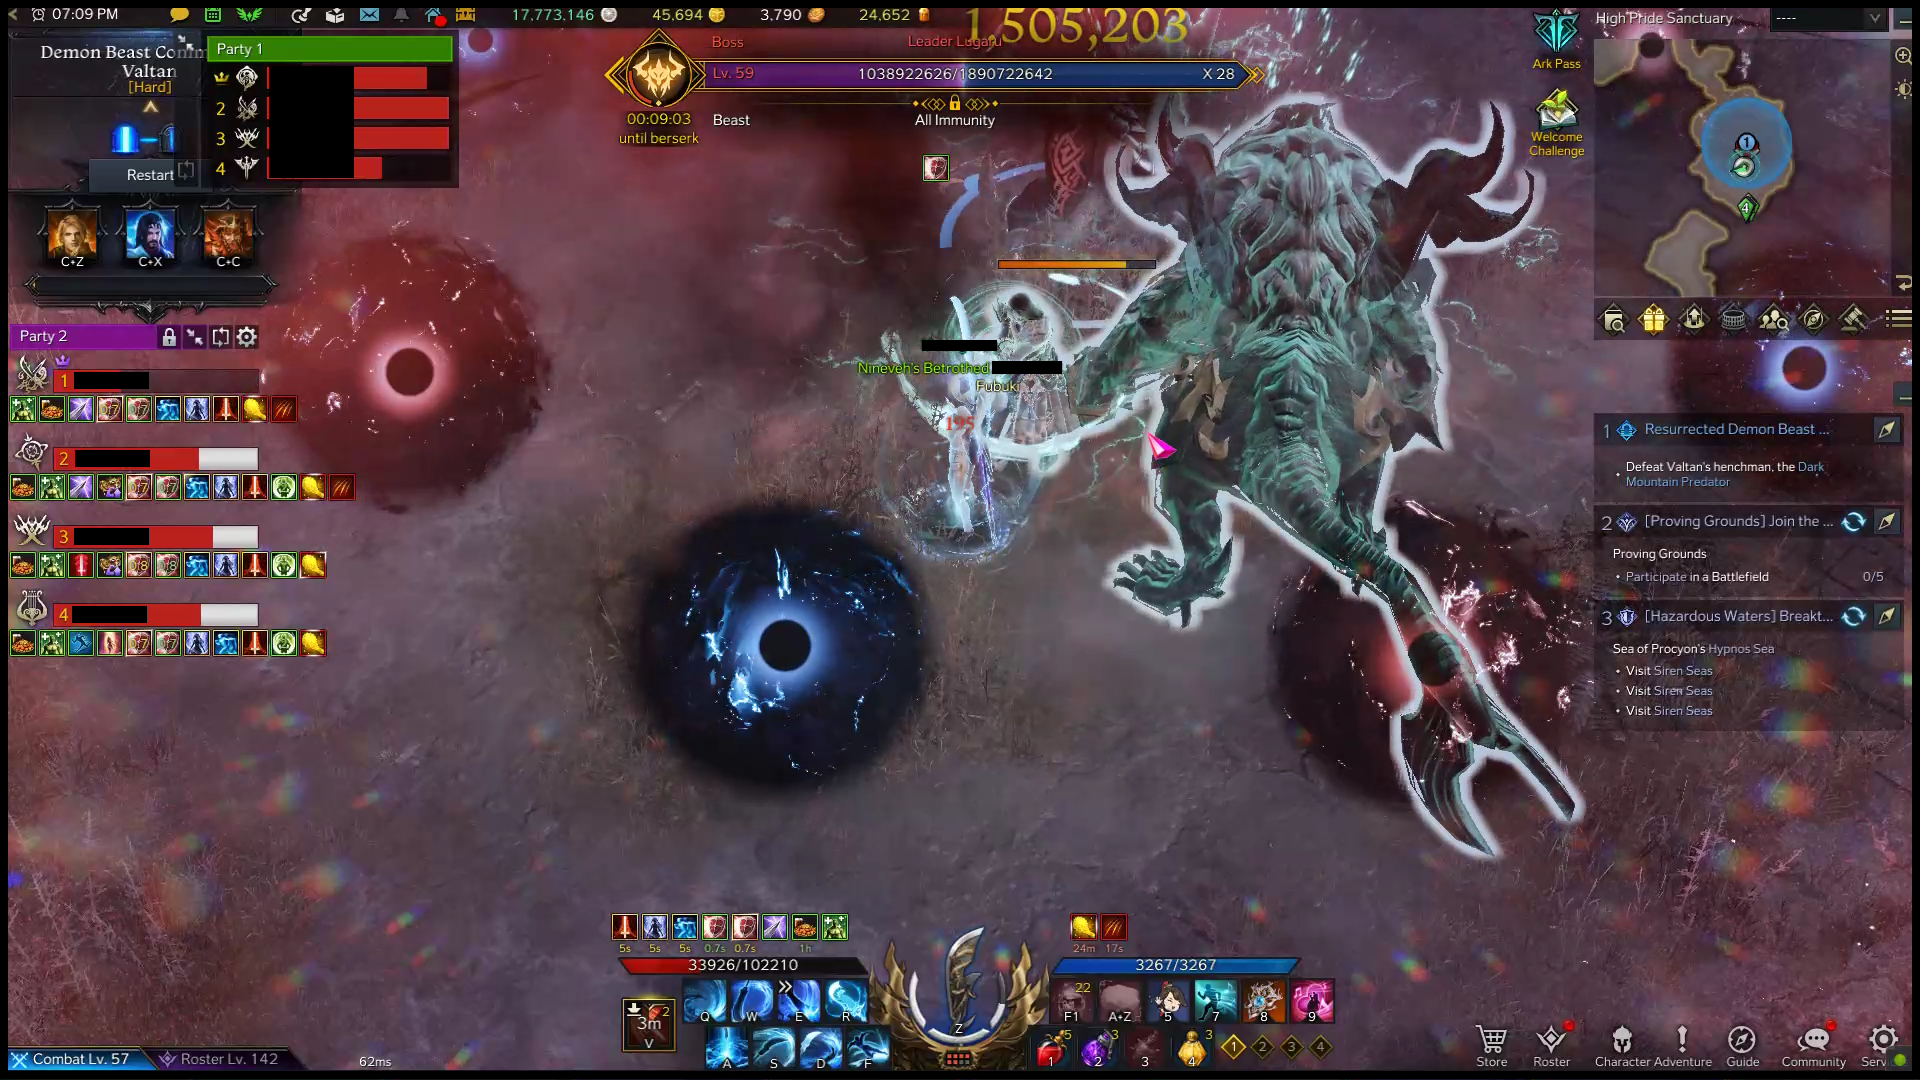
The Orb Stagger is a party wipe mechanic that occurs at around x30 HP and x15 HP. The current Wolf (Red at x30, Blue at x15) teleports to the center of the area and a Stagger bar will appear while it channels a party wipe attack. A brief second later, eight orbs of alternating red and blue color are summoned around the Wolf. Soaking an orb inflicts a stacking debuff on the Wolf, causing it to take increased Stagger damage. The orbs must be soaked in the order of alternating colors, otherwise it will cause the party to wipe. A single player soaking more than one orb will also lead to a party wipe. It is the players’ goal to soak the orbs correctly and Stagger the Wolf before it can complete its attack.
There are several ways to tackle this mechanic, so we will go through the proper strategy and a common ‘cheese’ strategy used by most pug groups.
The Proper Strategy
Prior to the fight, the group will need to assign players an order from one to eight. Since the goal is to Stagger the boss quickly, classes with the highest amount of Stagger, such as Gunlancers and Destroyers, are placed near the start. A Guide message at the bottom of the screen will notify players right before the Orb Stagger starts; Crimson Unity for Red Wolf (x30) and Azure Unity for Blue Wolf (x15). Players should quickly get in position around the boss before the orbs are spawned. Once summoned, each orb will target the closest player and begin traveling slowly towards them.

The first player should stand directly on top of the orb spawn so that they can soak it right as it appears. Players two to four should position themselves between the boss and the orb spawn so they can quickly soak their respective orbs in order. Players five to eight should position themselves next to their orbs on the outside of the encirclement. This gives players five to eight more space to kite the orbs as they await their turns. It also gives the first four players more room to maneuver so they don't accidentally soak an extra orb.
Whirlwind Grenades are highly recommended, and players should try to throw it after four orbs have been soaked for greater efficiency. If players are struggling to visually see when other players have soaked their respective orbs, it is recommended to use the Wolves’ debuff stacks as an indicator. Prior to the orbs being summoned, players can attack the boss to ensure the health bar is visible. This will allow players to see the number of debuff stacks under the health bar. Players can use the debuff stack count to indicate when it is their turn to soak the orb. For example, player six should soak the orb right as the stack count reaches five.

After completing the first Orb Stagger (x30 HP), the Red Wolf teleports away and the Blue Wolf teleports in to continue the fight. After the second Orb Stagger (x15 HP), the Blue Wolf will perform several large AoE explosions. To avoid this, players can wait for the outermost explosion to occur before dashing to the edge of the area. Another way is to run to the safe spot at the very south of the map where the explosions won’t reach. After the AoE explosions, the Wolves combine again to fight the players as the Purple Wolf.
Doing the Orb Stagger properly can be quite difficult at first, but it is highly recommended that players in guild or static groups learn it. By learning the proper way, groups can save the Sidereal Skill meter for Thirain to speed up the fight, as well as be prepared for similar mechanics in future Legion Raids. This strategy can be harder to achieve in random pug groups where communication and teamwork are less than ideal.
Wei ‘Cheese’ Strategy
The Wei ‘Cheese’ Strategy is often used in pug groups, or groups with lower Stagger damage, to help overcome this mechanic. This strategy requires less teamwork and takes advantage of Wei's Sidereal Skill to deal massive amounts of Stagger damage. When Orb Stagger is about to happen, all players, aside from the raid leader, need to immediately move to the very south of the map. The raid leader will then position themselves between the wolf and the south-most orbs to ensure all orbs are aggroed onto them. The leader will then activate Wei on the Wolf, soak one orb, and proceed to kite the orbs northwards, away from the Wolf. The rest of the team should then quickly rush to the boss and finish off the remaining Stagger bar.

This strategy is much easier to execute but will prolong the fight slightly due to lack of Thirain usages. Players also need to ensure that the Sidereal Skill meter is filled before each Orb Stagger. Groups with good DPS might notice themselves reaching Orb Stagger phase before their Sidereal Skill meter is filled, specifically for the second one (x15 HP). The players will need to slow down, or stop, DPS and wait for the meter to fill before pushing the boss’s health.
Quick Overview of Main Mechanics
- x50 HP: Purple Wolf.
- x45 HP: Purple Wolf splits into Red and Blue. Red Wolf stays.
- x40 HP: Blue Wolf Invades. Possible Dark Mist
- x30 HP: Red Wolf Orb Stagger. Red Wolf leaves, Blue Wolf comes in.
- x25 HP: Red Wolf Invades. Possible Dark Mist
- x15 HP: Blue Wolf Orb Stagger. Blue Wolf AoE. Purple Wolf comes in.
General Attack Patterns
The Red and Blue Wolf each have unique attacks that they can perform, while the Purple Wolf possesses the attack patterns of both colors.
[Bleed] (Red)
Majority of the Red Wolf’s attacks will apply a stack of Bleed debuff onto players that are hit. Upon reaching three stacks, a long, faint red line will appear below the affected player before a Slash attack is performed across that line, knocking up anyone hit. Although it is possible to dodge out of it, the Slash attack happens quite quickly. Having multiple Bleed Slashes going off on different players at the same time can be hard to avoid. It is advised that players bring Panacea to remove the debuff whenever it reaches two stacks. Players can also equip the ‘Purify’ rune on one of their low cooldown skills to help counter this debuff. The Purify rune can be obtained from collecting five Ignea Tokens.
While Bleed Slashes can occur as part of Purple Wolf’s attacks, the Purple Wolf does not apply Bleed debuff like the Red Wolf.
[Multi-Slash] (Red & Purple)
The boss spawns multiple, parallel Bleed Slashes across the area, indicated by red telegraphs. Right after the initial set Slashes go off, another Bleed Slash occurs under the boss before more Slashes expand outwards from both sides of him. These Slashes happen rather quickly, so players should try to dodge towards the Wolf after the first Bleed Slash under him occurs.
[Tornado] (Red & Purple)
Red Version
The Red Wolf becomes a tornado and chases after a single player. The tornado deals ticking damage to any player within contact of it. There is a narrow safe space for players between the center of the tornado and the outer ring.
Purple Version
The Purple Wolf becomes a tornado and remains stationary while shooting out shuriken in four directions, three times. The four shuriken will alternate between cardinal and ordinal directions, so players should dodge towards where a shuriken last shot out. Similar to the Red Wolf, coming in contact with the tornado will do ticking damage and a safe region will exist between the center tornado and the outer ring.
Players that are able to react fast enough can dash out of the outer ring before the tornados fully form for both versions.
[Flurry of Swipes] (Red & Purple)
The boss performs a flurry of swipes in front of him that expands out in the shape of a cone; a red cone indicator will show the expanding range.
[Triple Swipe] (Red & Purple)
The boss performs three large swipes in front of him, each in the shape of an arc. Each consecutive swipe is wider and hits further out from him. The swipes will closely resemble the arcs in a Wi-Fi icon or a radio wave icon.
[Elemental Bombs] (Blue & Purple)
The boss performs two sets of two swipe projectiles in front of him before tossing out Elemental Bombs towards the location of each player. During the swipes, the boss’s left arm will glow red, blue, or green, indicating the type of Elemental Bomb that he is going to throw.
Fire Bomb - Red Glow
After a short delay, each Fire Bomb will deal a giant AoE explosion, knocking up players hit. Players should run far away from the initial bomb location.
Freeze Bomb - Blue Glow
After a short delay, each Freeze Bomb will shoot ice projectiles outwards, freezing any players hit. If a player is hit, additional ice projectiles will shoot out from that player. This can be incredibly hard to dodge when multiple people get hit.
Poison Bomb - Green Glow
After a short delay, each Poison Bomb will detonate in a large expanding, circular area. The initial location of each Bomb has a small, circular safe area, but the chances of the bombs overlapping is quite high. It is recommended to dodge away instead of trying for the small safe spot.
It is recommended that players try to stack together before the Elemental Bombs are thrown so that all the bombs land at the same location. This will give players an easier time to dodge, regardless of the bomb type. Keep in mind, Elemental Bombs can occur while other attack patterns are still in motion, making it difficult to notice in the chaos.
[Shuriken] (Blue & Purple)
The boss throws a giant shuriken in front of him, which travels a short distance before splitting into multiple shuriken that fly outwards from the original. Stay near the boss’s sides to avoid the shuriken.
[Fear] (Purple)
The boss will smash the ground and fear the farthest target from him before teleporting to them after a few seconds. A stagger bar will appear while the boss prepares an attack on the feared target. The feared target should immediately ping their location so the rest of the players can rush to Stagger the boss before the attack happens. Failing the Stagger check will result in huge damage done to the feared target. If players fail this mechanic a second time, it will result in a team wipe.
[Dark Circle] (Purple)
The boss spawns two giant pools of darkness that continuously pulses damage to any who stand in it.
[Backflip Swipe] (Red, Blue, & Purple)
The boss performs an upward kick during a backflip before spinning around to swipe at the location behind him.
[Shadowstep Swipe] (Red, Blue, & Purple)
The boss vanishes briefly before teleporting behind a random player and swiping at them. A brief second after the first swipe, the boss will perform an AoE swipe around him, knocking up players.
[Exploding Mines] (Red, Blue, & Purple)
The boss goes into a crouched position with his arms folded and begins summoning multiple mines in random locations. The mines will explode after a short delay and knock up anyone hit.
[Charge] (Red, Blue, & Purple)
Blue Version
A red line indicator will appear in front of the boss before he charges along it. The boss will also summon Exploding Mines randomly during the charge.
Red Version
A smoky line indicator will appear in front of the boss before he charges along it. The boss can repeat this up to three times.
[Exploding Swipe] (Red, Blue & Purple)
The boss jumps at a random player with a strike and a small AoE spin, followed by an explosion ring centered around him that knocks players up. Dash into the boss after the AoE spin or stay far away to avoid the explosion.
Conclusion
Legion Raids are a step up in difficulty compared to previous content and will require lots of practice to complete. Don’t worry about failing as it may take quite a bit of time to get used to the fight patterns. Take your time and have fun, because the sense of accomplishment from beating a Legion Raid is definitely worth the struggles. Good luck and have fun!
Update: you can find our Gate 2 guide here!
