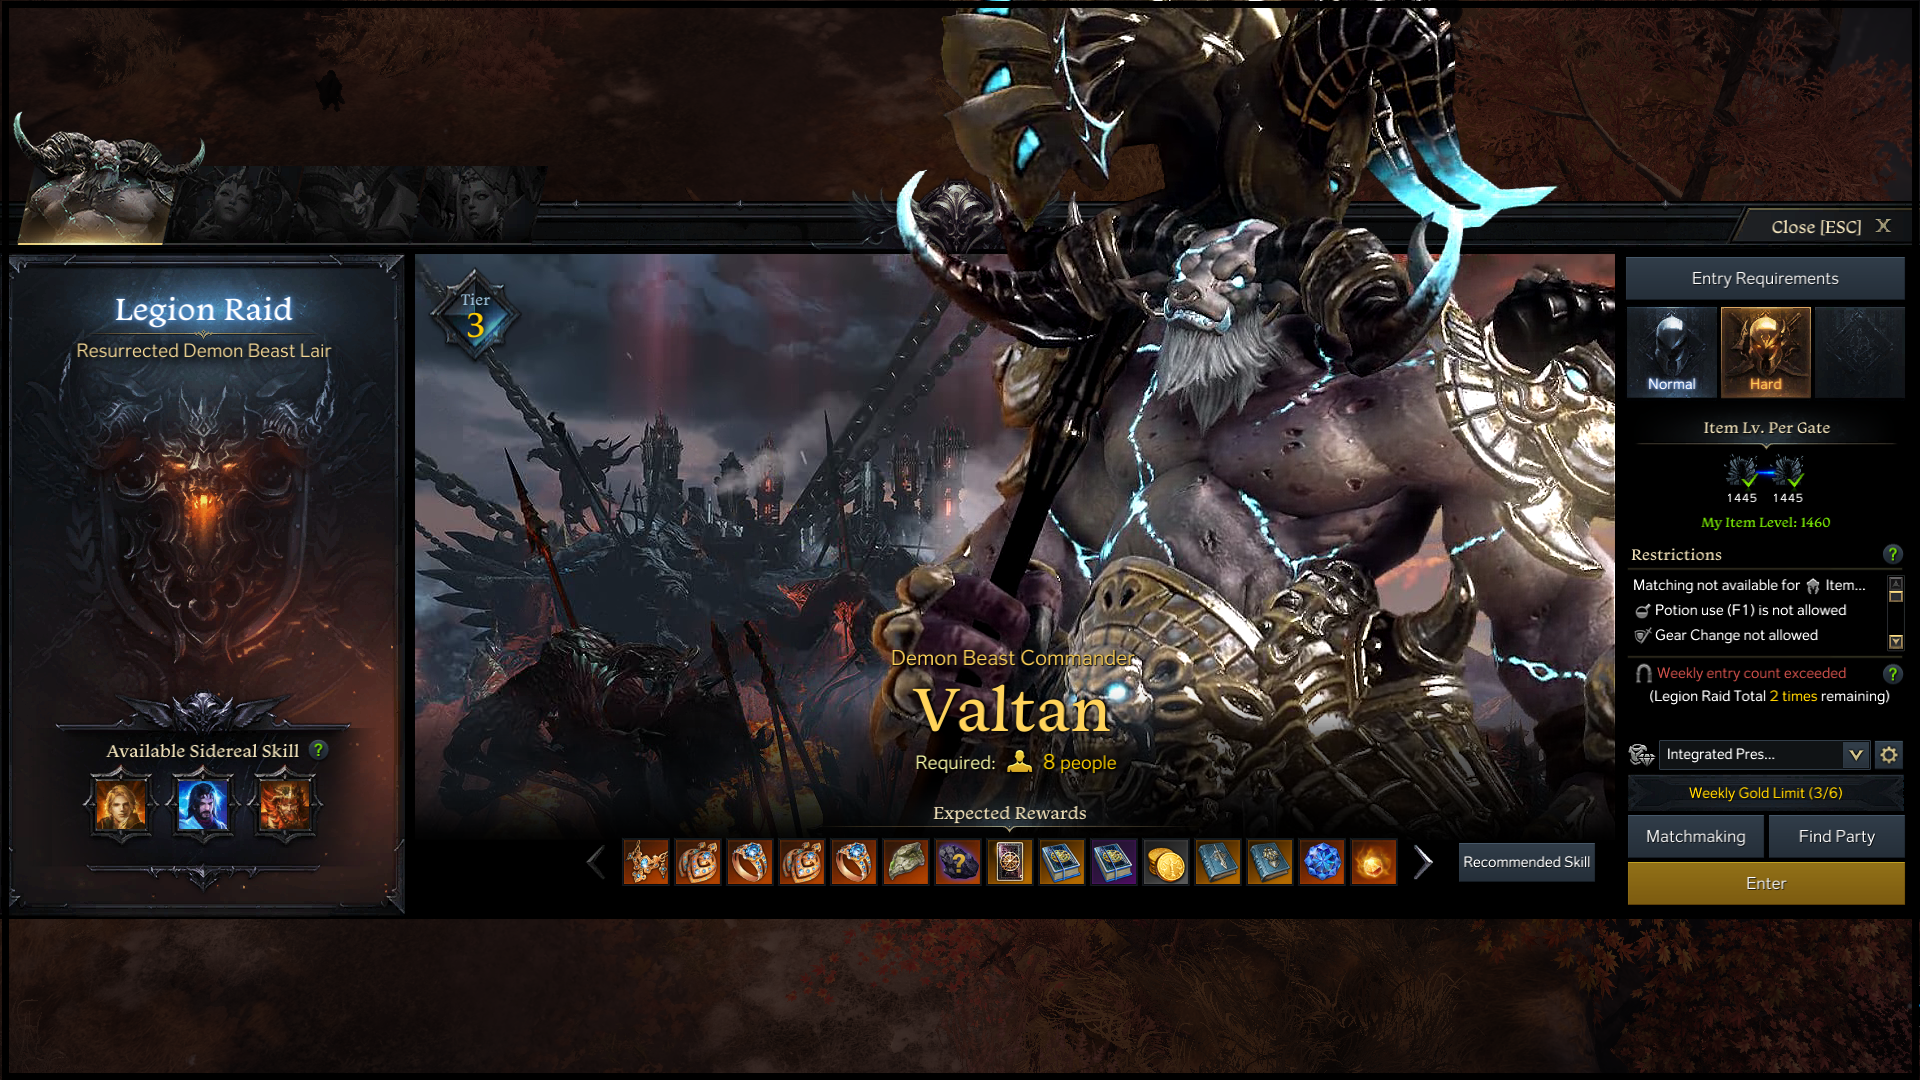
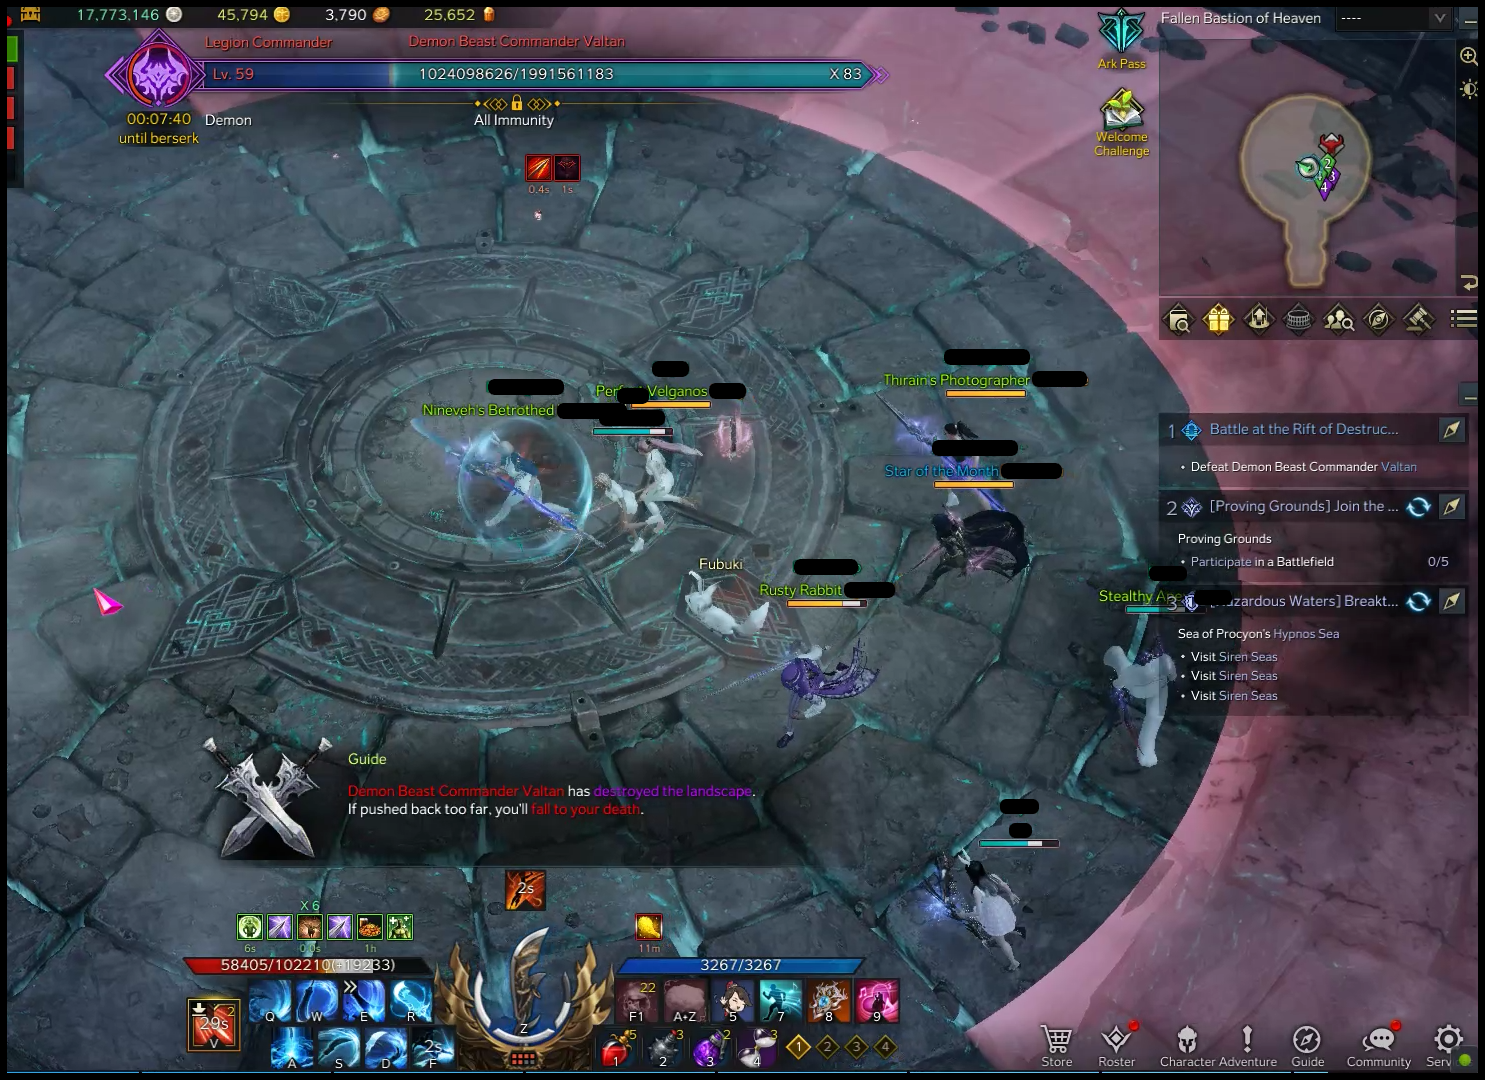
Legion Raids are challenging eight-player encounters that require a huge amount of teamwork and effort to overcome. Considered the ultimate PVE endgame of Lost Ark, Legion Raids have a much higher learning curve than other Raids and Dungeons. Valtan is the first Legion Raid to come to the Western regions and players will need to be Item Level 1415 and 1445 for Normal and Hard mode respectively. Valtan can be accessed through the Legion Raid structure in every major city, the Party Finder tool, or the Integrated Dungeon (Alt + Q) menu.

Valtan has two Gates, each with a different fight encounter and a variety of mechanics to learn. Unlike Argos, Gates in Legions Raids will act as checkpoints, saving players’ progress until the weekly reset. Rewards are distributed after completing each Gate and players can choose to proceed to the next Gate or resume at a later time; with either the same party or a different one. Normal and Hard mode will share the same weekly lockout, so players will only be able to attempt one difficulty per character for each Gate. Players, however, can choose to do each Gate on different difficulties, for example Gate 1 on Hard and Gate 2 on Normal should players find it too challenging.
This guide will go over the main mechanics and general attack patterns for Gate 2, as well as the common strategies used to beat this encounter. Just like Gate 1, Normal and Hard mode share the same mechanics and patterns, with the only differences being boss health and damage. In Hard mode, certain boss skills can be incredibly deadly for squishier classes and less geared players.
In case you missed it, you can find our Gate 1 guide here.
Notable Rewards
- Relic Accessories & Ability Stones
- Demon Beast’s Bones (Material for Relic Gear)
- Demon Beast Veins (Normal Only. Material for Legendary Gear)
- Stone of Chaos (Hard Only)
- Fused Leapstones
- Great Honor Leapstones
- Guardian/Destruction Stone Crystals
- Engravings
- Metallurgy: Applied Welding
- Tailoring: Applied Mending
- Cards
- Gold
Gate 2 of Valtan notably drops Stones of Chaos and Fused Leapstones. Stone of Chaos is used alongside Demon Beast’s Bones to craft Relic Gear pieces. It is also used when attempting to increase the quality of Relic Gear, which can greatly improve their stats. Outside of Legion Raids, Stone of Chaos can drop from the Field Boss, Thunderwings, and be bought with Gold from ‘Legion Raid Exchange’ NPCs in every major city. Fused Leapstones are used to perform ‘Special Honing’ at ‘Gear Honing’ NPCs. Special Honing essentially allows the players additional attempts at honing their gear, without the need of Gold, Silver, Leapstones, and Guardian/Destruction Stone Crystals. However, Special Honing still requires the targeted piece of gear to be at 100% Honing XP.
Sidereal Skills
Sidereal Skills is a new mechanic introduced with Legion Raids, which allow players to utilize the power of the Sidereals during the encounters. The Sidereal Skills available in each Legion Raid will appear on the top left-hand corner of the players’ UI. To activate one of these skills, the Sidereal Skill meter must be completely filled. The meter will slowly fill up throughout the fight and certain mechanics, such as counters, can also help further increase this meter. Only the raid leader can activate Sidereal Skills, so if the leader dies, it is important that they immediately pass the position of leader to someone else. For Valtan, the Sideral Skills are provided by Thirain, Wei, and Balthorr.
Thirain - Completed Vanquisher (Control + Z)
Thirain strikes with his sword in a straight line, dealing a massive amount of damage. This skill deals the most damage amongst the three, as well as significant amounts of Weak Point damage.
Wei - Awakened Dochul (Control + X)
Wei summons Dochul to deal massive Stagger damage in three hits at the targeted location.
Balthorr - Arcturus’s Breath (Control + C)
After a short delay, Balthorr will strike his anvil at the targeted area and provide players with Push Immunity, reduced damage taken, and protection from certain wipe mechanics for 30 seconds. Players must be within 14 meters of the anvil when it is struck in order to gain the benefits.
Sidereal Skills are incredibly important and timing their usage properly can help tremendously with the fights. When activated, the Sidereal Skills will land in the direction that the raid leaders’ character is facing, not where the cursor location is. For Valtan Gate 2, players will mainly be using Balthorr or Thirain for the most common strategies.
Valtan Gate 2
In Gate 2, players will finally face off against Legion Commander, Valtan, who comes with a variety of new mechanics and attack patterns. Just like Gate 1, the boss’s health bar will serve as an important indicator for the occurrences of major mechanics. Valtan is an incredibly well-designed and challenging encounter for players to learn. Although many of his attacks are not deadly enough to one-shot players, it is still incredibly important to learn them due to a unique gimmick in the later stages of the fight. During the later stages of the fight, all Valtan’s attacks have the potential to knock players off the platform, instantly killing them. Let’s go through all the main mechanics of Gate 2 before we move on to Valtan’s general attack patterns. Due to the complexities of this encounter, players should reference the ‘General Attack Patterns’ section as needed to better understand the explanations.
Recommended utility items to bring are HP Potions, Corrosive Bombs, Destruction Bombs, Dark Grenades, Time Stop Potions, and Whirlwind Grenades.
Main Mechanics
[Armor Destruction] (x160 HP)
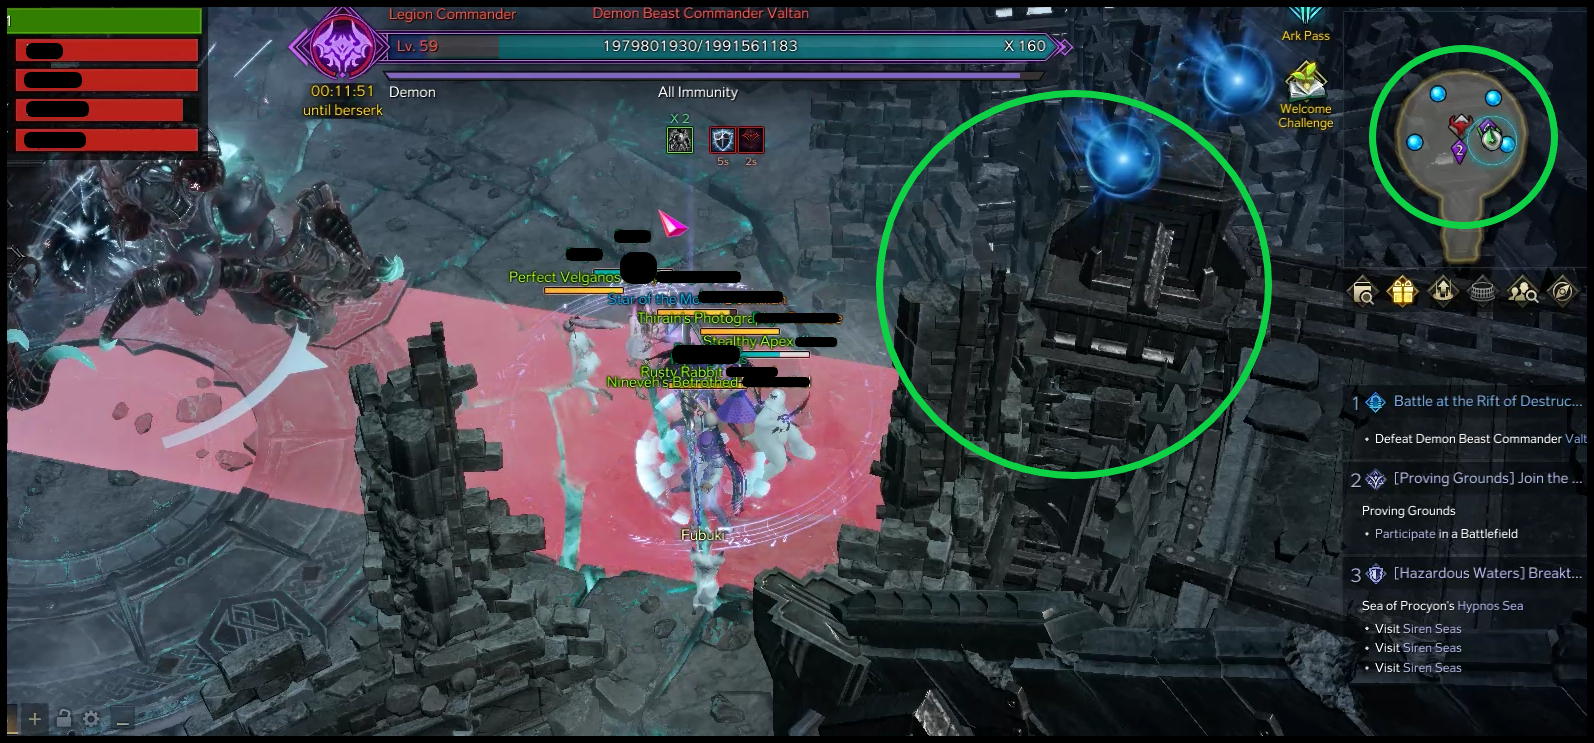
At the start of the fight, Valtan will be buffed with two stacks of Armor, which need to be destroyed before the next main mechanic at x130 HP. Throughout this phase, players will need to apply Weak Point Damage Skills and Items to Valtan whenever he is incapacitated to try and destroy his Armor stacks. To incapacitate Valtan, players must aim his ‘Charge’ attack, which targets a random player, at towers and protruding structures around the wall. It is recommended that one player uses Corrosive Bomb before the other seven players use Destruction Bombs and Weak Point Damage Skills to ensure Valtan takes as much Destruction damage as possible.

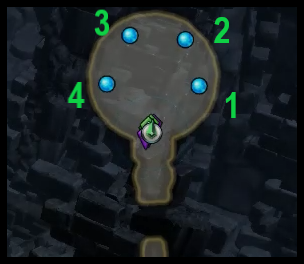
Valtan will perform his first Charge right after the initial ‘Whirlwind’ attack at the very start of the fight. It is recommended that players start with the tower near the three o’clock position. There are four tower structures around the area, each marked by a blue circle on the mini-map, as well as two blue orbs orbiting around the top of the towers. The purpose of these blue orbs will be explained later in the next main mechanic. The most common strategy is to move counterclockwise as a group to systematically destroy the towers and wall structures. If players have utilized their Bombs and Skills correctly, one stack of Valtan’s armor should be destroyed after the first Charge. If unsuccessful, players can attempt again after his second Charge.

After the first Charge, Valtan will either start his second Charge immediately or perform a ‘Jump Cross Slam’. Regardless of what he performs, players should group together by the second tower, which is near the one o’clock position. This will ensure that the tower is destroyed, creating additional space for players to maneuver around his ‘Axe Toss’ later. If Valtan performs the latter, players should dodge towards the third tower at the 11 o’clock position. After his Jump Cross Slam, Valtan will instantly start his second Charge.

Following his second incapacitation, Valtan will perform a ‘Triple Swing’ before jumping into the sky to carry out his ‘Axe Toss’ ability. During this phase, Axe Toss will be done eight times to each player (Six in Normal Mode), before Valtan comes crashing down to deal damage in a massive AoE. The only safe locations will be on the outer edges of the area, accessible only after the wall structures in front of them have been destroyed. Hence the importance of having Valtan destroy as much of the wall as possible before this occurs. The only exception to this is the entrance area at the south, which is an accessible safe spot that doesn't require any wall destruction. Unfortunately, this area can be difficult for all players to reach in time, as everyone will be spread out during Axe Toss. Time Stop Potion is a great utility item to use if players are unable to reach safety in time.
Soon after Valtan lands the AoE, either immediately or one attack pattern later, he will start his third Charge. Players should position at either the third or fourth tower (near nine o’clock) depending on which has yet to be destroyed. Corrosive Bomb and Destruction Bombs should be off CD at this point, meaning players should use them to ensure the last Armor stack is destroyed. Valtan will once again jump into the air to perform Axe Toss after the third Charge.
If at this point, the last Armor stack has yet to be successfully destroyed, players will need to hold off on their DPS to ensure Valtan does not pass the x130 HP threshold. Players need to wait for Valtan to perform around five attack patterns before he begins his fourth Charge, which will be the players’ last chance to destroy his Armor. A reminder that any protruding structure along the wall can incapacitate Valtan’s Charge, not just the four towers.
[AoE Party Wipe] (x130 HP)
Around x130 HP, Valtan becomes invincible and performs two giant AoE strikes with his axe. For the first strike, Valtan will raise his axe with his right arm before slamming down a giant AoE that instantly kills any player hit. There are several safe zones within the AoE that players can stand in to avoid the first strike. The second strike, performed with both arms overhead, will slam down an AoE that covers the entire area, wiping the whole party. There are no safe zones for the second strike and Time Stop Potions will not work for this mechanic. There are two strategies for dealing with this wipe mechanic.
The Balthorr Strategy
This is the most common strategy used, especially in pug groups, due to its simplicity and ease of execution. Around x130 HP, the leader should use Balthorr’s Sidereal Skill, which will protect the party from this mechanic. Players should ensure they get into range of Balthorr’s skill to get the buff. Do not be afraid to use Balthorr a few bars before x130 HP as the protection buff lasts for 30 seconds, which is more than enough time. It is better to be early than to be too late.
The Orb Strategy
This strategy is the ‘proper’ way to deal with this mechanic but is seldom used due to the amount of coordination required to execute it. After each tower is destroyed during the Armor Destruction phase, the two blue orbs on top will drop to the ground. Soaking an orb will protect the player from one of the two AoE Party Wipe attacks. With each of the four towers having only two orbs, there is just enough for everyone. Players should predetermine a soak order to ensure everyone gets an orb and avoid soaking more than one. It is crucial to avoid getting hit by the first strike, because it will remove the protection from the orb, leaving players vulnerable to the second strike.
Using the orb strategy allows players to utilize Thirain instead of Balthorr for more damage. This strategy is required in Inferno mode (equalized content), which is significantly harder than Hard mode, due to tighter DPS checks.
After the wipe mechanic, Valtan becomes targetable again and players will fight him for a short while before he jumps to the middle for a brief cutscene. The fight will continue until around x110 HP.
[Red Cone Strike] (x110 HP)
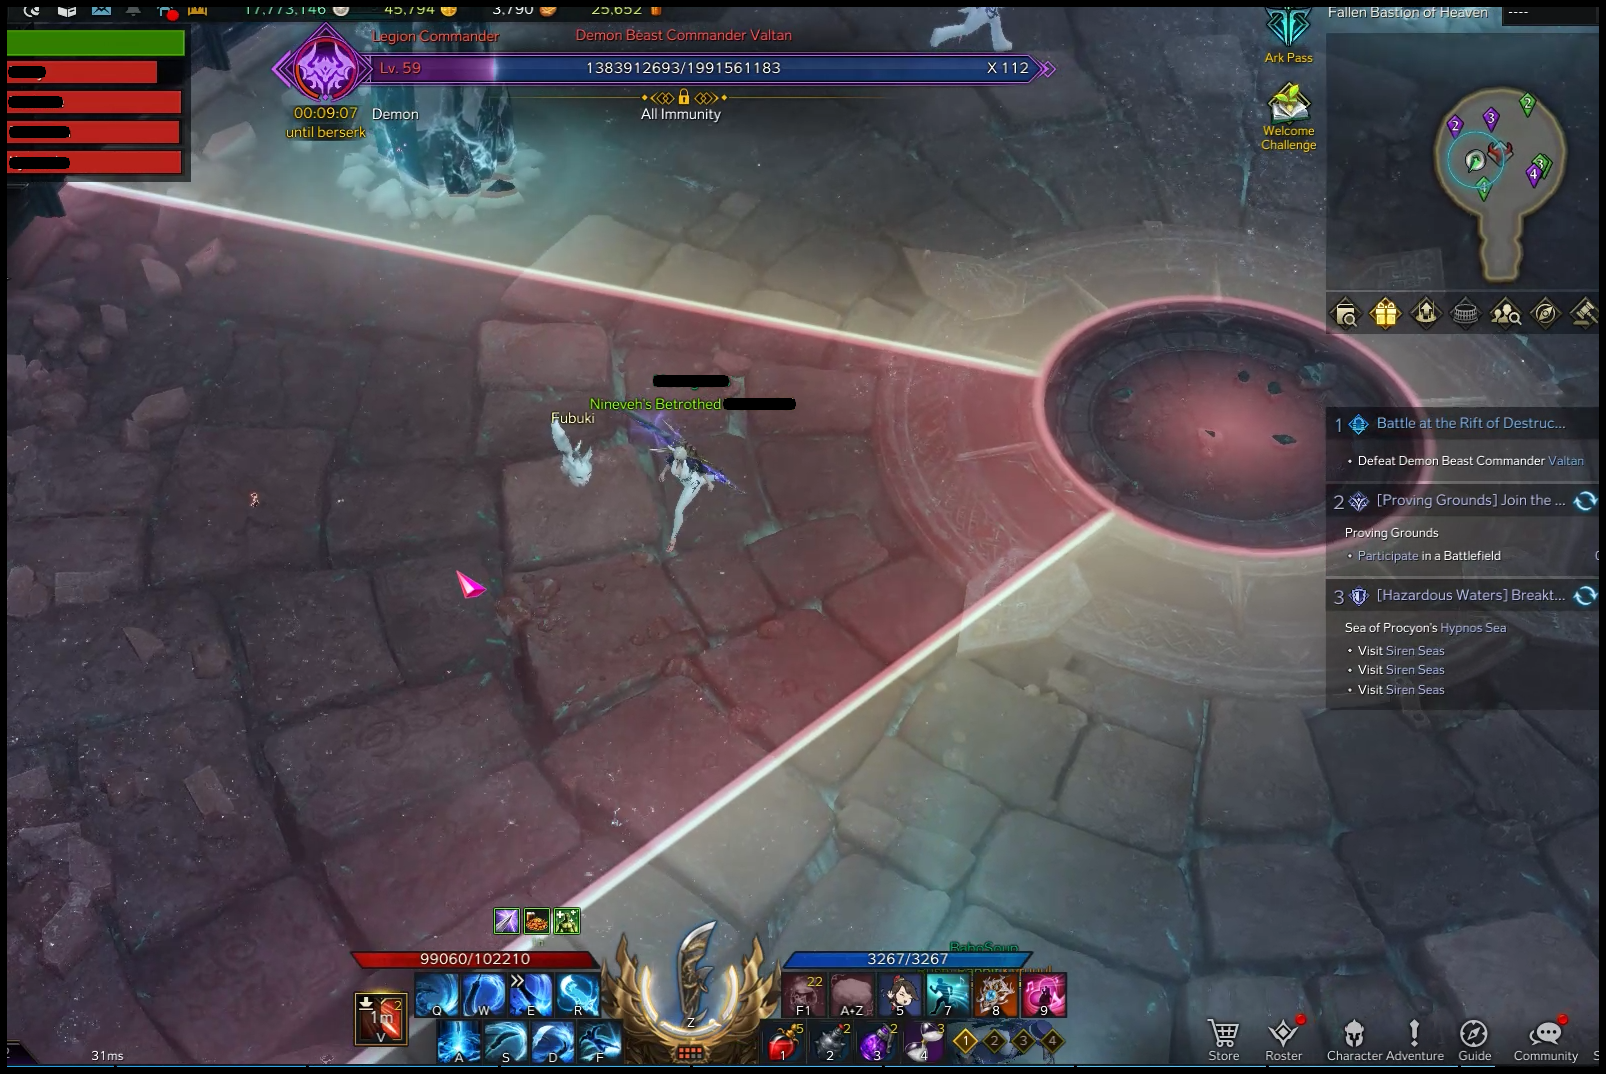
Around x100 HP, Valtan jumps to the middle of the platform and performs an AoE similar in shape to the first axe strike from the AoE Party Wipe. Once again, players should stand in the safe zones to avoid the red indicators.
Valtan proceeds to summon a stone pillar in each ordinal direction before jumping high into the sky. A yellow indicator will cover the entire platform and players must quickly hide behind any of the stone pillars to avoid the impending damage from Valtan’s landing. While in the sky, Valtan will target one random player with Red Cone Strike. The red, cone-shaped indicator follows the targeted player's movements for a few seconds before stopping.

Approximately three seconds after the red indicator stops moving, Valtan comes crashing down with a strike from his axe. Anyone not behind a stone pillar is instantly killed. The targeted player should position the Red Cone Strike between two pillars and wiggle side-to-side, so they know when the cone stops tracking their movement. Once it stops, that player must quickly rush behind a pillar before the one-shot happens. Avoid placing the red cone on top of a pillar as the Red Cone Strike will still kill anyone within it and cause the stone pillar to explode shortly after. If players are unable to get behind a pillar in time, Time Stop Potion is a great item to use here. However, be aware that Time Stop Potions will only work in the yellow section and not within Red Cone Strike.
Shortly after, a second Red Cone Strike begins, but this time the rest of the platform will be free of the yellow indicator. This is a great opportunity to use Dark Grenade so the rest of the team can deal as much damage as possible while he is preoccupied. Same as before, the randomly targeted player should wiggle from side-to-side before dodging out of the cone. After the second Red Cone Strike, all the stone pillars will explode, damaging and knocking anyone close by.
[Platform Break + Red Cone Strike] (x80-85 HP & x35-40 HP)
The first Platform Break happens around x80 to x85 HP. Valtan roars and jumps into the sky for a few seconds before smashing down to destroy either the left or the right side of the platform. Players should gather in the middle when Valtan jumps and then immediately move to the opposite side of the red indicators. After destroying parts of the platform, Valtan ‘Whirlwinds’ back to the center and summons four stone pillars, like before. It is crucial that players are not hit by the platform break or the Whirlwind, because from this point onwards it is possible to fall off the platform. If players are knocked close to the side of the broken platform, they will fall and instantly perish.

The platform is covered once again with a yellow indicator and players must hide behind the pillars before Valtan performs an AoE roar. After the roar, Valtan targets a random player with Red Cone Strike. The player should try to position the cone on top of two stone pillars, preferably ones closer to the broken platform. Pillars hit by the strike instantly channel an explosion around it, followed soon after by the rest of the pillars.
By positioning the cone towards the broken platform, players can dodge towards the other side, lowering the risks of falling off. If only one pillar is struck, the rest of the three pillars will explode at the same time, leaving very little room to maneuver and dodge around the platform. This becomes important more so after platforms on both sides have been destroyed.
The second Platform Break happens around x35 to x40 HP and this time the other side of the platform will be destroyed. Players must quickly get to the opposite side and stand by the very edge to avoid Valtan’s Whirlwind as he spins back to the center. Only attacks from Valtan can knock players off, so don’t be afraid to click past the edge. Same as before, Valtan will target a random player with Red Cone Strike. With no walls left to save players from falling, players will need to be extremely cautious of the explosions.
[Cutscene Counter] (x65 HP)
Around x65 HP, Valtan jumps into the air and lands in the center before stomping on the ground. Valtan’s stomp creates green AoE explosions under each player that knocks them up after a short delay. Players should group together, towards the side of the intact platform, before quickly dodging towards the boss after the stomp. A brief cutscene of Valtan gathering power will then occur for a few seconds. Right after the cutscene ends, Valtan will turn to face a random player and prepare a charging attack. Everyone should gather in front of Valtan and get ready to Counter him three seconds after his turn animation. If players fail to Counter Valtan, he will grab everyone in his path and perform a one-shot attack.
[Ghost Transition] (x16 HP)
Around x16 HP, Valtan will disappear into a portal before coming back to slam the center and south side of the platform. He will perform a series of attacks before transitioning into his ghost form.
Right after returning, Valtan will perform four red, cone-shaped slams, once near each cardinal direction. The direction of the first slam will be near a random player and is an important location for subsequent attack patterns. Players should group together to bait the location of the first slam, before dodging out and returning to that spot.
After the four cone-shaped slams, Valtan puts down his axe and faces the direction of the first slam. He will begin to smash the ground with his fists, causing delayed eruptions underneath each player. Players should stack together at the original location of the first slam, so in front of Valtan, before running together to avoid the eruptions. Regardless of whether the group runs clockwise or counterclockwise, players should refrain from running too far ahead of the pack. A single player getting too far ahead of the group will cause their eruptions to hit the players behind them.
Immediately after, Valtan will raise both his arms to smash down in a large area in front of him, telegraphed by a giant, red circle. This is followed by an explosion to the rest of the platform, also shown by a red indicator, so players should dodge back into the area of the first slam.
When Valtan performs his two-arm smash, three stone pillars will spawn on the platform. After dodging the explosion, players should hide behind a pillar as Valtan will perform a roar, covering the entire platform. Just like before, once the roar is done, the stone pillars will explode so players should rush to the area without a pillar. At this point, Valtan will transform into his ghost form and heal back to x40 HP. Survival is priority during this transitional phase, as the DPS done here will not matter.
The Balthorr Strategy
The Ghost Transition phase is incredibly dangerous as it is very easy for players to get knocked off. Therefore most groups, especially pugs, will choose to use Balthorr at the start of Ghost Transition, to prevent players from being knocked off. Players can either use Balthorr right when Valtan portals away or during his four cone-shaped slams, after players have returned to the location of the first slam. Keep in mind, even with Balthorr’s buff, the eruptions from his fist smashes can still hurt and kill players.
Time Stop Strategy
Instead of using Balthorr, players can utilize a well-timed Time Stop Potion to bypass a large portion of the attacks. Immediately after Valtan smashes his fists against the ground six times (three times for each fist) players should press their Time Stop Potion. The effect should wear off right before Valtan is about to roar, giving players enough time to run behind a pillar.
By not using Balthorr, players can use Thirain near the start of Ghost Phase for extra damage.
[Ghost Phase] (x40 HP)
In his ghost form, Valtan starts the fight with six stacks of armor buff (Four in Normal), reducing the amount of damage he takes. To remove these stacks, players must successfully Counter his Ghost Clones, which get summoned periodically over the course of the fight. Each successful Counter reduces one armor stack and increases the Sidereal Skill meter. Groups will often use Thirain during this phase, after all stacks of armor have been removed, to deal a significant amount of damage to Valtan.
It is important for players to focus more on surviving and Countering than trying to deal as much damage as possible. With Thirain available, it is not necessary to have incredibly high DPS to overcome this phase. Due to the fight timer, groups that take too long might see Valtan go berserk, causing his attacks to start one-shotting most classes. Nevertheless, it is still entirely possible to beat Valtan during berserk by focusing on dodging and Countering to gain Sidereal Skill meter. Without armor stacks, Thirain will deal approximately ten of Valtan’s health bars.
Quick Overview of Main Mechanics
- x160 HP: Armor Destruction. Bait Valtan’s Charge & apply Weak Point Damage.
- x130 HP: AoE Party Wipe. Collect blue orbs or use Balthorr.
- x110 HP: Red Cone Strike. Hide behind pillars & position Red Cone Strike.
- x80-85 HP: 1st Platform Break. Hide behind pillars, position cone, & avoid explosions.
- x65 HP: Cutscene Counter. Counter three seconds after turn animation.
- x35-40 HP: 2nd Platform Break. Same as the first.
- x16 HP: Ghost Transition. Properly avoid attacks or use Balthorr/Time Stop Potion.
- x40 HP: Ghost Phase. Avoid being knocked off, Counter Ghost Clones, & use Thirain.
General Attack Patterns
Valtan’s large variety of attack patterns can be very overwhelming, especially when many of them look quite similar to each other. Some attacks appear more often than others, while some attacks rarely appear at all. All of Valtan’s attacks have the potential to knock players off once one side of the platform is destroyed. Let’s go over the most important attack patterns and how to recognize them.
[Whirlwind]
A red circle appears under Valtan before he begins to spin around with his axe for a few seconds.
[Cross Slam]
Valtan raises his axe with his right arm and smashes the ground in front of him. Rocks will quickly expand outwards from the point of impact, in the shape of a cross, knocking players up. Stand to either side of Valtan to safely avoid the knock ups.
[Jump Cross Slam]
Valtan leaps in a target direction to Cross Slam before using Whirlwind on the way back to his original position. Stay clear of the rocks just like you would the normal Cross Slam.
[Triple Swing]
Valtan swings his axe widely in front three times, before slamming it down in front of him. As the slam happens, a giant ring explosion quickly channels around the center of impact. Valtan then immediately spins around once to cause two consecutive ring explosions around him, each further than the last. Players should stay close to his feet on either side of him to avoid the entire combination.
[Charge]
Valtan leans forward and drives his left fist into the ground twice before charging towards a random player. While performing the animation before the Charge, Valtan will track the movement of the targeted player. Players can Counter this attack shortly after Valtan drives his left fist into the ground a second time.
Keep in mind, this is the same Charge attack that Valtan uses during the Armor Destruction phase at the start of the fight. Charge cannot be countered during this phase of the fight.
[Axe Toss]
Valtan lowers both fists to the ground before jumping into the sky and raining down axes on each player, telegraphed by a green circle. During the Armor Destruction phase, Valtan will rain down eight axes (Six in Normal) on each player. Players should spread out and run around in tight circles to dodge these axes.
After the Armor Destruction phase, Axe Toss has a slight variation and will instead rain down three times before Valtan comes crashing down to the platform again. Valtan’s landing will be telegraphed by a giant red circle, dealing large damage to anyone hit. Right after Valtan’s impact, players need to rush to his landing area before another explosion happens to the rest of the platform.
[Quadruple Slam]
Valtan targets a random player and slams his axe towards them three times. A fourth slam is performed at the same location of the third, but with a slightly larger impact. Be careful not to lead these slams towards other players.
[Back and Forth Slam]
Valtan slowly swings down his axe in front of him, dealing damage in a cone shape, then swings the axe backwards to do the same thing towards his back. Valtan then brings his axe back to slam in front of him again, this time in a large circular area. Stay on either side of Valtan to avoid this, but don’t be too close during the third slam as the circular area can be quite large.
[Overhead Fist Slam]
Valtan puts down his axe and raises both arms overhead before slamming down on the ground in a giant red circle. Immediately after, the area outside the original slam will explode. Players should dodge away from the slam and immediately dash back in to avoid the outside explosion.
[Roaring Axe Slam]
Valtan roars, causing a shockwave that silences players for a brief second, then proceeds to raise his axe up for a frontal slam. There are two variations for this slam and players can use the status of his axe overhead as an indicator. If the axe is covered in lightning, Valtan will deal damage in a giant red circle in front of himself.
If the axe appears normal, with no lightning, Valtan will deal damage to the rest of the platform. For this variation players will need to run to the area right in front of Valtan to avoid the damage. After each slam, regardless of variation, green AoEs will spawn under each player and explode after a short delay.
[Portal Charge]
Valtan summons a portal and disappears into it before summoning random pairs of portals around the arena. Each pair of portals will face each other from a distance as indicated by faint green lines. Valtan will charge across each pair of portals, along the faint green lines, knocking up players that are hit.
This ability can be quite dangerous when one side of the platform is destroyed. Make sure to stay near the side of the intact platform to avoid getting knocked off. This can be a great point to use Time Stop Potion if players are not confident about dodging the charges. This attack won’t be used when both platforms have been destroyed, but a variation of it will appear during the Ghost Phase.
During Ghost Phase, Valtan’s Ghost Clones will frequently perform Portal Charges on the very edges of the arena. Be sure to watch out for them when trying to dodge out of Valtan’s attacks in the middle.
[Imprison]
Valtan randomly imprisons three players that must be freed as quickly as possible. After a few seconds, Valtan will perform a roar, dealing a massive amount of damage if the imprisoned have not been freed. The roar can kill most of the squishy classes in Hard mode.
[Shielded Stagger Check]
A Stagger bar appears on Valtan while he summons a large orb in his hand and prepares to perform a party-wipe attack. Before players can perform Stagger damage to Valtan, they must first damage through a small shield protecting him. Players should save their Skills with high Stagger Damage until after the shield is broken through. During this, random green cracks will appear all over the platform, pulling in players towards the orb when they step on them.
[Counter Swing]
With both arms, Valtan brings his axe to his left side as he prepares to perform a giant swing. Any Stagger damage done to Valtan at this point has a chance of triggering his ‘Counter’, causing him to spin around and knock players away. If Valtan’s Counter is not triggered, his swing will only hit the area in front of him. When this attack happens, players need to immediately position themselves by the hilt of his axe and cease any attacks. The area around his hilt will be safe from his frontal swing.
[Grab]
Valtan reaches out with his left hand and turns towards a random player. After a brief second, he charges to the edge of the platform, grabbing all the players in his path. When Valtan reaches the edge, he will turn to face the platform to perform a giant roar, telegraphed in yellow. Players hit by the roar, including those who got grabbed, are dealt large amounts of damage, and blown far away. With destroyed platforms, getting hit by the roar will most likely result in death.
During the Ghost Phase, this attack pattern will have a slight variation. Valtan will grab players within a wide angle in front of him, shown by a red indicator. The Grab animation will spin Valtan to face the opposite direction where he will immediately perform his roar, shown in yellow. Grab will happen three times during Ghost phase, once each around x39, x27, and x14 HP.
[Cardinal Orbs]
Valtan summons a green orb in each cardinal direction with two concentric semi-circles around each that pulse damage and knock back players hit. Four players must rush to soak the orbs as quickly as possible. Each orb that is not soaked within a few seconds will cause a giant explosion. Players that have soaked the orbs will take increased damage for a few seconds. During Cardinal Orbs, Valtan will also perform a Charge attack, so players should be ready to Counter it.
[Silence Counter]
Valtan roars and releases a small green shockwave around him before holding his axe behind him in preparation for an attack. This attack needs to be Countered to prevent him from dealing damage to the party. He repeats this attack three times, with the third one being a party wipe if players fail to Counter him. Each time a player successfully Counters Valtan, that player, and any close to him, will be silenced for 60 seconds. During this, green orbs will randomly appear and follow players, causing explosions if they are soaked. These explosions appear either as multiple green circles or as concentric semi-circles, like the ones from Cardinal Orbs.
The group should pre-assign three of their most reliable players to take turns Countering these attacks. The rest of the team should stay away to avoid being silenced, as well as to keep orbs from exploding near the boss.
[Ghost Clone Counter]
Periodically throughout Ghost Phase, Valtan will summon Ghost Clones of himself to the edge of the platform to perform a Cross Slam. These clones can be Countered and should be done to avoid getting knocked off by their Cross Slam. Successful Counters also fill up the Sidereal Skill meter by quite a good amount.
Conclusion
Players will most likely find that Gate 2 is considerably more challenging than the fight in Gate 1. Although the majority of the damage is avoidable, it can take a lot of time to learn and remember all the attack patterns. Avoiding attacks should take priority over DPS once the platforms are destroyed, as the risk of dying increases substantially. Keep in mind, while damage is important in any boss fight, a dead DPS deals no damage at all. Good luck and have fun!
