In the course of every CS:GO player’s career, learning how to make a config file to practice utility is definitely an integral step. Most players naturally improve their aim and game sense through consistent gameplay in-match, but out-of-match practice is equally necessary if you wish to maintain the upper-hand against your opponents.
Such out-of-match practice heavily emphasizes exercising efficient utility usage. On top of classic smoke lineups, knowing spots to throw a fake smoke or working together to coordinate a nade stack lineup can turn the tide in pivotal situations. Some preparation is required to maximize your efficiency and ensure that you have all the tools you need to theorycraft in your own custom server. Follow these instructions and you’ll experience smoother sailing down the road!
Making a Practice Config
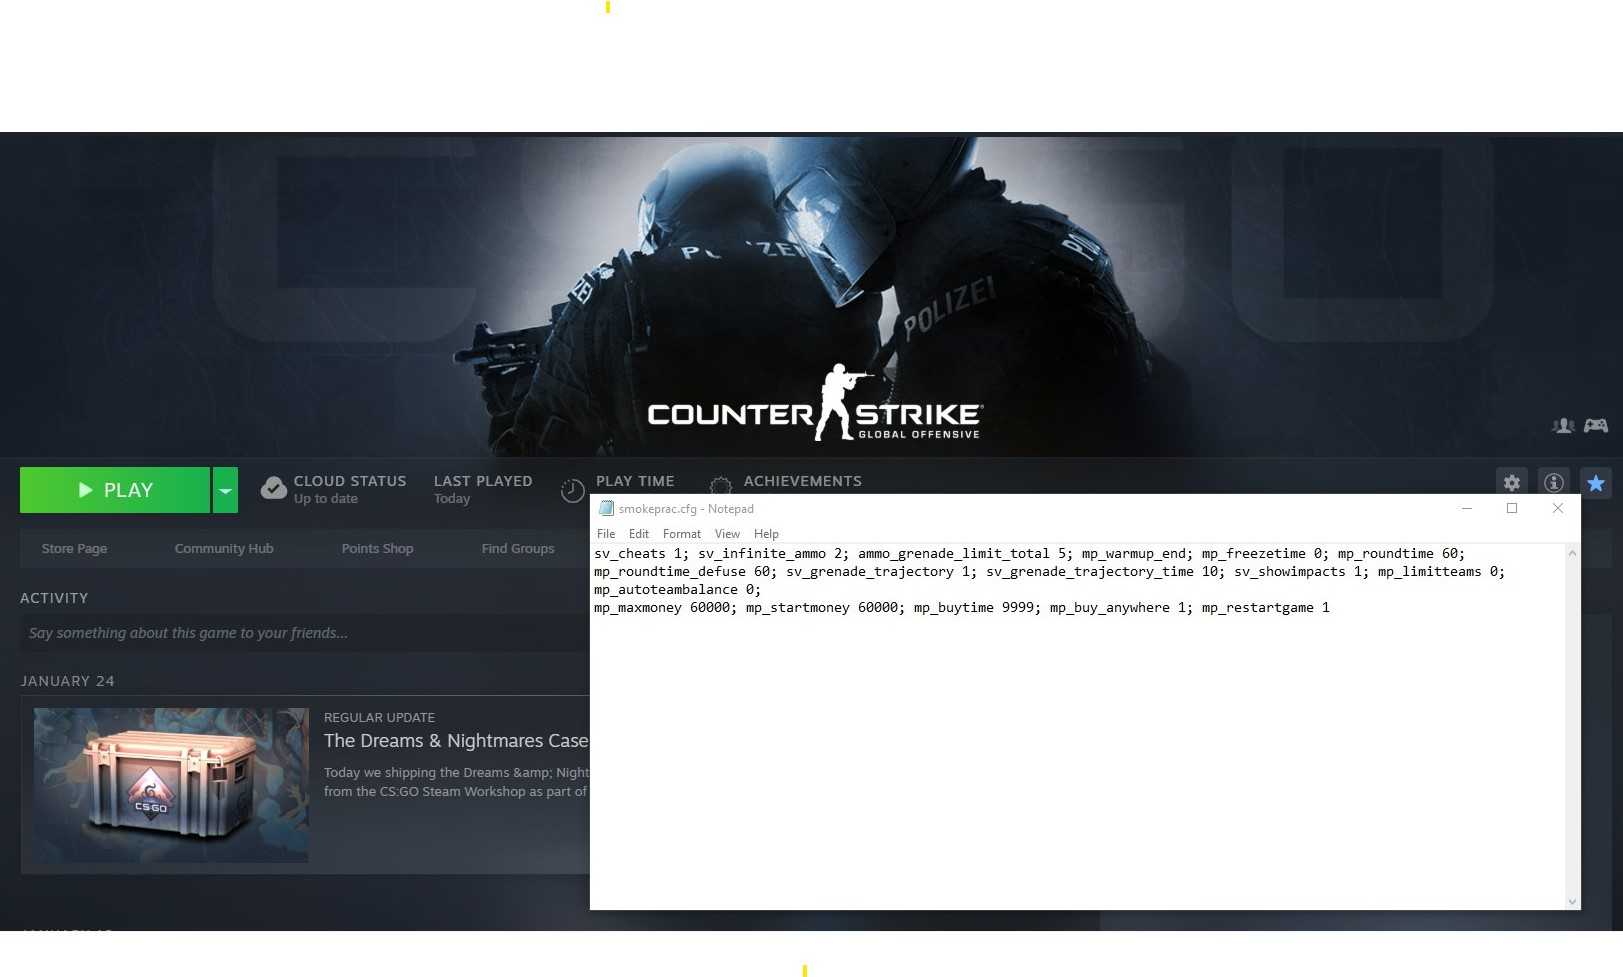
First, you must create a custom config for all of your utility practice commands. Simply open a simple plain text editor — such as Notepad or Notepad++ — and create a new file. Note that you cannot use word processing software such as Microsoft Word. The name of the file is not important, but you must remember what you named it! I personally use “smokeprac.” Save the file with a .cfg file extension at the end — this is your custom config. Now you have two options on where to place it:
- [Path to your Steam installation]\steamapps\common\Counter-Strike Global Offensive\csgo\cfg (for example, on my setup this is C:\Program Files (x86)\Steam\steamapps\common\Counter-Strike Global Offensive\csgo\cfg).
OR
- [Path to your Steam installation]\userdata\[STEAM3ID]\730\local\cfg (for example, on my setup this is C:\Program Files (x86)\Steam\userdata\[insert your STEAM3ID here]\730\local\cfg).
For the second option, to find your appropriate Steam3ID, follow these quick steps:
- Go to your Steam profile’s Inventory.
- Click the Trade Offers button in the upper-right hand corner
- Click on Who can send me Trade Offers?
- Looking at your Trade URL here, the number between ?partner= and &token is your desired SteamID.
Which Option Should I Choose?
With the way CS:GO works on startup, Option 1 might be preferable due to the steamapps directory acting as the “master source.” In other words, when launching the game, anything stored in steamapps overrides any config settings placed in userdata (the directory for Option 2). Therefore, you would want to use this option if you play on multiple accounts — or share a computer with multiple CS:GO players — allowing for the config to be shared across all of them without needing to create the same config per account. However, with Option 1, your config settings will be deleted if you ever were to uninstall CS:GO, forcing you to redo the process.
Option 2 involves storing your config in your own Steam account’s files rather than in CS:GO’s files. This would be more desirable if you only play on one account or have no interest in using the config on another account. As such, your files will remain in place if you were to uninstall the game, without risk of being deleted.
Comprehensive Commands
With your config file named and placed, it’s time for the commands! All the text written into your config file are commands that will be available to you to use in CS:GO. Here is a comprehensive list of all my recommended commands for the most efficient and effective practice:
- sv_cheats 1; Enables cheat commands.
- sv_infinite_ammo 2; Provide an infinite number of magazines (while still requiring you to reload).
- sv_infinite_ammo 1; Provide an infinite number of bullets (without requiring you to reload). Note that this will conflict with the previous command, so only include one or the other.
- ammo_grenade_limit_total 5; Increases the maximum amount of grenades you can carry.
- mp_warmup_end; Ends the warmup phase.
- mp_freezetime 0; Sets the time (in seconds) that players freeze at the start of the round to 0.
- mp_roundtime 60; Sets the time (in minutes) that a round lasts for to 60.
- mp_roundtime_defuse 60; Sets the time (in minutes) that a round lasts for in competitive games to 60.
- sv_grenade_trajectory 1; Shows grenade trajectory.
- sv_grenade_trajectory_time 10; Sets the amount of time (in seconds) that the grenade trajectory stays before disappearing.
- sv_showimpacts 1; Shows bullet impacts.
- mp_limitteams 0; Disables team number limit.
- mp_autoteambalance 0; Disables auto team balancing.
- mp_maxmoney 60000; Sets the max money amount to $60,000.
- mp_startmoney 60000; Sets the starting money available to $60,000.
- mp_buytime 9999; Enables unlimited buytime.
- mp_buy_anywhere 1; Enables buying anywhere on the map.
- mp_restartgame 1; Restarts the server after 1 second. This is necessary in order for the previous commands to be properly implemented.
- bind [KEY] noclip; Allows you to toggle noclip on or off by pressing a key of your choice — replace [KEY] with your chosen key in the command text. Allows for efficient movement in a custom server.
- bind [KEY] sv_rethrow_last_grenade; Allows the server to rethrow the last thrown utility by pressing a key of your choice — replace [KEY] with your chosen key in the command text. Allows you to move to the point of impact and see how your grenade landed.
Copy whichever bolded commands you want into your config file and you’re ready to go! Be sure to Save the modified file and launch CS:GO. When in-game, launch a custom server (e.g., the “Practice with Bots” game mode). Whenever you want to practice utility, type “exec [NAME OF CONFIG]”into the console without quotation marks. For example, since my config file is named “smokeprac.cfg,” I would enter “exec smokeprac”into my console.
Additional Recommended Steps
On top of creating a custom config file, I would highly recommend creating an autoexec file to store all of your in-game settings — from crosshairs to viewmodel configurations. To make your own, take a look at our guide to creating an autoexec file! Once completed, when CS:GO is next launched, the commands in the autoexec will be automatically executed. A few commands in particular are extremely helpful in throwing grenades while in a match. I strongly suggest the following three lines which, when combined, allow for jumpthrows:
- alias "+jumpthrow" "+jump;-attack";
- alias "-jumpthrow" "-jump";
- bind [KEY] "+jumpthrow" Certain utility throws require a jumpthrow bind in order to be consistent.
Here is a video demonstration that shows the difference between a non-jumpthrow and a jumpthrow. For more information, view our jumpthrow guide!
Just like with the utility practice config file, copy these bolded commands into your autoexec file and it will be good to go! Note that there’s no need to type “exec autoexec” into the console, as this file is automatically executed with every launch.
Things to Keep an Eye Out For
Keep in mind that professional matches are played on 128 tick servers, while Valve’s matchmaking servers are hosted with a tick rate of 64. This means that if you see a pro throw a smoke and want to try it out yourself, you’ll have to check your server’s tick rate. If it differs, certain lineups and jumpthrows may differ and require different positions for the same execution. Our article on tick rate goes further in-depth about the explanation.
There are many resources on the internet to find what smokes to throw, like our very own Dust 2 B Site Smoke Guide. Alternatively, my two recommended sites are CSGO Nades for general lineups and the YouTube channel NadesOutHere for professional strategies.
Good luck and have fun on the practice server!


