


Best Controller Settings in Fortnite
Unlock the true potential of your controller by using the correct Fortnite Controller Settings. Find the perfect sensitivity, build binds, and more.
Unlock the true potential of your controller by using the correct Fortnite Controller Settings. Find the perfect sensitivity, build binds, and more.
Competing against keyboard/mouse players for a controller player is already difficult. Combine that with poor controller settings, and you will be disadvantaged. Even though Fortnite offers a lot of customizability for controller players, most players struggle to find the right settings. This is especially the case for players just starting out in Fortnite.
Related Read: Best Controllers for Fortnite
Of course, only settings will not make you a pro. However, it is a step in the right direction. Having the right controller settings will help you play more efficiently and comfortably. So, in this guide, we will cover the best controller settings for Fortnite – building binds, sensitivity, and more.
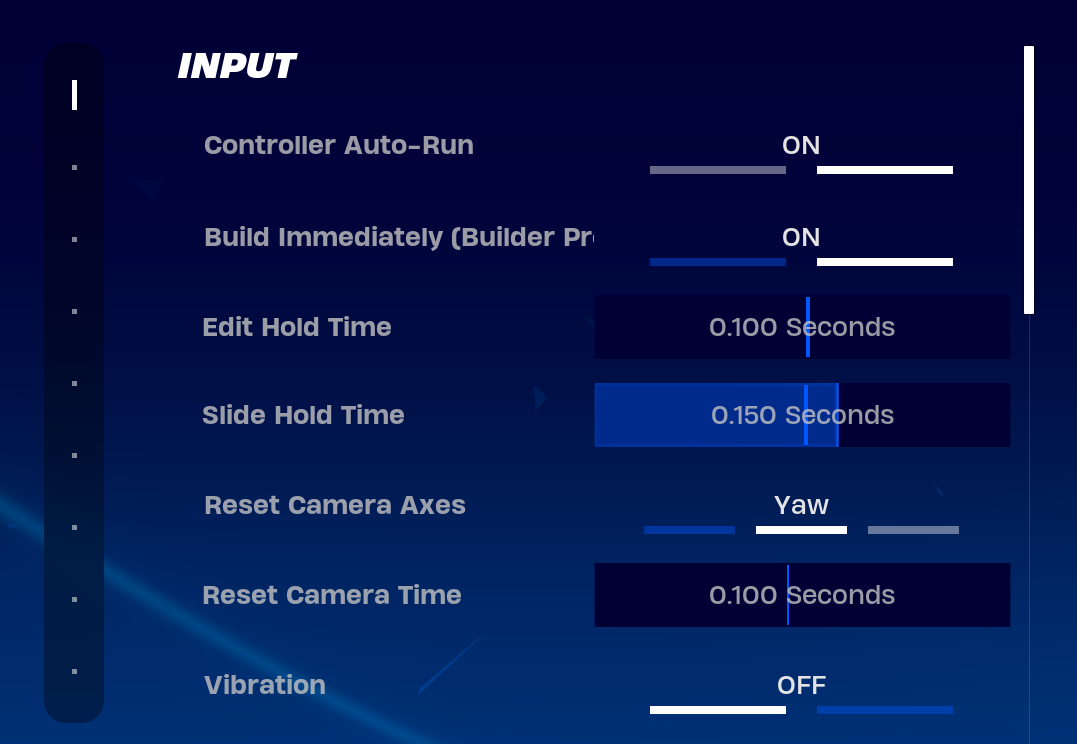
Before we get into the more technical settings, let's first configure the input section in controller settings. Just copy these settings below, and you should be fine.
The only confusing settings are the Reset Camera Axes; the rest are self-explanatory. The Reset Camera Axes has three options: pitch, yaw, and both. All this setting does is snap the camera to the center with the press of a button (you need to bind a separate button for this).
Pitch only works on the vertical axes, so it will only center the camera when you are looking straight up or down. Yaw, on the other hand, snaps the camera in the direction you are moving (press the center camera button and move the left stick to the desired direction – it will snap there). Both, as it sounds, combine the two.
Reset Camera Axes requires a separate bind to work, and given that controllers already have limited buttons, this setting can be disadvantageous. However, if you want to use it, Yaw is the best because it is the most practical.
The Quick Weapon settings work by switching your Next Weapon button to the Quick Weapon. It allows you to quickly switch to your primary weapon. If you want to switch to another weapon, you can do it by pressing the Quick Weapon button and the shapes/alphabet buttons on your controller.
The Quick Weapon Settings should address the weapon-switching issues that all controller players encounter. However, it is still in the experimental stage and may contain bugs. So, avoid using it in competitive matches. However, we recommend that you try it because the benefits are worthwhile.
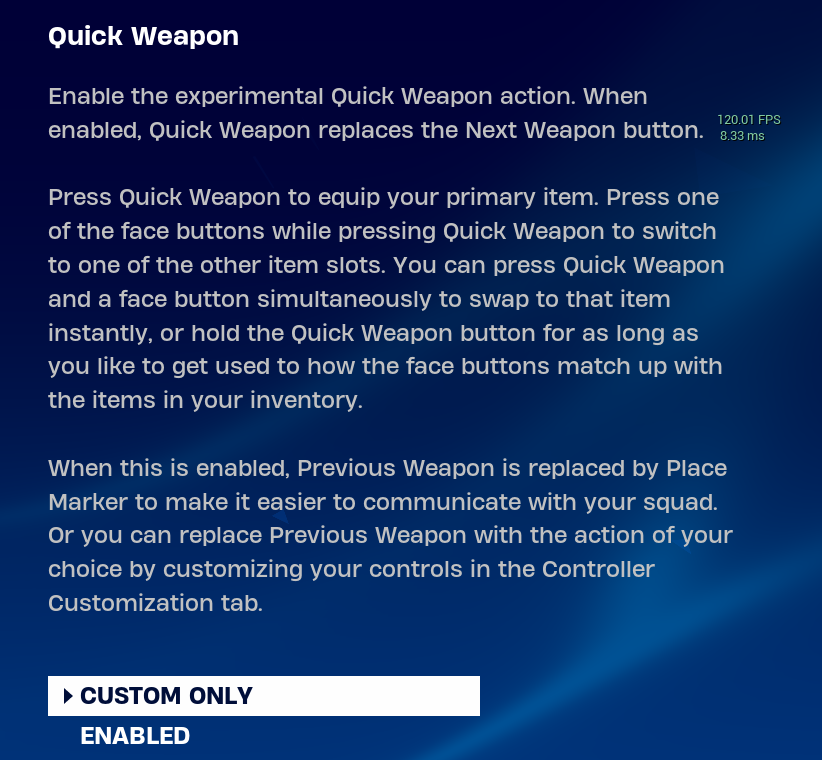
Fortnite’s Explanation of Quick Weapon
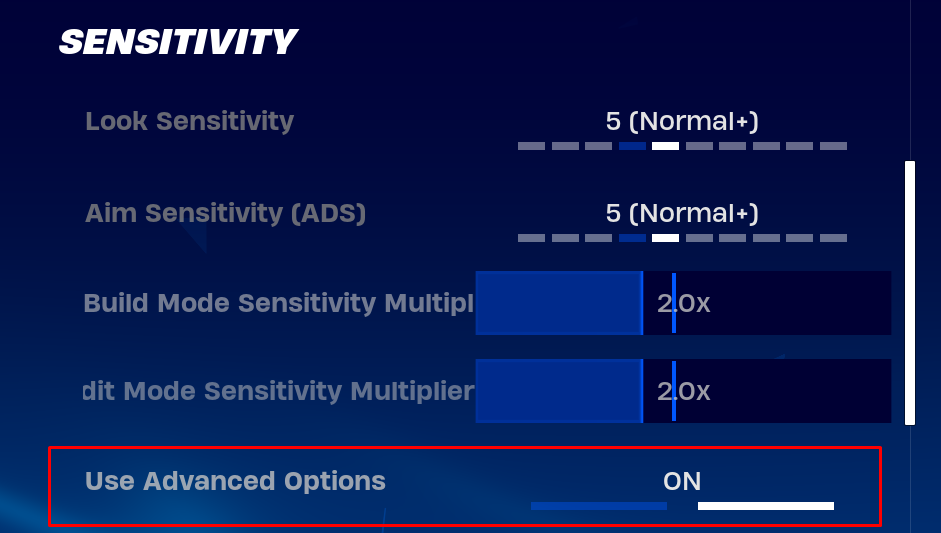
Sensitivity plays a crucial role in your aiming capabilities. Thankfully, Fortnite offers a lot of customization for controller players in this area. Even though sensitivity is a personal preference, a majority of the pros prefer a low-aiming sensitivity and a high building/editing sensitivity. We also recommend the same, as it is a good balance between precision and speed.
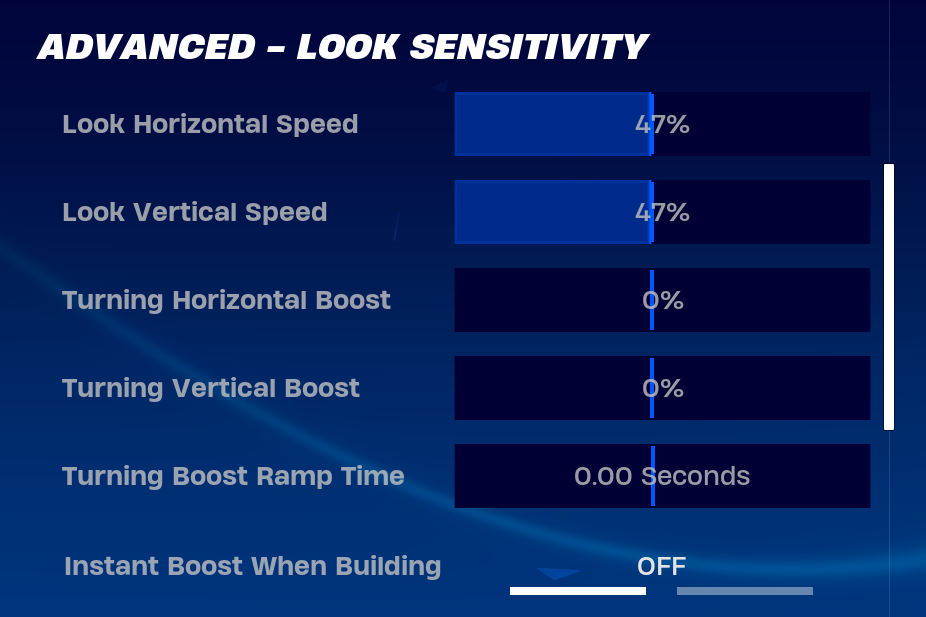
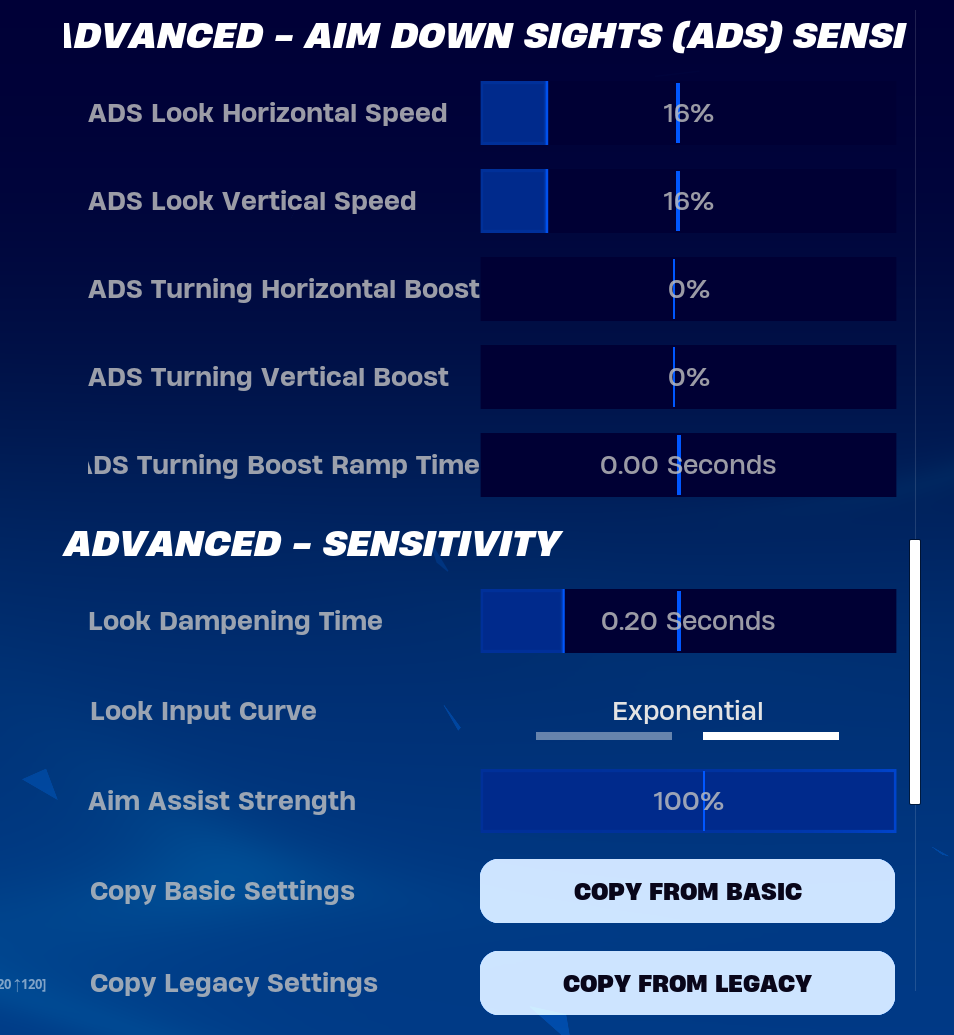
To configure your sensitivity, first, you have to turn on Advanced Options in the Sensitivity section. Once done, you will see new settings, these settings offer more control over your sensitivity and should be used instead of the Look Sensitivity. However, do configure the build and edit sensitivity. A good range for both is 1.5x - 2.2x. Apart from that, use the following settings.
While 45-65% is a good range for sensitivity, you can tweak it to your liking.
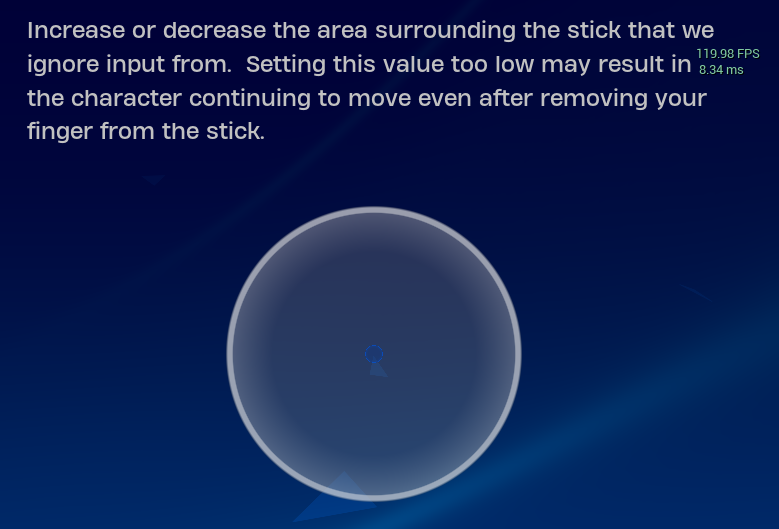
Deadzones determine how far you must push the thumbsticks before any movement registers in-game. The default deadzone is 0.15, meaning you must push 15% of the total range of motion before any response. Lowering your deadzone gives you more finite control, allowing for minor adjustments and quicker reactions. However, too low of a deadzone can cause drift as the sticks become worn.
Start by lowering your deadzone to 0.10-0.12. This small decrease will make building and editing feel more responsive without much risk of drift. You can then lower it in increments of 0.01 to find your optimal deadzone setting. Any setting below 0.05 is not recommended, as it can lead to loss of control and difficulty making precise movements.
There is little need to mention it (as it is common knowledge at this point) but use the “Builder Pro” preset. It’s the only preset that allows you to bind building to different buttons. The default building binds Builder Pro offers are pretty good and don’t need changing. The only reason you should change them is if you have a controller with paddles on the back. You can bind the building to those paddles.
Many professional Fortnite players recommend switching to Builder Pro and practicing with it to improve your building speed and skills.
In addition to layouts, you can customize individual bindings to suit your preferences. Some recommended custom bindings include:
• Edit: Change 'Edit' from the default B/Circle button to either the left stick click or a paddle on the back of a pro-style controller. This allows for editing without taking your thumbs off the sticks.
• Jump: Set Jump' to either a bumper or paddle. This makes it easy to jump while still aiming and firing your weapon.
• Reload/Interact: Map 'Reload/Interact' to the remaining bumper or paddle. This frees up the X/Square button to be used as an additional build bind if desired.
These custom bindings and settings changes may feel strange at first, but with practice in Battle Royale matches and Creative mode, they can become second nature and elevate your skills. Be patient through the adjustment period, focus on muscle memory, and your controller play will improve over time.
Keep tweaking and optimizing your keybinds until you find the setup that suits your playstyle the best. With the right layout and bindings, you'll be outbuilding and outediting your opponents in no time.
All these tweaks and settings should now make aiming and building on the controller easier. Of course, becoming a good Fortnite player is a long journey, but having the right settings gives you a good headstart. It is also worth mentioning that these settings are not strict, you are free to tweak it further to your liking. At the end of the day, it is you who is playing, and finding settings that work for you should be the main goal. These settings are supposed to be a foundation from which you can tweak.


