


CS2: How to Set Up a 1v1 Map
Here is the only guide you will ever need on setting up a 1v1 in CS2. It’s a bit confusing at first, but this guide will make your life easier.
Here is the only guide you will ever need on setting up a 1v1 in CS2. It’s a bit confusing at first, but this guide will make your life easier.
While CS2 is the most popular game out there, its interface is not the most user-friendly. As such, getting lost trying to set up a custom match is quite normal. There are often cases when you want to settle a bet with a friend, and CS2 1v1s are the norm for that.
However, you will get lost trying to set up a fair match; that's just how the interface in CS2 is. This guide will be focused on helping you set up 1v1s in CS2. It will include everything from maps, the initial setup, to commands and rules.
Before we get to setting up a 1v1, the first thing you need to do is enable the developer console. It allows you to run commands that we will be using while setting things up for 1v1s. Enabling it is quite easy; just follow these steps.
The console is a very handy tool, allowing you to change settings just by writing quick commands. It was the go-to way in old CS2 games to tweak your settings like sensitivity and crosshair, since the settings were limited in those days, and this was the only way you could tweak certain settings.
Even when CS2 improved and added a lot of setting options, players still stick to the good old console, and even now, some match rules and commands can only be configured through the console.
Overall, the console is a very handy option, and you should enable it. I can go on and on about how important the console is in CS2, but this guide is not about that.
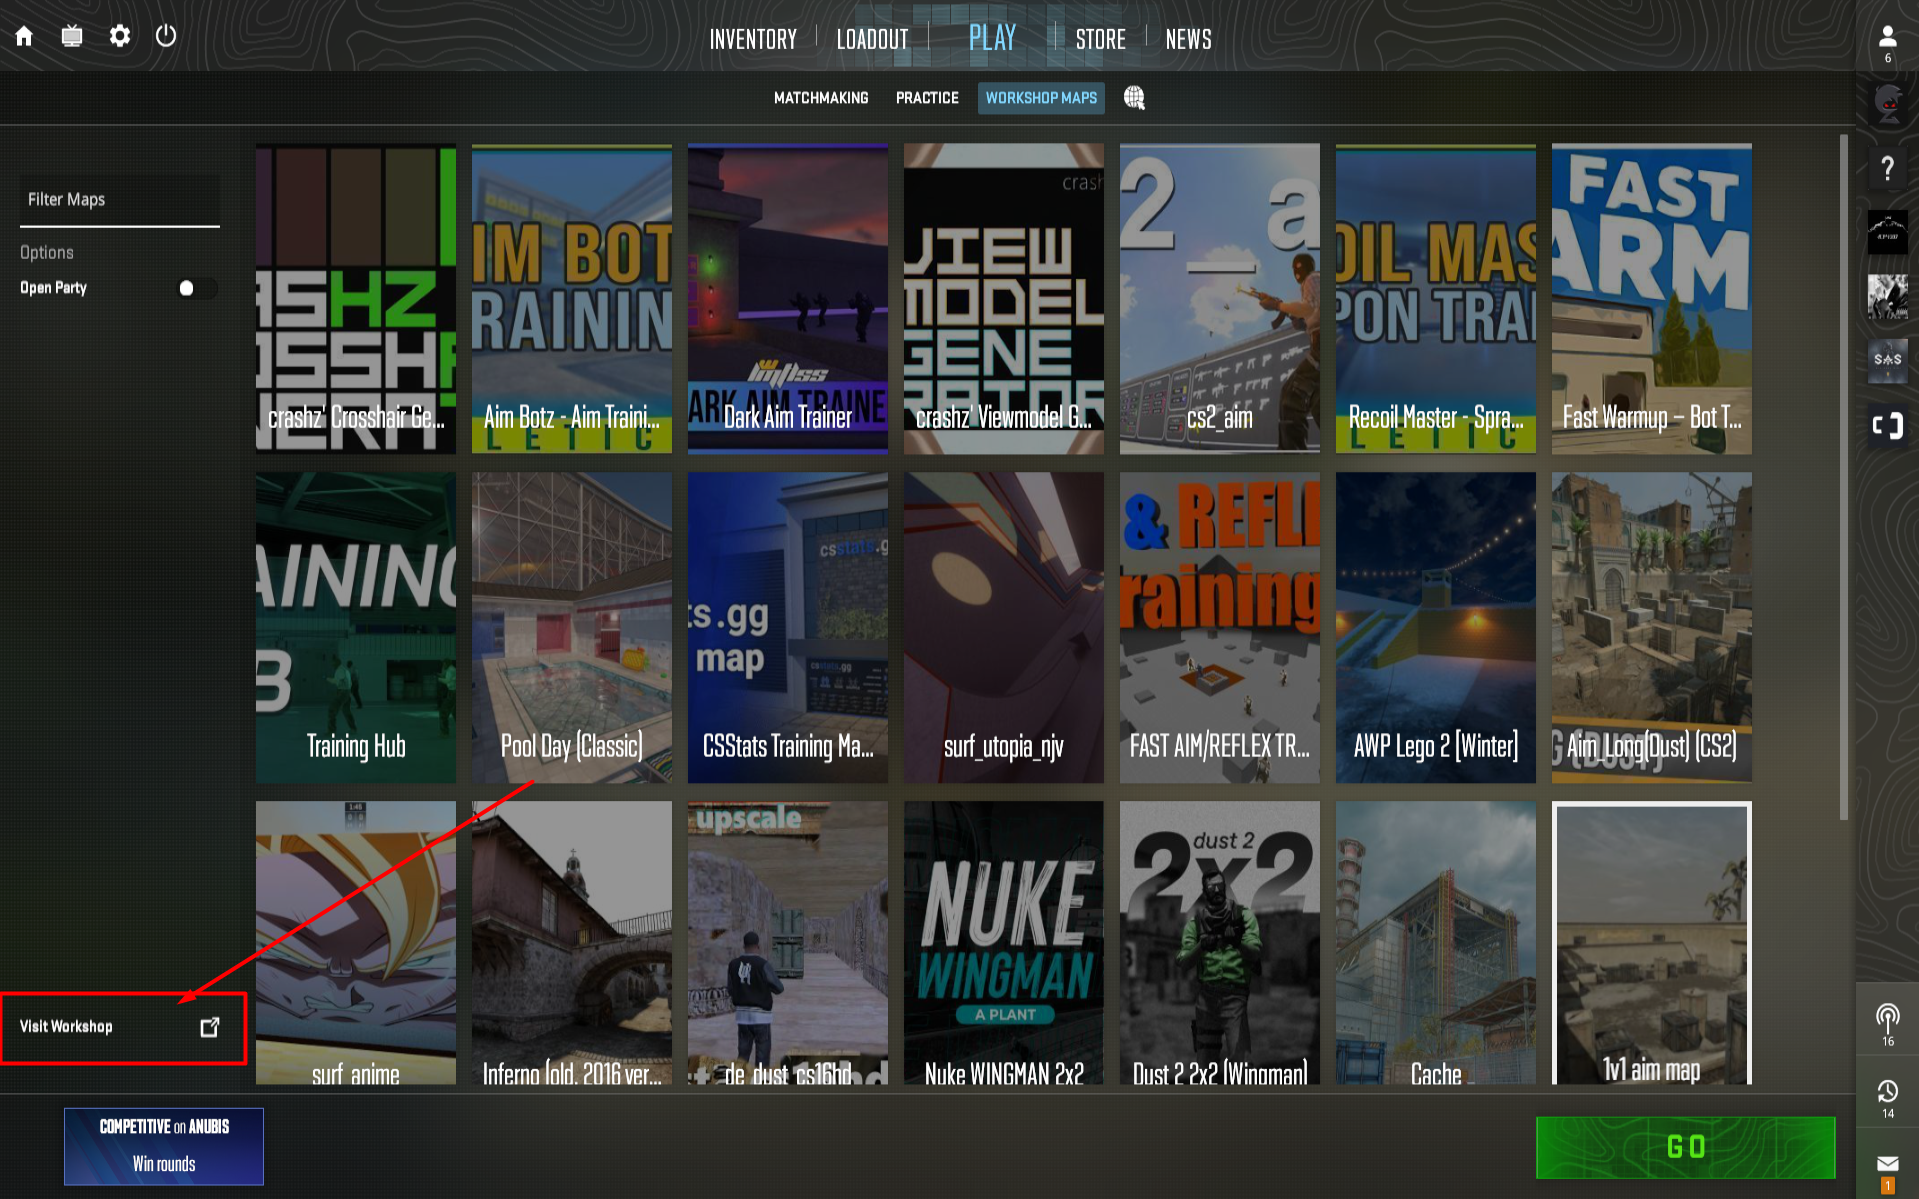
Now that we have enabled the console, it’s time to find some great 1v1 maps. The Steam Workshop is filled with 1v1 maps, so you won’t have a hard time finding one. You have multiple options to choose from: symmetrical aim maps, to short versions of CS2’s maps.
You might have to test a couple out to find the ones that you like and are up to your needs. Because there are a lot of 1v1 maps in the Workshop, you will often find broken or trash maps that are not worth playing.
Let’s get into the steps of how to download a Workshop map.
Aim_redline: A classic FaceIt 1v1 map, it’s quite big and has different elevation points you can use to your advantage.
Awp_Lego 2: One of the most popular AWP 1v1 maps. It’s big and filled with a lot of angles. Timing and precision are everything on this map.
1v1 Aim Map: A very traditional symmetrical 1v1 map. All you have are some boxes for cover, and all the guns at your disposal. These types of maps are all about aiming ability.
You can also check out our existing article on the Best 1v1 Maps in CS2 for more options.
Next up is to invite your friend. This is quite simple, obviously, just invite them to your party. There are other ways, like using the console, but inviting is the easiest.
Just find them in your friends list and send them an invite to your lobby. Once they are there, it’s time to launch the map.
When your friend is in the lobby, just navigate to your Workshop Maps and click on the map you want to play. It will ask you what mode to start in. Select Custom if you have the option; if not, go with Competitive.
Your friend will be prompted to download the map. Once he does, he will be redirected to the match. Don’t worry if he doesn’t join instantly; sometimes it takes time to download and connect to the map.
We are on the last step before you and your friend start shooting each other. It’s time to set up some game rules that will ensure you have a pleasant 1v1 experience. All you need to do is copy these commands into your console that we enabled in the first step.
When you are both in the match, the game will be in the warm-up phase. You can wait it out, but you can also end it. Type these commands
Then you can move on to the other commands.
There are many other settings that you can have fun around with, but these are the bare minimum. You can always Google to find the settings you are looking for.
Despite the initial hectic setup, 1v1s is a core part of CS2. Since the days of Condition Zero, players have been dueling each other to decide who is the better player. Once you configure everything, 1v1ing is one of the most fun things you can do with your friends. The pure fun of roasting your friends as you beat them or being roasted by them as they destroy is what CS2 and gaming is all about.


