


10 Essential Binds to Have in CS2
Up your CS2 game with these 10 essential binds for smoother movement, quicker throws, and tactical advantage.
Up your CS2 game with these 10 essential binds for smoother movement, quicker throws, and tactical advantage.
For players who are getting into Counter-Strike 2, on top of optimizing your in-game settings, you should also customize your binds. Custom binds can be really helpful in CS2, allowing you to quickly execute actions with one keystroke that normally would take two or more. Given the extremely short time-to-kill (TTK), it could save your life in a clutch situation. While there is no problem with using the default binds, having some extra ones does help.
When it comes to binds in CS2, there is really no limit. You can bind multiple commands to single keys, allowing you to execute a chain of actions easily. But, frankly speaking, you won’t ever need that in a competitive match. With that said, some binds can really improve your CS2 gameplay, we’re going to suggest some essential ones.
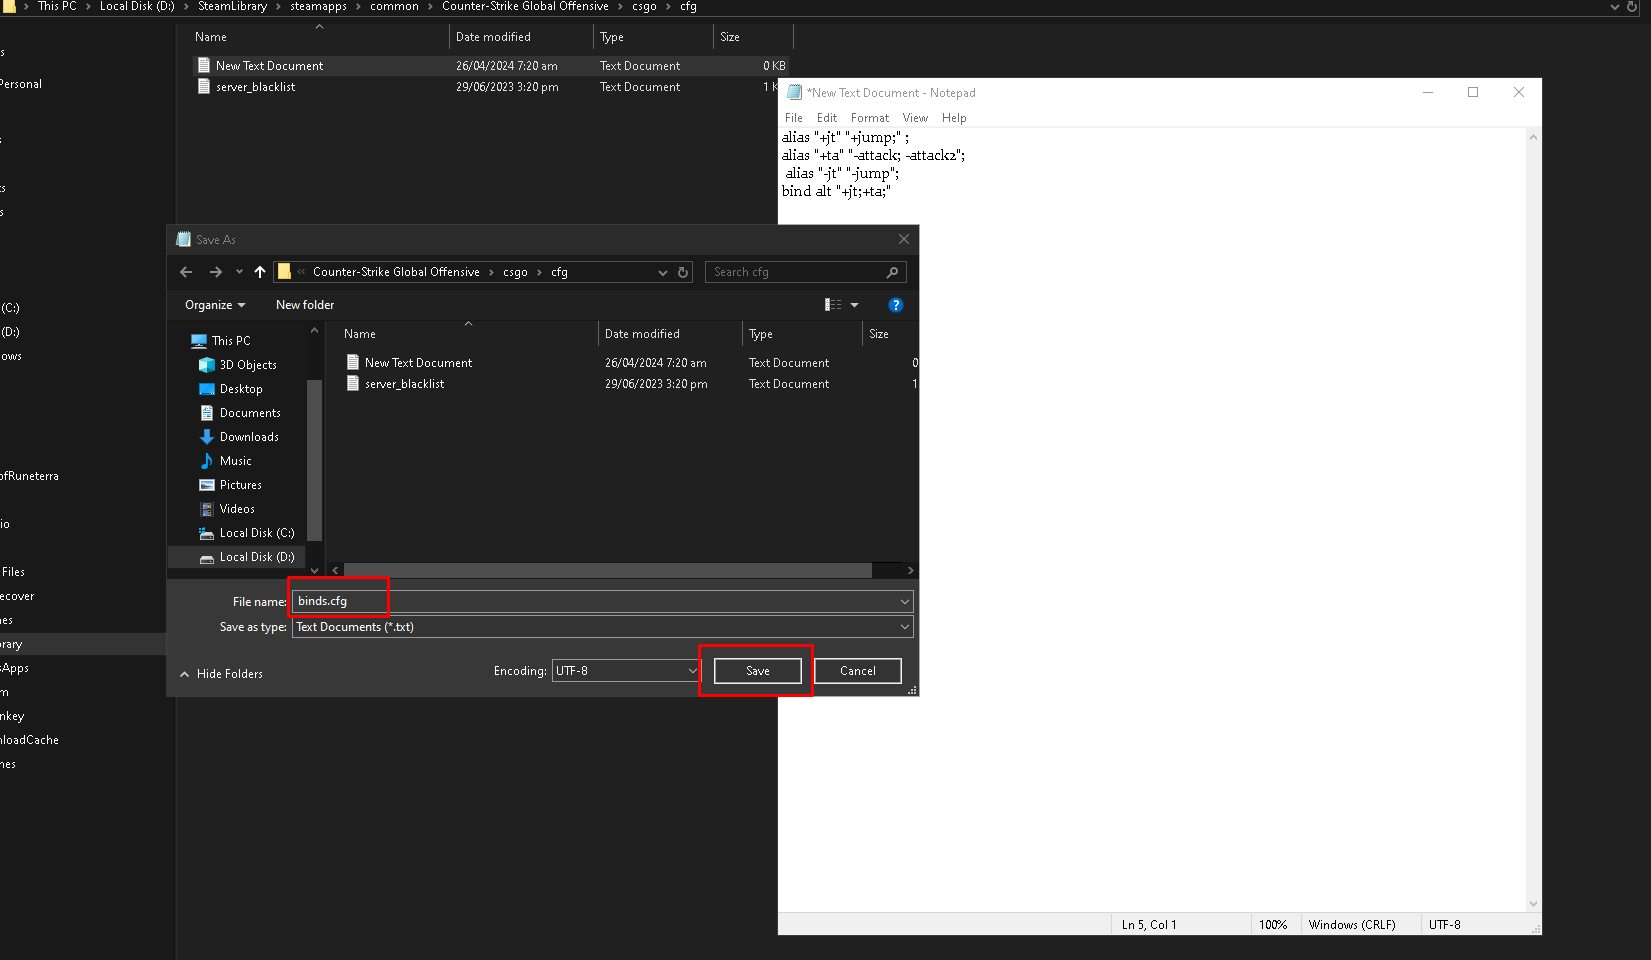
Some of these binds cannot be configured through the settings and you will need commands for it. There are two main ways to set up these binds. One is to execute each command every time you open the game, which is as stupid as it sounds. The other is to set up a dedicated config file with all your binds. You can then either execute a single command to load this config file or set it in the launch options to automatically launch with the binds enabled. It might sound a bit technical so here is a step-by-step guide.
You can now execute it in the game by typing “exec filename.cfg” in the console. Remember to swap out the “filename” with what you named the config file. A better way is to put +exec filename.cfg in your Launch Options in the Steam app (Steam > CS2 > Properties > Launch Options). This will make it so the game automatically loads with the binds.
If you have been playing CS2 for some time now, you already have your jump bound to the mouse wheel. However, it is worth mentioning how important this bind is. It would not be an exaggeration to say that every pro has this bind. In fact, it has been around since the Condition Zero days.
As the name implies, mouse wheel jump means to bind your jump action to either Mwheelup, MwheelDown, or both. It basically allows you to spam jump, which enables you to do movements like bunnyhops and long strafe jumps.
bind mwheelup +jump; bind mwheeldown +jump; bind space +jump
Utility is one of the most important parts of CS2, and so is having a separate bind for each. If you were to access your grenades normally, you would have to press the “4“ key multiple times to get to the other grenades. A better option is to have different buttons for each of the grenade types i.e. molly, flashes, smokes, and nades.
It saves you the hassle of switching through each utility to get to the one you want to use. Having separate binds for each allows you to access the nade you want quickly.
bind z "slot7"; bind x "slot8"; bind c "slot6"; bind v "slot10"
Just for context,
Feel free to use any other buttons, just change the button you want to use. For example, if you want any other button for your flash, then just swap “z” out with that.
Things can get really intense at the end of a round. In these cases, you will often find your dead teammates screaming into the voice chat. While they mean well, it can get really distracting when you are trying to clutch up. At these times, it’s better to quickly mute the voice chat instead of asking everyone to quiet down. This is why having a quick Voice chat mute bind can really help.
bind k "voice_modenable_toggle"
Same with the other binds, you can swap out “k” with any other button you want to use.
As the name implies, it’s a bind that allows you to quickly drop the bomb. While the usual way of pressing “5” and then “g” isn’t bad, having anything that speeds up the process is beneficial. For example, you could be going for a quick peek, and want to give the bomb to your teammate, having a bind just makes it faster.
bind b "slot2; slot3; slot5; drop; slot1"
Buying everything again and again after every round gets repetitive and is inefficient. Instead, using a button to buy everything you need is a good idea. You can have three different binds for different buy rounds such as eco, full buy, or half buy. It saves you a lot of time over buying them manually.
Since, this is a personal preference, consider using a bind generator tool to customize which weapons you want to buy with that bind. Keep in mind you can only bind weapons that are in your CS2 loadout.
This bind can be very useful if you often take screenshots, using a button to quickly remove the crosshair can help improve the screenshots. Of course, you are not going to be using this in competitive matches. You can use this on private servers to goof off with your friends.
bind f2 "toggle crosshair 0 1"
The Swap hands bind allows you to quickly switch the gun on your left or right hand. The gun model can be obstructive if you are peeking, so quickly switching to the other hand improves visibility. You could never know if an enemy was camping behind a wall and you didn’t spot him because your gun model hid him.
bind c "toggle cl_righthand 0 1"
Jump throw is really important for nade lineups, it increases the distance a nade can go. In order to perform a jump throw, you need to press the jump and throw button at the same time. To perfectly execute it you need to nail the timing down, which is very hard to do consistently. Having a dedicated bind for it removes the need to time it and allows you to perform a perfect jump throw every time
This is a bit technical to bind as it requires four commands to be run in order. Just copy the four commands and execute them in the same order or paste it into your binds.cfg file.
Some nodes in CS2 have to be pixel-perfect. In that case, lining the nade up with your normal crosshair becomes hard. For this reason, you need to have a nade lineup crosshair. It’s crosshair whose all sides spread out to all ends of the screen, allowing you to line up more easily. Setting up this bind is also relatively simple. Just copy and paste this into your console or cfg file.
bind 1 "slot1 ; cl_crosshairsize 3"; bind 2 "slot2 ; cl_crosshairsize 3"; bind 3 "slot3 ; cl_crosshairsize 3"; bind 4 "slot8 ; cl_crosshairsize 1000"
Although this won’t work in any matchmaking mode as it requires sv_cheats to be enabled, it can be useful to bind for practice in private servers. Noclip allows you to fly and pass through walls. Whether you are practicing nades on a map, or having fun surfing around, having this bind is really useful.
bind p "sv_cheats 1; noclip"
Binds can go a long way in helping in your CS2 ranked journey. They can save time in clutch situations and are generally more efficient than the manual way. Not to say, you do not have to play with these binds, but having them can be a big help. Of course, it all comes down to personal preference so choose the binds you need and keep grinding!


